Removal and replacement procedures 23
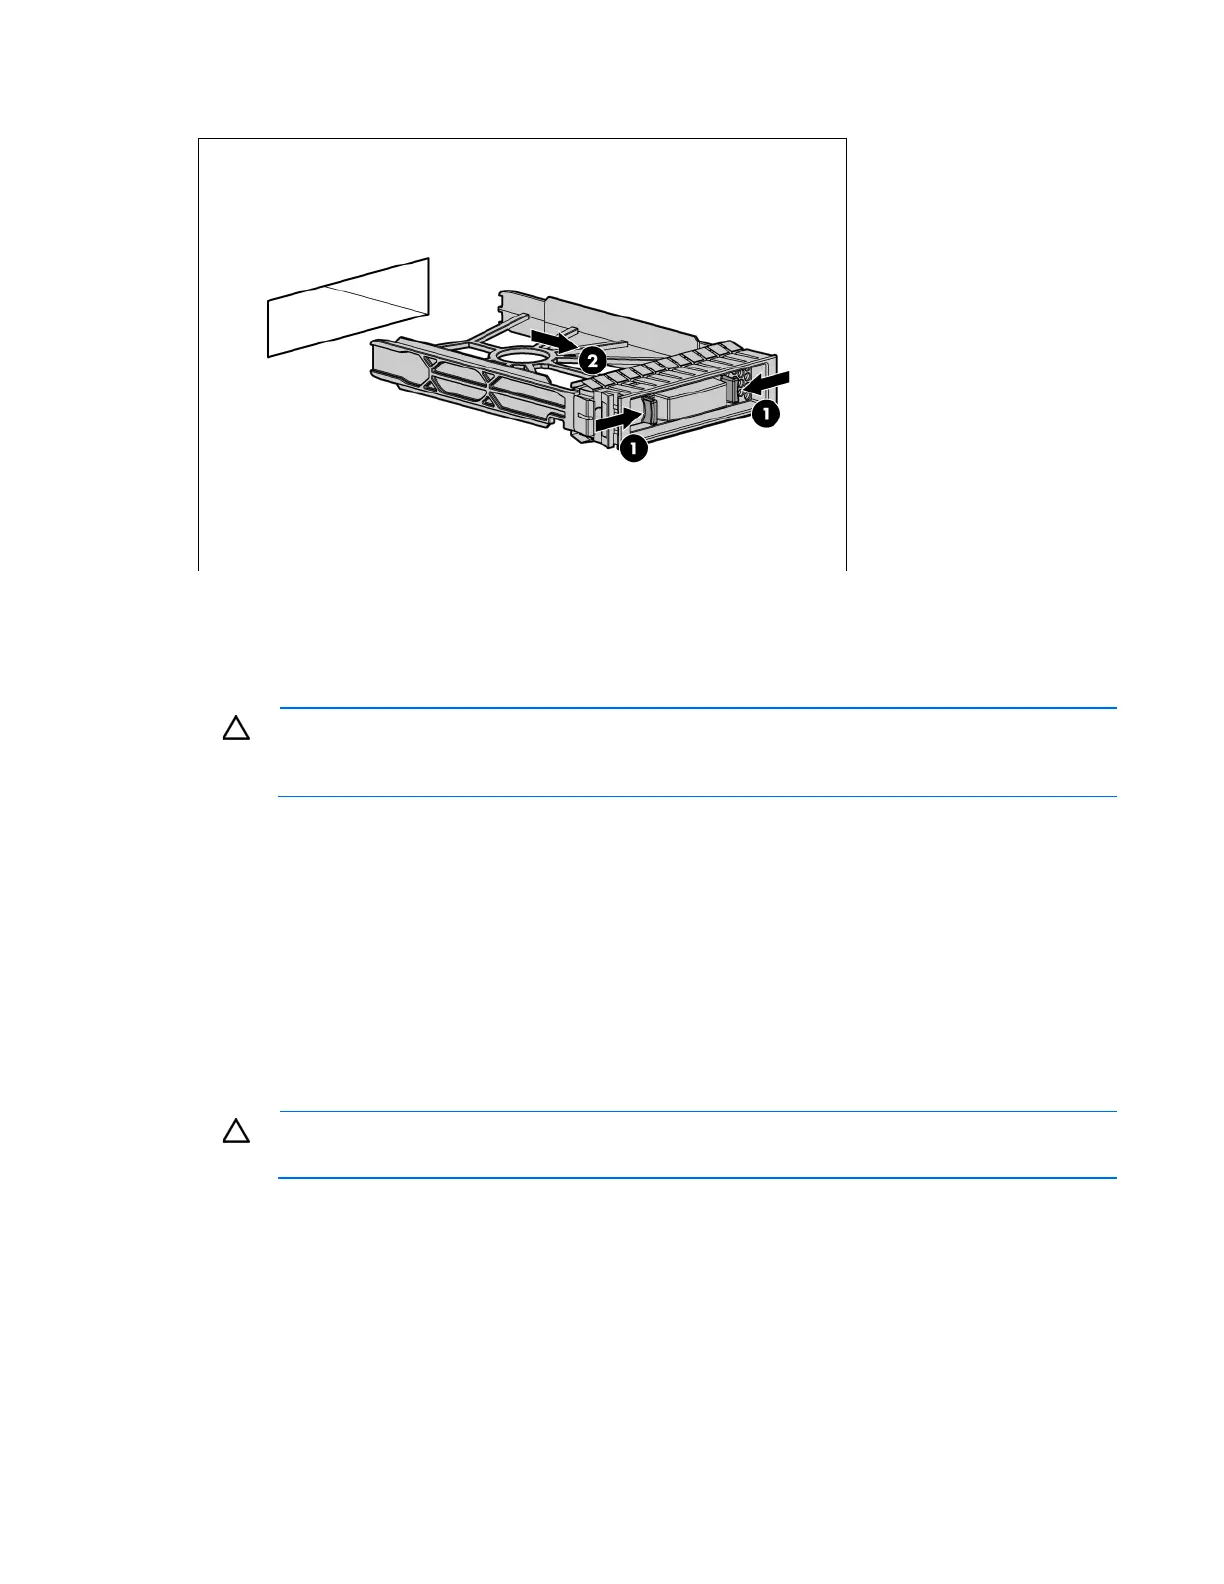
2.
Remove the hard drive blank.
To replace the blank, slide the blank into the bay until it locks into place.
Hard drive
CAUTION: To prevent improper cooling and thermal damage, do not operate the D6000 unless
all bays are populated with either a component or a blank. Remove a drive only when there is
another drive ready to install or the D6000 is powered down.
Before replacing a hard drive, do the following:
• Verify the status of the drive to be replaced by reviewing the hard drive LEDs (on page 48) and hard
drive LED combinations (on page 49).
• Check the RAID status and configuration to be sure data loss will not occur if the drive is removed. For
more information, see the HP Array Configuration Utility User Guide on the HP website
(http://www.hp.com).
• Be sure that the replacement hard drive is the same interface and the same or larger capacity.
To remove the component:
1. Extend the hard drive drawer (on page 22).
CAUTION: To avoid data loss, be sure that the drives are labeled and returned to the same bays
they were removed from.
 Loading...