Removal and replacement procedures 25
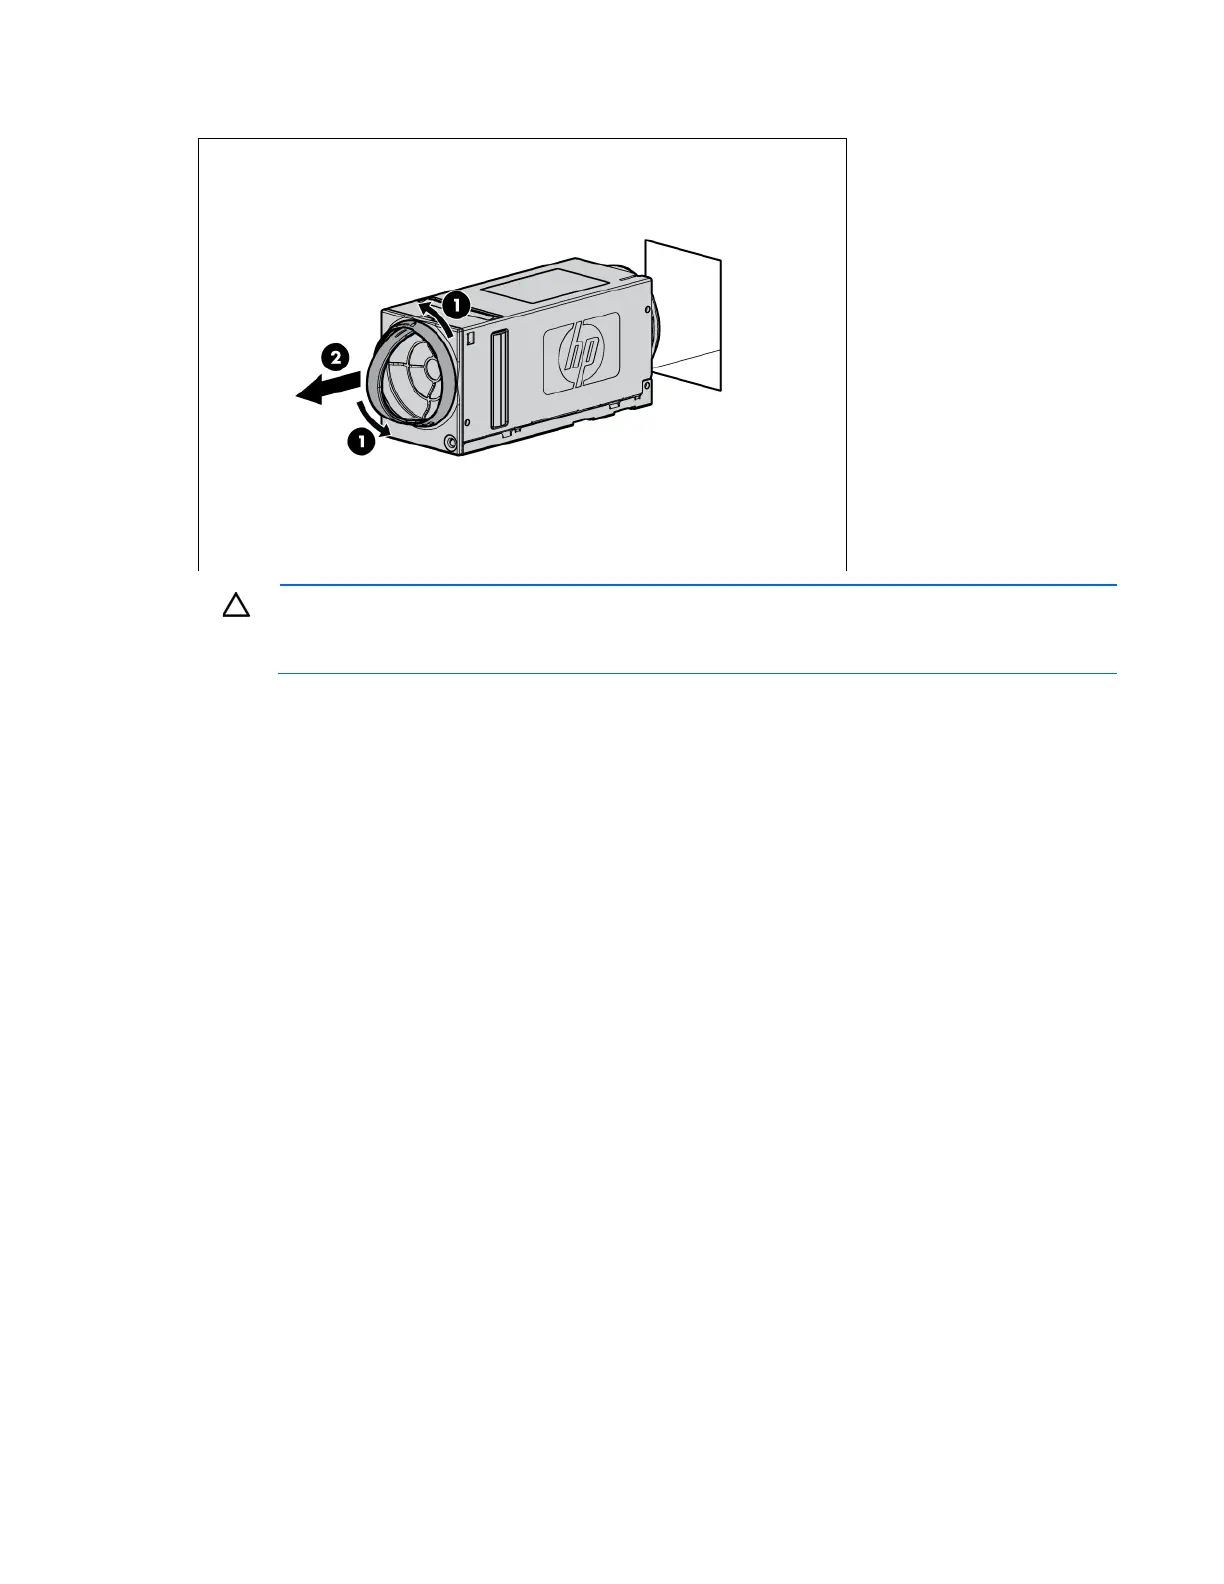
2.
Remove the fan.
CAUTION: For best cooling practices, do not operate the enclosure for extended periods with
more than one component or blank removed. When removing an active component permanently,
replace it with a blank.
To replace the fan, install it into the fan bay and push until it locks into place.
Hot-plug I/O module
Before removing the component, be sure to do the following:
• Verify the status of the I/O module to be replaced by reviewing rear panel LEDs and buttons (on page
46).
• Be sure that your configuration can support your actions. If the proper redundancy is not in place,
power down the D6000 before beginning this procedure.
To remove the component:
1. Be sure the hard drive drawer is closed all the way.
2. Disconnect the SAS cables.
 Loading...