EasyManuals Logo
Home>HP>Storage>D6000 Disk Enclosure

HP D6000 Disk Enclosure User Manual

HP D6000 Disk Enclosure
54 pages
To Next Page IconTo Next Page
To Previous Page IconTo Previous Page
Page #35 background imageLoading...
Page #35 background image
Removal and replacement procedures 35
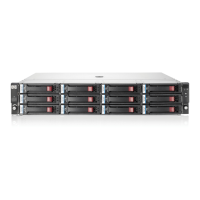
3. Push the drawer in about 25 cm (10 in).
4. Release the cable management arm and expand to the rear of the chassis.
5. Push the drawer in another 25 cm (10 in).
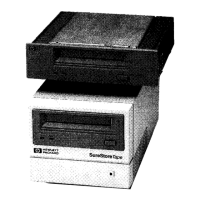
6. Install the power block ("Power block" on page 28).
WARNING: Pinch hazard—Keep hands out of front and rear of chassis when closing hard drive
drawers.
7. Install the hard drives.
Be sure that the drives are returned to the drive bays they were removed from.
8. Close the drawer.
9. Install all rear panel components.
10. Connect the cables.

Questions and Answers:

Question and Answer IconNeed help?

Do you have a question about the HP D6000 Disk Enclosure and is the answer not in the manual?

HP D6000 Disk Enclosure Specifications

General IconGeneral
BrandHP
ModelD6000 Disk Enclosure
CategoryStorage
LanguageEnglish

Related product manuals