25
4. Check the power LED (Power/PWR) on the front panel. If the LED is on, the power cord is properly
connected.
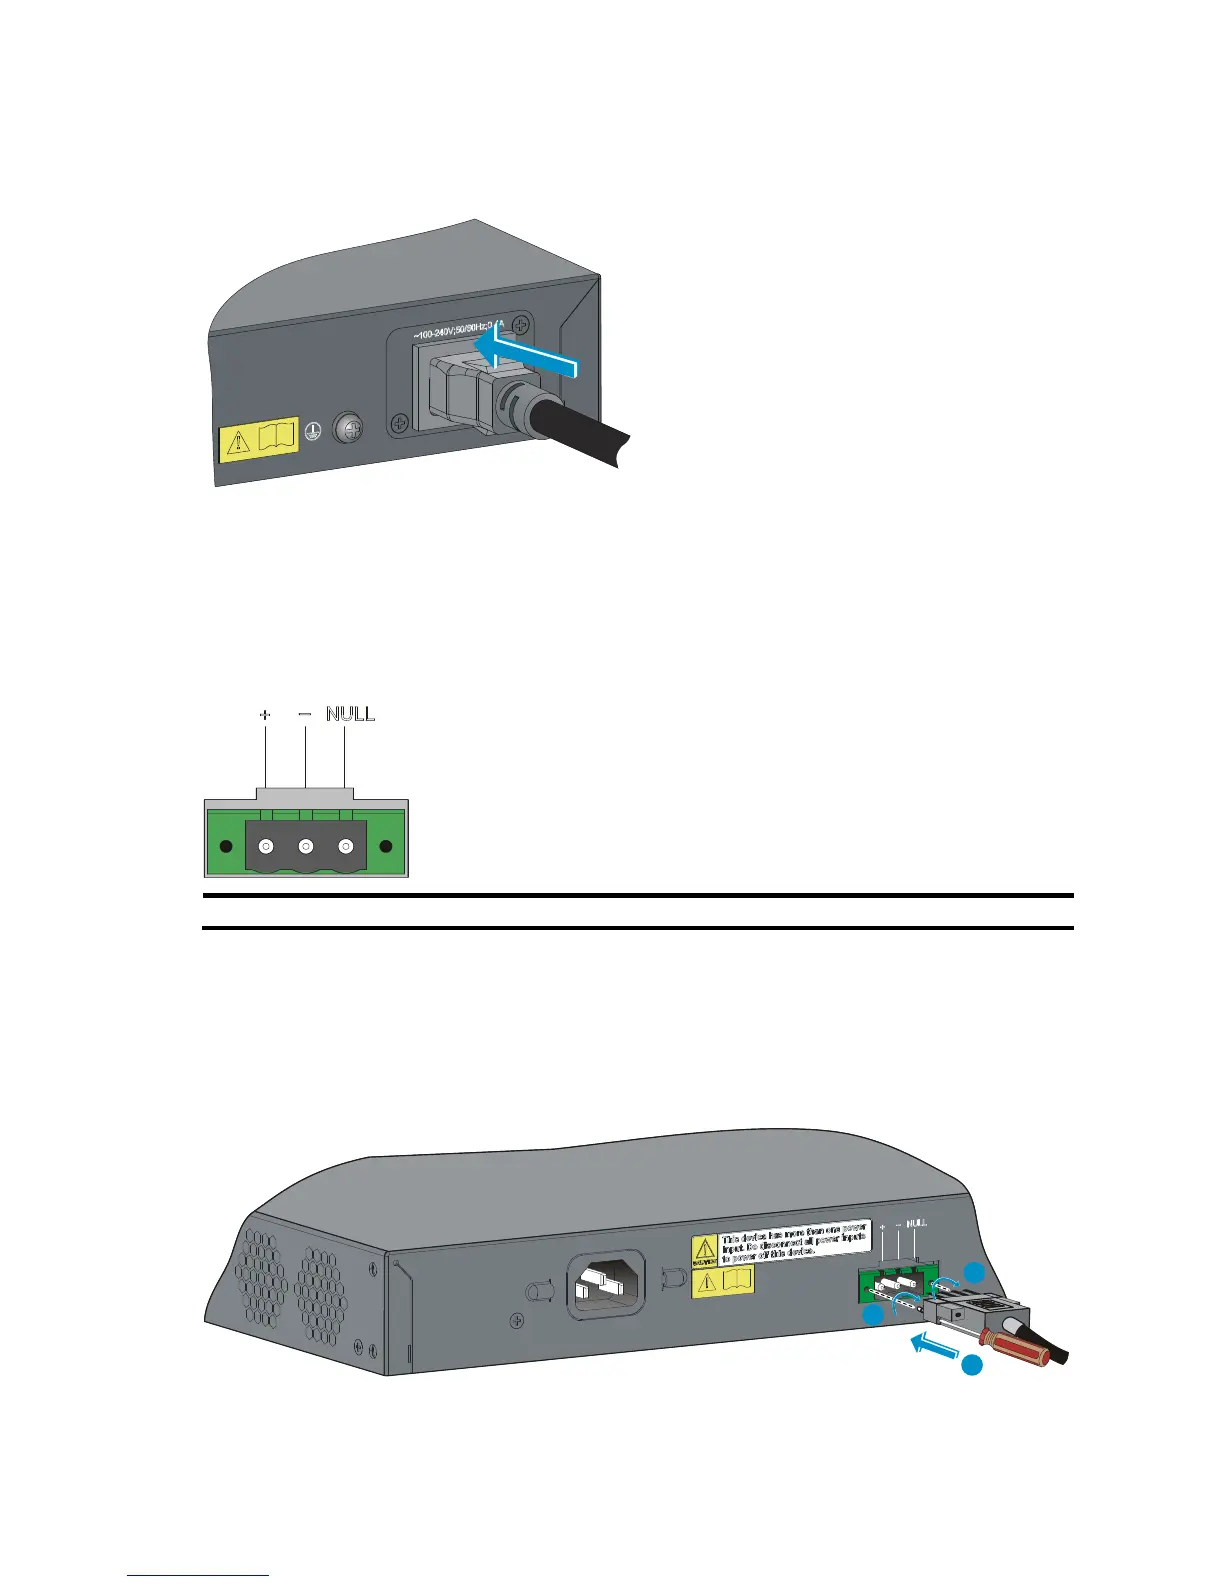
Figure 32 Connect the AC power cord (I)
Connecting the DC power cord
The A3100-24-PoE v2 EI provides a DC power receptacle as shown in Figure 33. You can use the –48 VDC
power in the equipment room or the HP RPS DC power input.
Figure 33 DC power receptacle
—: Input voltage range (–47 VDC to –57 VDC)
To connect the DC power cord:
1. Wear an ESD-preventive wrist strap and make sure it makes good skin contact and is well grounded.
2. Unpack the DC power cord, correctly orient the plug at one end of the cable with the power receptacle
on the power supply, and insert the plug into the power receptacle (see callout 1 in Figure 34).
Figure 34 Connect the DC power cord
 Loading...

