4–8 Hardware Guide
Drives
Inserting and Removing Drive Media
Ä
CAUTION: To avoid playback distortion or damage to optical media,
stop the CD or DVD and exit media software before inserting or
removing an optical drive.
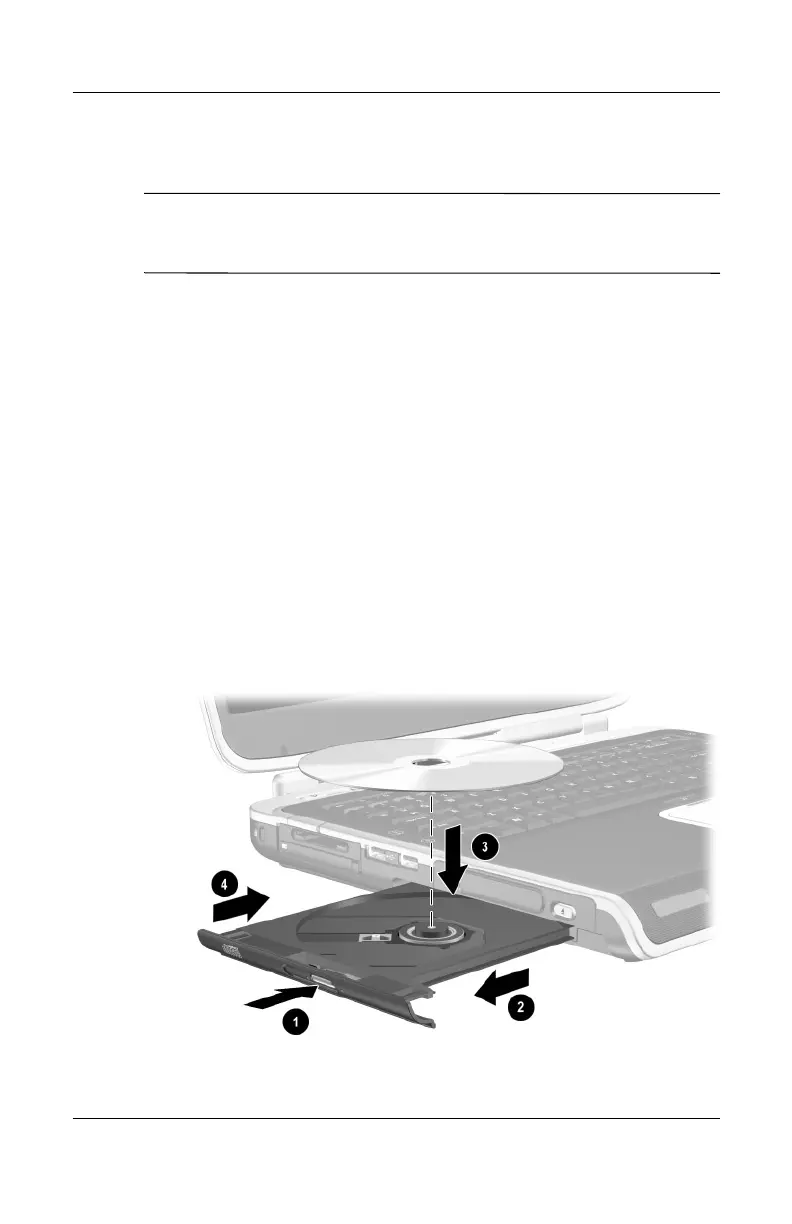
Inserting a CD or DVD
1. Turn on the notebook.
2. Press the release button 1 on the drive bezel to release the
media tray, and then pull the tray out until it is fully
extended 2.
3. Position a CD or one-sided DVD over the tray spindle 3,
label side up.
4. Gently press on the disc near the hole until the disc snaps into
place. If the media tray is not fully extended, tilt the disc to
position it over the tray spindle, and then press it down into
position. Handle the disc by the edges, not the flat surfaces.
5. Close the media tray 4.
Inserting a CD or DVD into an optical drive
 Loading...