4.4 Installing the Mounting Bracket
Before installing the mounting bracket, remove the security Torx wrench and keep
it for later use.
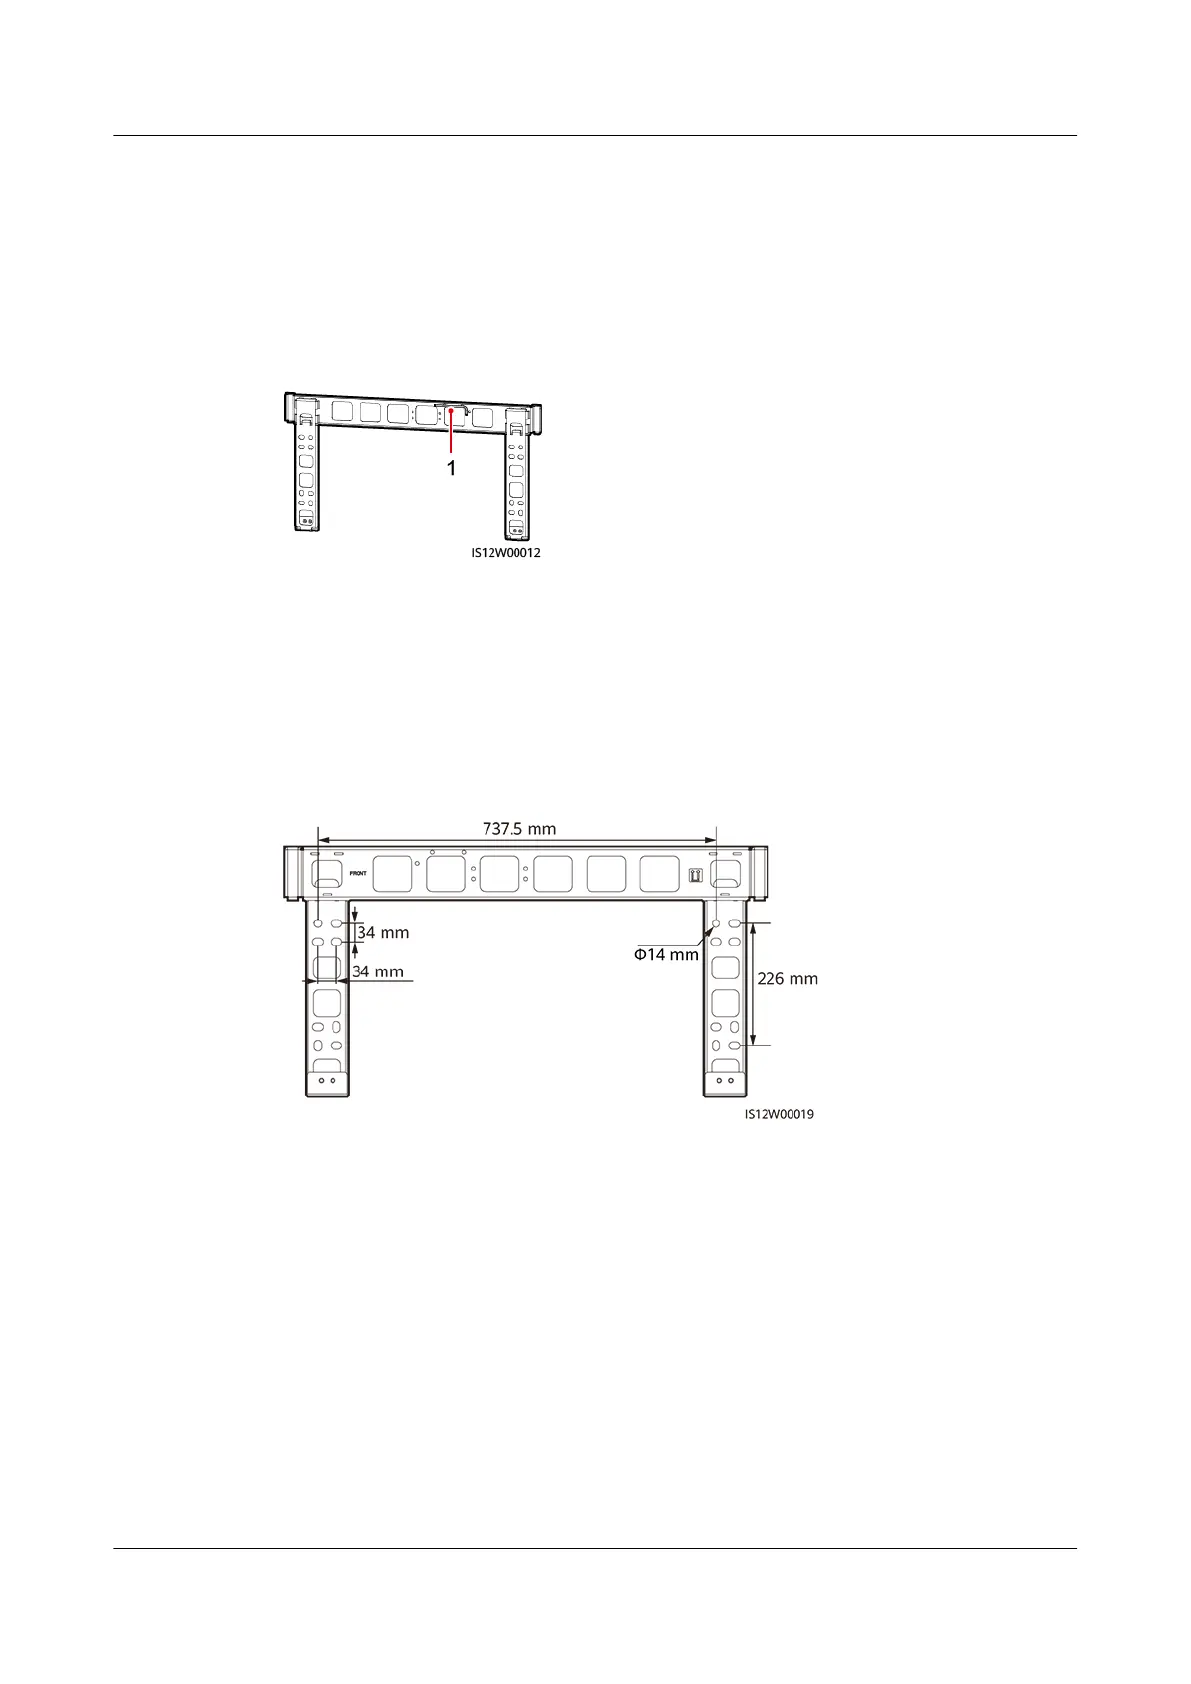
Figure 4-7 Position for binding the security Torx wrench
(1) Security Torx wrench
The mounting bracket of the solar inverter has four groups of tapped holes, each
group containing four tapped holes. Mark any hole in each group based on site
requirements and mark four holes in total. The two round holes are
recommended.
Figure 4-8 Hole dimensions
4.4.1 Support-mounted Installation
Prerequisites
M12x40 bolt assemblies are supplied with the mounting bracket. If the bolt length
does not meet the installation requirements, prepare M12 bolt assemblies by
yourself and use them together with the supplied M12 nuts.
Procedure
Step 1 Determine the positions for drilling holes using the mounting bracket. Level the
positions of mounting holes using a bubble or digital level, and mark the positions
with a marker.
SUN2000-(100KTL, 110KTL, 115KTL)-M2
User Manual 4 Installation
Issue 02 (2022-06-30) Copyright © Huawei Technologies Co., Ltd. 28
 Loading...