 Loading...
Do you have a question about the Husqvarna AUTOMOWER 230 ACX and is the answer not in the manual?
| Cutting Width | 22 cm |
|---|---|
| Cutting Height (min-max) | 20-60 mm |
| Battery Type | NiMH |
| Area Capacity | 3000 m² |
| Maximum Incline | 35% |
| Power Consumption During Cutting | 30 W |
| Cutting System | 3 pivoting razor blades |
| Alarm | Yes |
| PIN Code | Yes |
| Lift Sensor | Yes |
| Tilt Sensor | Yes |
| Typical Mowing Time on One Charge | 60 minutes |
| Typical Charging Time | 60-80 minutes |
Provides essential safety guidelines for using the Automower.
Safety warnings and guidelines for maintenance tasks.
Explains the mower's capacity, mowing technique, and operating principles.
Describes how the Automower operates, searches for charging, and handles obstacles.
Details the control panel, STOP button, and initial start-up sequence.
Lists necessary preparations and included parts for installation.
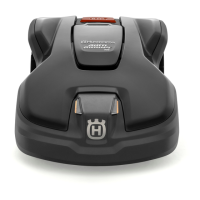
Details requirements for placement, ground level, and cable connections.
Instructions for connecting the low voltage cable and power cord.
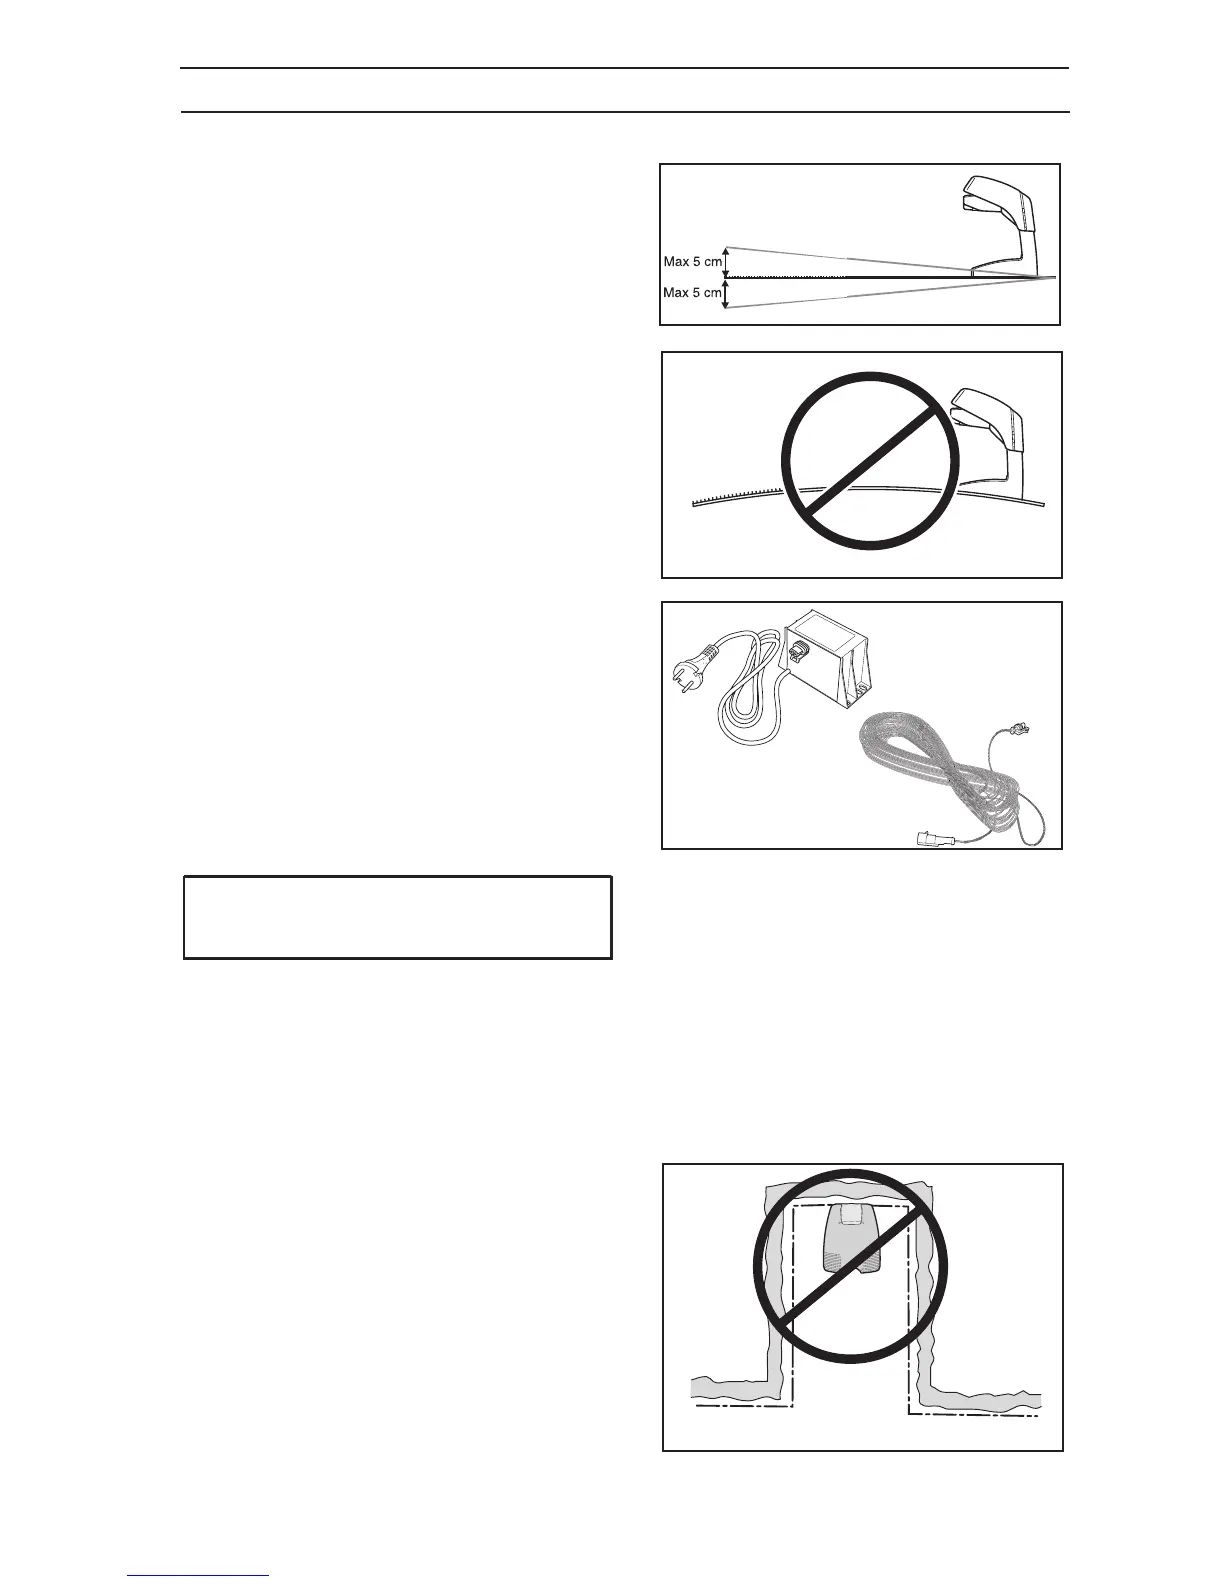
Specifies distances for boundary wire placement around obstacles.
Defines boundary wire placement for paths, slabs, and water features.
Step-by-step instructions for connecting the boundary wire to the charging station.
Detailed steps for placing and securing the boundary wire connectors.
Explains when and how to install guide wires.
Instructions for placing and connecting guide wires to the charging station.
Guidance on ideal positioning for the charging station.
Steps for physically installing and securing the charging station to the ground.
Outlines methods for installing the boundary wire (stapling or burying).
Steps for initial start-up and linking the mower to the station.
Guidelines for optimal placement of the boundary wire loop.
Instructions for charging the battery before initial use.
Steps to start the Automower after setup.
How to switch off the Automower using the main switch.
How to safely stop the Automower.
Settings for PIN code, time lock, stop protection, and settings lock.
Activates an alarm if the PIN code is entered incorrectly after stopping.
Theft prevention function requiring PIN entry after set days.
Prevents unauthorized changes to settings or programs without PIN.
Emphasizes regular checks and part replacement for reliability and service life.
Detailed instructions on how to clean the mower, underframe, and blade disc.
Step-by-step guide for replacing the mower blades.
Instructions for storing the Automower and charging station for winter.
Warning and instructions for replacing the mower blades.
Lists common fault messages, their causes, and actions to resolve them.
Continues listing fault messages, causes, and actions.
Lists symptoms of incorrect operation and their causes/actions.
Continues listing operational symptoms and their remedies.