15 ELECTRICAL SYSTEM
114
E00360-10
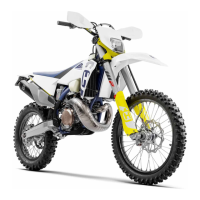
Main work
– Remove the screw on the rear of the turn signal housing.
–
Carefully remove turn signal glass
1
.
–
Lightly squeeze orange cap
2
in the area of the holding lugs
and take it off.
– Press the turn signal bulb lightly into the socket, turn it coun-
terclockwise by about 30°, and take it out of the socket.
Info
Do not touch the reflector with your fingers and keep it
free from grease.
– Press the new turn signal bulb carefully into the socket and
turn it clockwise until it stops.
Turn signal (R10W/socket BA15s) ( p. 150)
– Mount the orange cap.
– Position the turn signal glass.
– Insert the screw and first turn counterclockwise until it
engages in the thread with a small jerk. Tighten the screw
lightly.
Finishing work
– Check that the turn signal system is functioning properly.
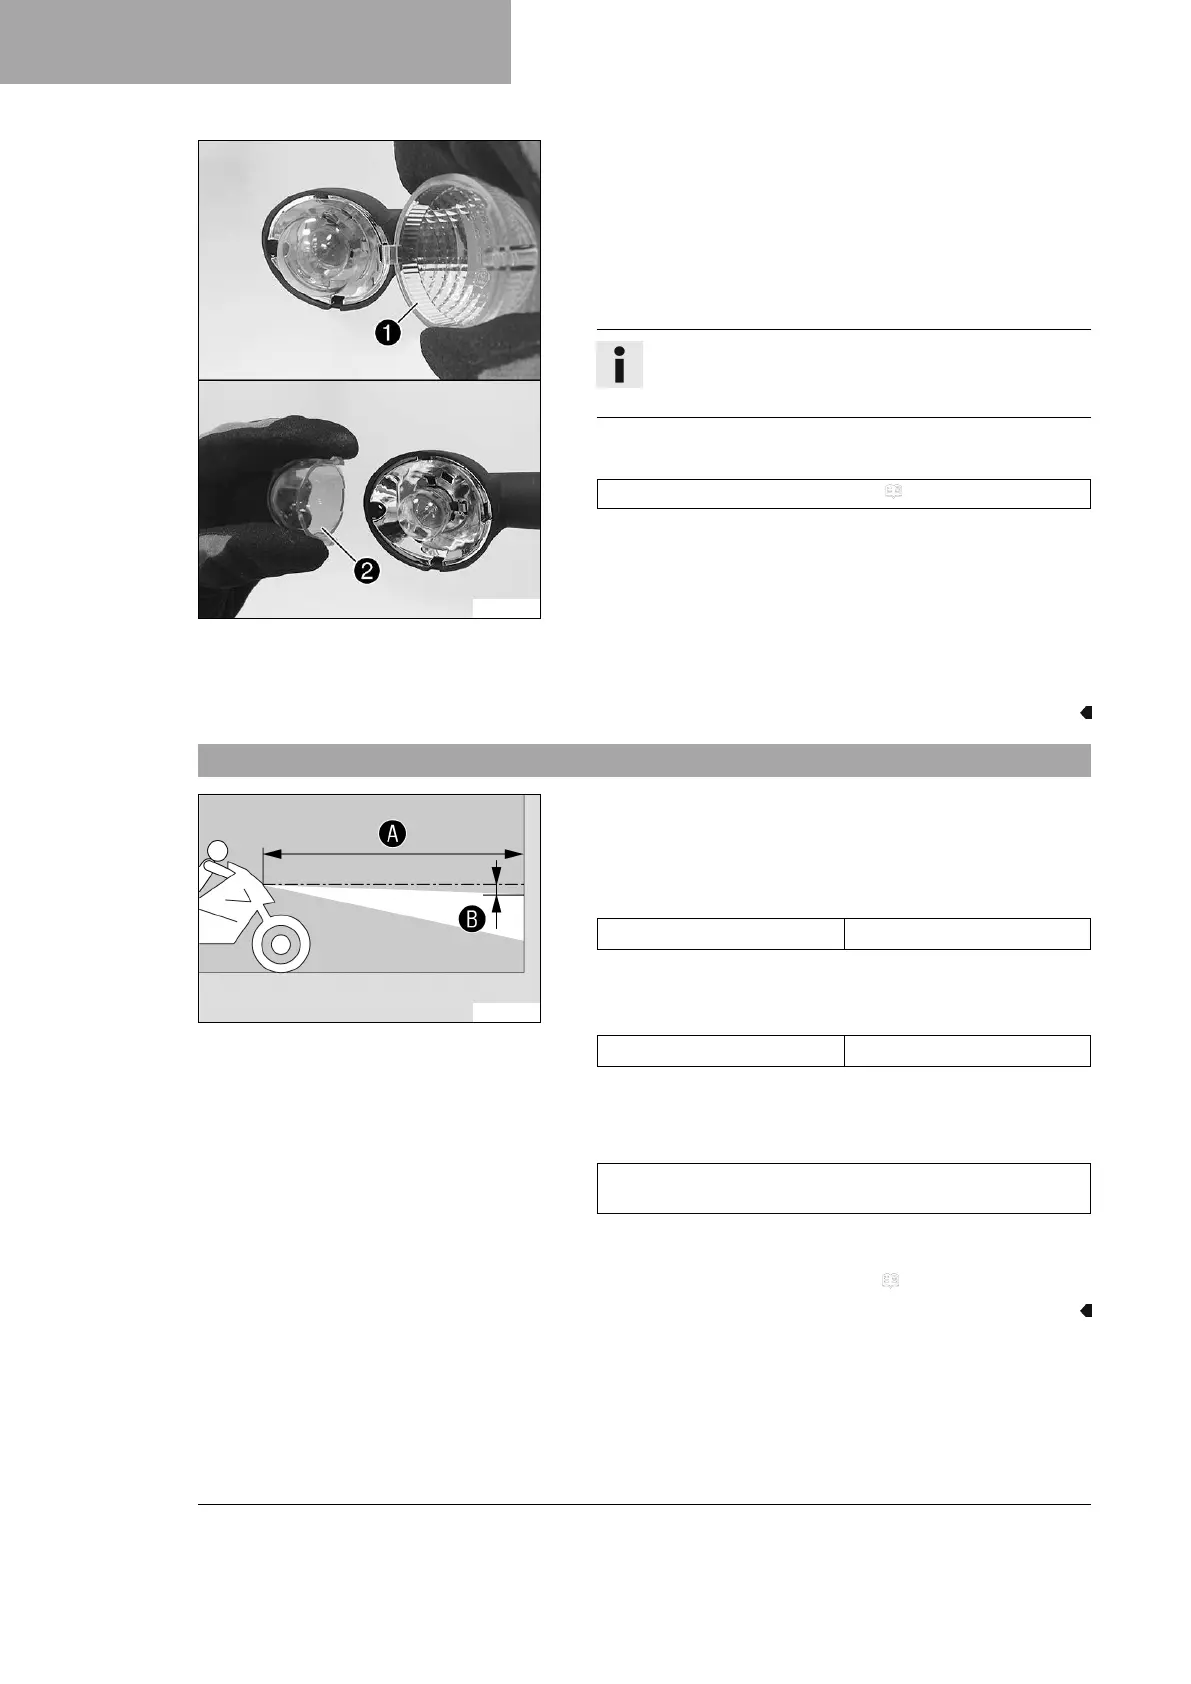
15.10 Checking the headlight setting
400726-10
– Park the vehicle on a horizontal surface in front of a light-
colored wall and make a mark at the height of the center of
the low beam headlight.
–
Make another mark at a distance
B
under the first marking.
Guideline
Distance
B
5 cm (2 in)
–
Position the vehicle vertically at a distance
A
away from the
wall.
Guideline
Distance
A
5 m (16 ft)
– The rider now sits down on the motorcycle.
– Switch on the low beam.
– Check the headlight setting.
The boundary between light and dark must be exactly on
the lower mark for a motorcycle with rider.
» If the boundary between light and dark does not meet
specifications:
– Adjust the headlight range. ( p. 115)
 Loading...