
Do you have a question about the Hypertherm Duramax and is the answer not in the manual?
| Brand | Hypertherm |
|---|---|
| Model | Duramax |
| Category | Flashlight |
| Language | English |
Overview of Hypertherm's compliance with EMC standards and environmental considerations.
User responsibilities for installation and resolving electromagnetic disturbances.
Evaluating potential electromagnetic problems in the surrounding environment.
Methods to reduce electromagnetic interference, including mains supply and cable management.
Ensuring proper maintenance for electromagnetic compatibility.
Guidelines for positioning cutting cables and equipotential bonding.
Techniques for earthing the workpiece and screening/shielding for EMC.
Genuine parts, user responsibility for safe use, and general warranty terms.
Conditions not covered by warranty and limitations of Hypertherm's liability.
Hypertherm's commitment regarding patent infringement and liability limits.
Customer responsibilities for insurance and conditions for transferring warranty rights.
Overview of Duramax and Duramax Hyamp robotic torch lines and their applications.
Weights for Duramax robotic torches and lead bend radius information.
Weights for Duramax Hyamp robotic torches and lead bend radius information.
Detailed dimensions for Duramax 180° and 90° robotic torches.
Detailed dimensions for the Duramax 45° robotic torch.
Detailed dimensions for the Duramax Hyamp 180° robotic torch.
Detailed dimensions for the Duramax Hyamp 90° robotic torch.
Detailed dimensions for the Duramax Hyamp 45° robotic torch.
Identification of key components in robotic torches.
Step-by-step guide for installing the torch, including through-arm mounting.
Procedure for disassembling and reassembling robotic torches.
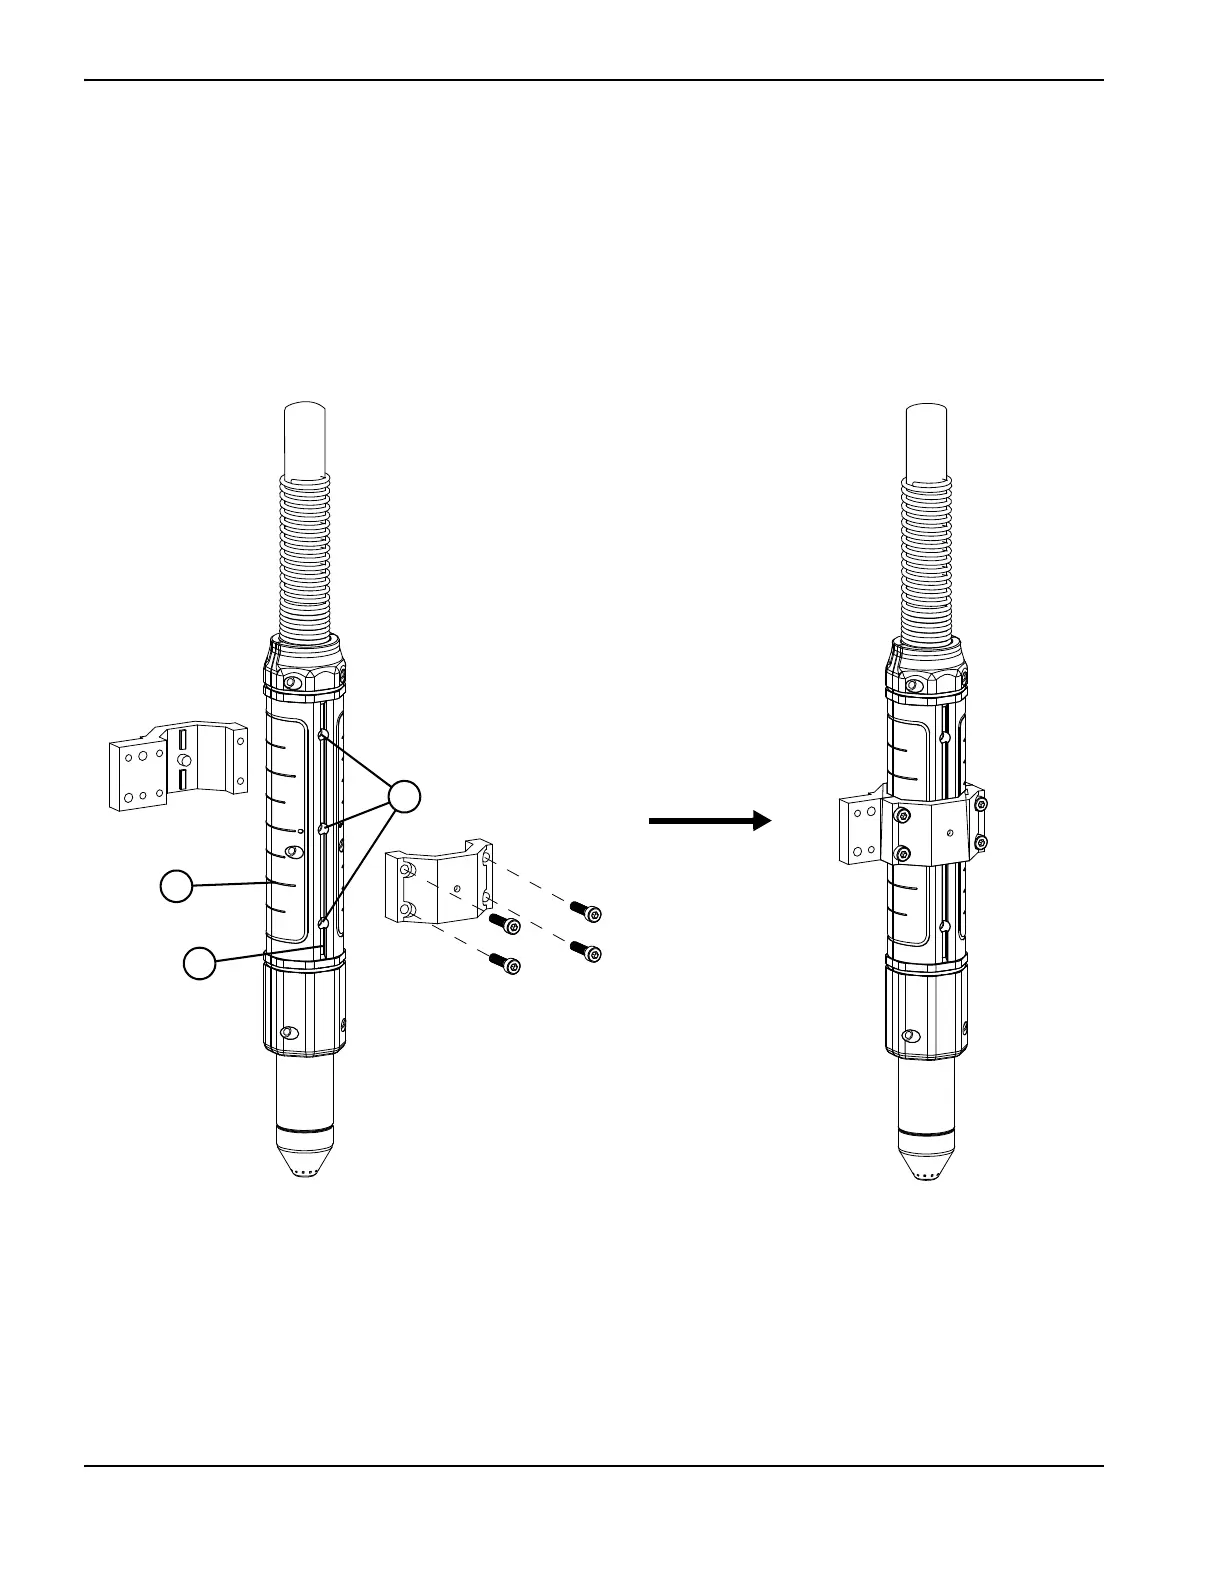
Methods for mounting the torch to the robot arm using increment markings or positioning holes.
Factors influencing the lifespan of torch consumables.
Guide to selecting and identifying Duramax shielded and unshielded consumables.
Guide to selecting and identifying Duramax Hyamp shielded and gouging consumables.
Procedure for installing shield, retaining cap, nozzle, electrode, and swirl ring.
Instructions for connecting and disconnecting the torch lead using the FastConnect system.
Guide for connecting an optional remote-start pendant to Powermax systems.
Details on connecting machine interface cables for arc voltage and signals.
Diagram and table detailing connector sockets and signals for machine interface cables.
Procedure for changing the five-position voltage divider settings on the power supply.
Explanation of cut chart information and its use for optimizing cutting parameters.
General guidance on operating robotic torches and optimizing performance.
Instructions for installing and using the torch teach tool for robot programming.
Factors affecting cut quality like angle, dross, and straightness.
Techniques and considerations for piercing workpieces with robotic torches.
Troubleshooting common faults encountered during machine cutting operations.
General overview of Duramax and Duramax Hyamp robotic torch components.
Steps to safely disconnect the torch, power supply, and gas supply.
Procedure for removing and installing the positioning barrel on robotic torches.
Procedure for replacing the main body of the robotic torch.
Procedure for replacing the cap-sensor switch on the robotic torch.
Procedure for replacing the torch lead assembly.
Safety precautions and general guidelines for performing maintenance.
Scheduled maintenance tasks for every use, every 3 months, and every 6 months.
Guidelines for inspecting and identifying worn or damaged consumables.
Part numbers for Duramax 180°, 90°, and 45° robotic torch components.
Part numbers for Duramax 90° robotic torch components.
Part numbers for Duramax 45° robotic torch components.
Part numbers for Duramax Hyamp 180°, 90°, and 45° robotic torch components.
Part numbers for Duramax Hyamp 180° robotic torch components.
Part numbers for Duramax Hyamp 90° robotic torch components.
Part numbers for Duramax Hyamp 45° robotic torch components.
List of available accessory parts, including sheathing and teach assemblies.