MAINTENANCE
3-32
Service Manual
PAC121TS TORCH PARTS REMOVAL AND REPLACEMENT
Torch Main Body Removal and Replacement
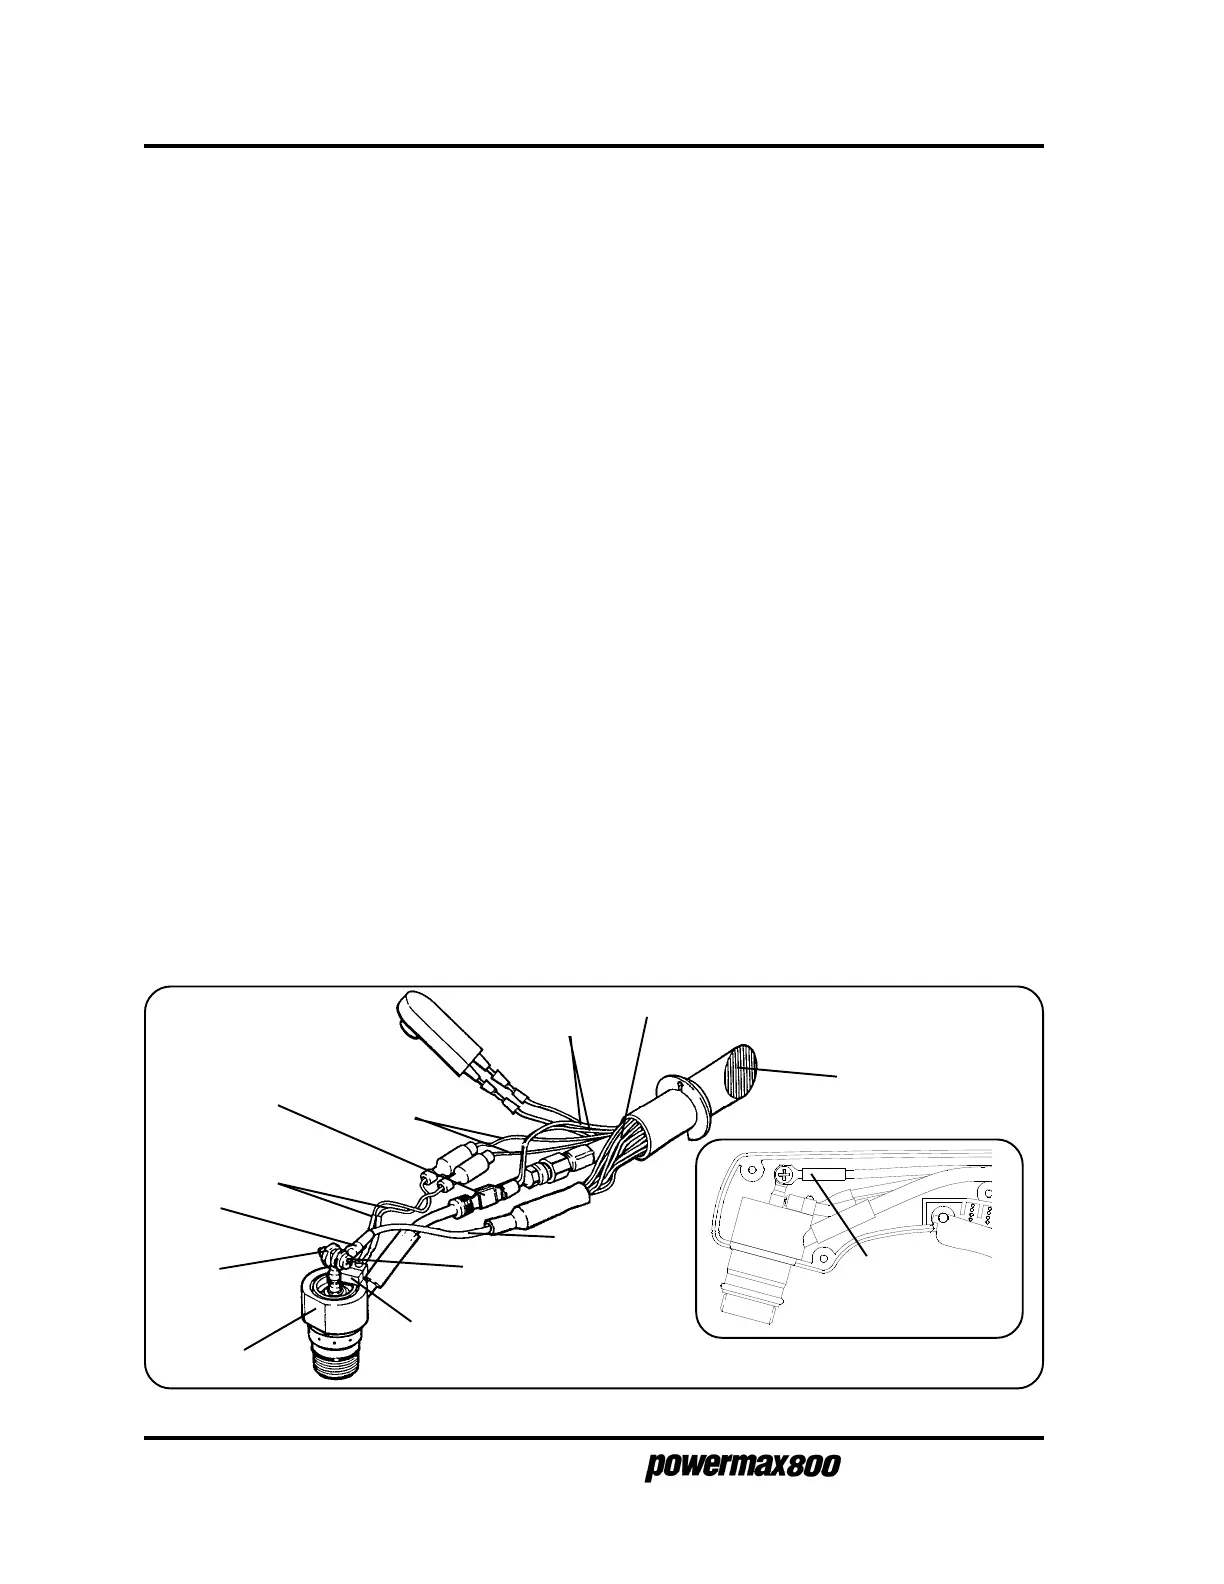
To remove and replace the torch main body, order the torch main body with cap-on sensor switch
and refer to the following procedure and Figures 3-7 and 3-8.
1 Set the Powermax800 power switch to O (off), unplug the power cable, and disconnect
the gas supply. Disconnect the torch lead quick disconnect from the power supply.
2. Remove the five screws that secure the handle halves together and remove handles from
torch main body, torch switch and safety trigger (Fig. 3-8).
3. Remove the red wires attached to the pilot arc tab (Fig. 3-7).
Note for step 4: Disconnect wires by pulling on terminals. Do not pull on wires.
4. Disconnect the two lead terminals (blue wire in each terminal) from the two white wires of
the cap sensor microswitch (Fig. 3-7).
5. Disconnect the plunger wire from the torch main body by holding the plunger nut with a 1/4"
(6mm) wrench or nut driver and removing the plunger screw (Fig. 3-7).
6. Disconnect the torch main body and torch lead gas fittings using 5/16" (8mm) and 7/16"
(11mm) open-end wrenches.
7. Replace with the new torch main body by reversing these instructions. Note: When
connecting the plunger wire, be certain to keep the plunger wire terminal at the proper angle
as shown in Fig. 3-7 inset. Tighten the plunger screw with 8 lb-in (9 kg-cm) of torque.
8. Install the torch main body and torch switch back into handle (Fig. 3-8). Be certain that torch
switch slides into position above safety trigger, and that trigger movement activates the switch
pushbutton and then releases. While positioning the handle halves together, be careful not to
pinch any wires.
9. Replace the five screws to secure the handle halves together.
Torch Lead
Figure 3-7 PAC121TS Torch Main Body Removal
Torch
Main Body
Cap Sensor
Microswitch
White Wires (8)
Blue
Wires (2)
Red
Wires (2)
Cap Sensor
Microswitch
White Wires (2)
Plunger
Wire
Pilot Arc
Tab
Plunger
Nut
12-97
Plunger
Screw
Plunger
Terminal
Proper plunger
terminal mounting
angle
 Loading...