MAINTENANCE
3-18
Service Manual
Before switching on the power supply, perform
Visual Checks - Internal, Resistance Checks
and also
review the warnings on page 3-9.
• Verify that the torch is plugged into the power supply.
• Connect the power cord into the line voltage disconnect switch box or plug into a properly
grounded outlet.
• Switch the power supply on.
• Connect the gas supply to the pressure regulator at the rear of the power supply.
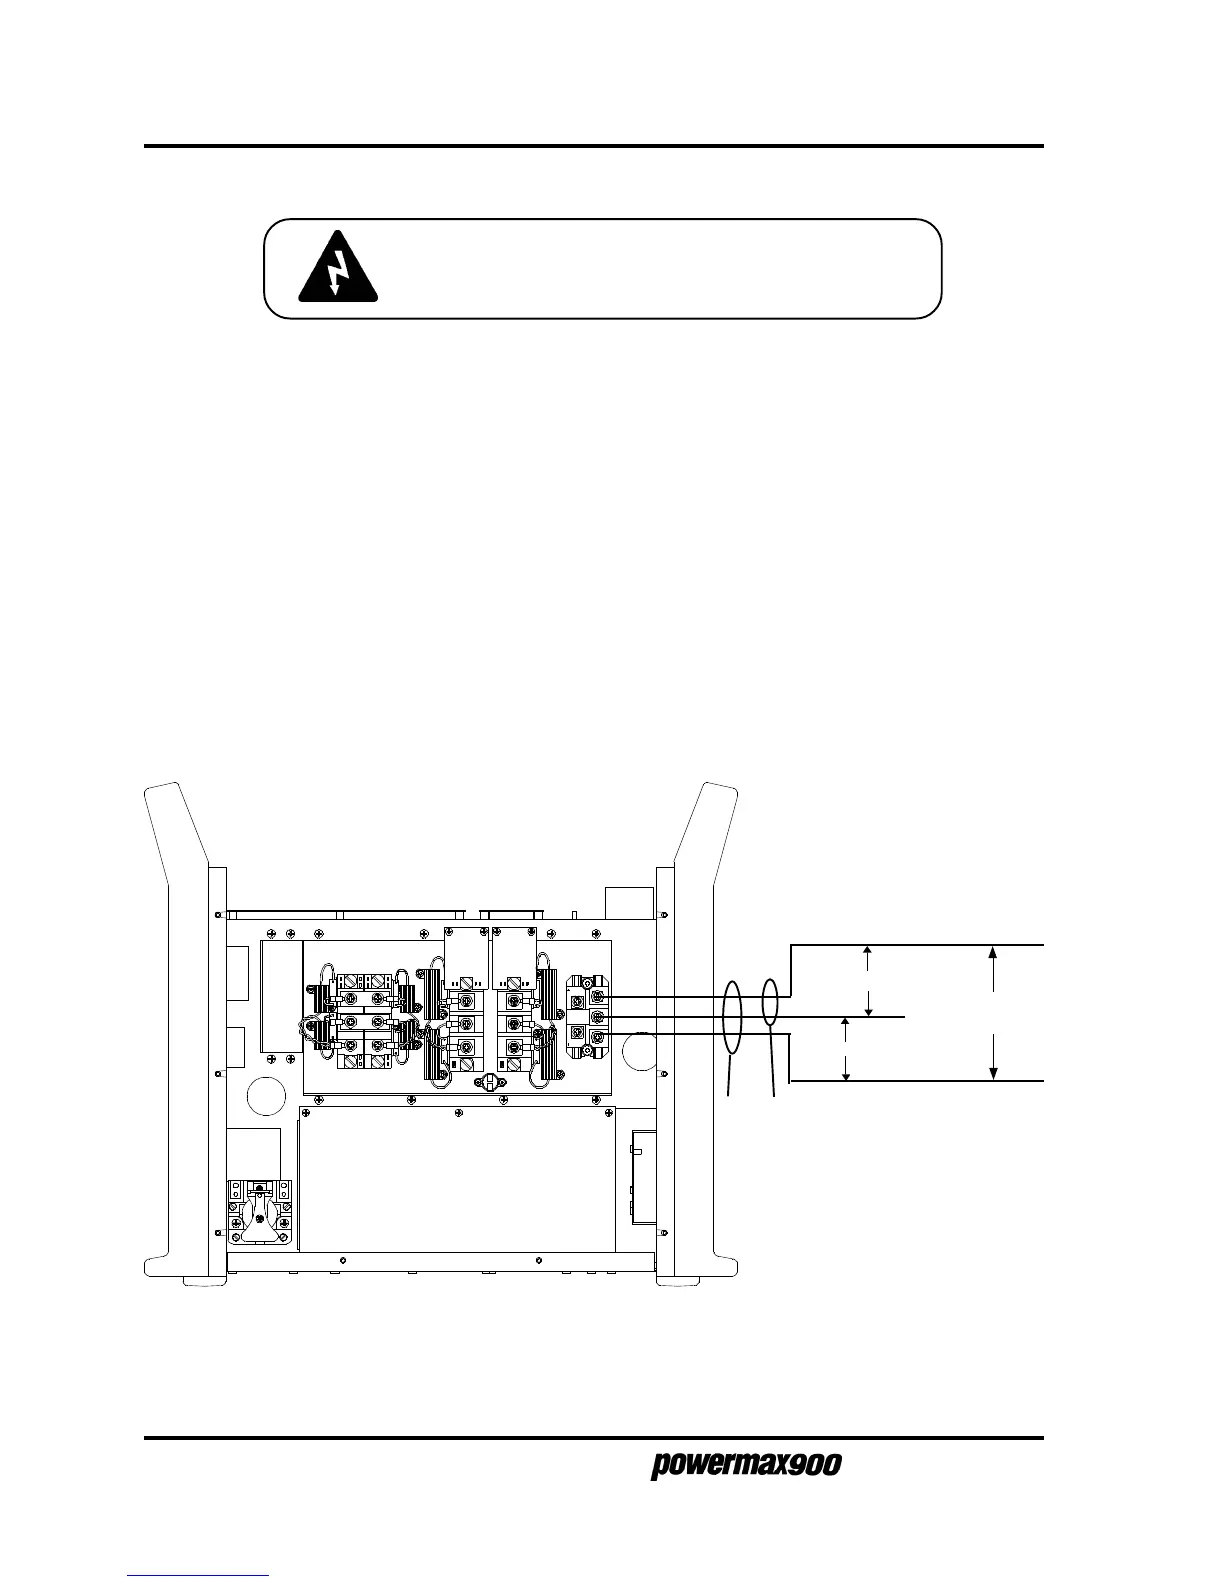
Voltage Check #1 - Figure 3-11
• Voltage at Input of Input Diode Bridge
The AC voltage between any 2 input wires will equal the line voltage on 3φ systems.
On 1φ systems, the AC voltage between the top 2 input wires will equal the line voltage.
Voltage Checks
SHOCK HAZARD - See warnings on page 3-9
before proceeding.
= Line Voltage
= Line Voltage
= Line Voltage
8 or 32
12
11
3φ 1φ
Figure 3-11 Voltage Check #1 - Input of Input Diode Bridge

 Loading...