3-29
MAINTENANCE
Service Manual
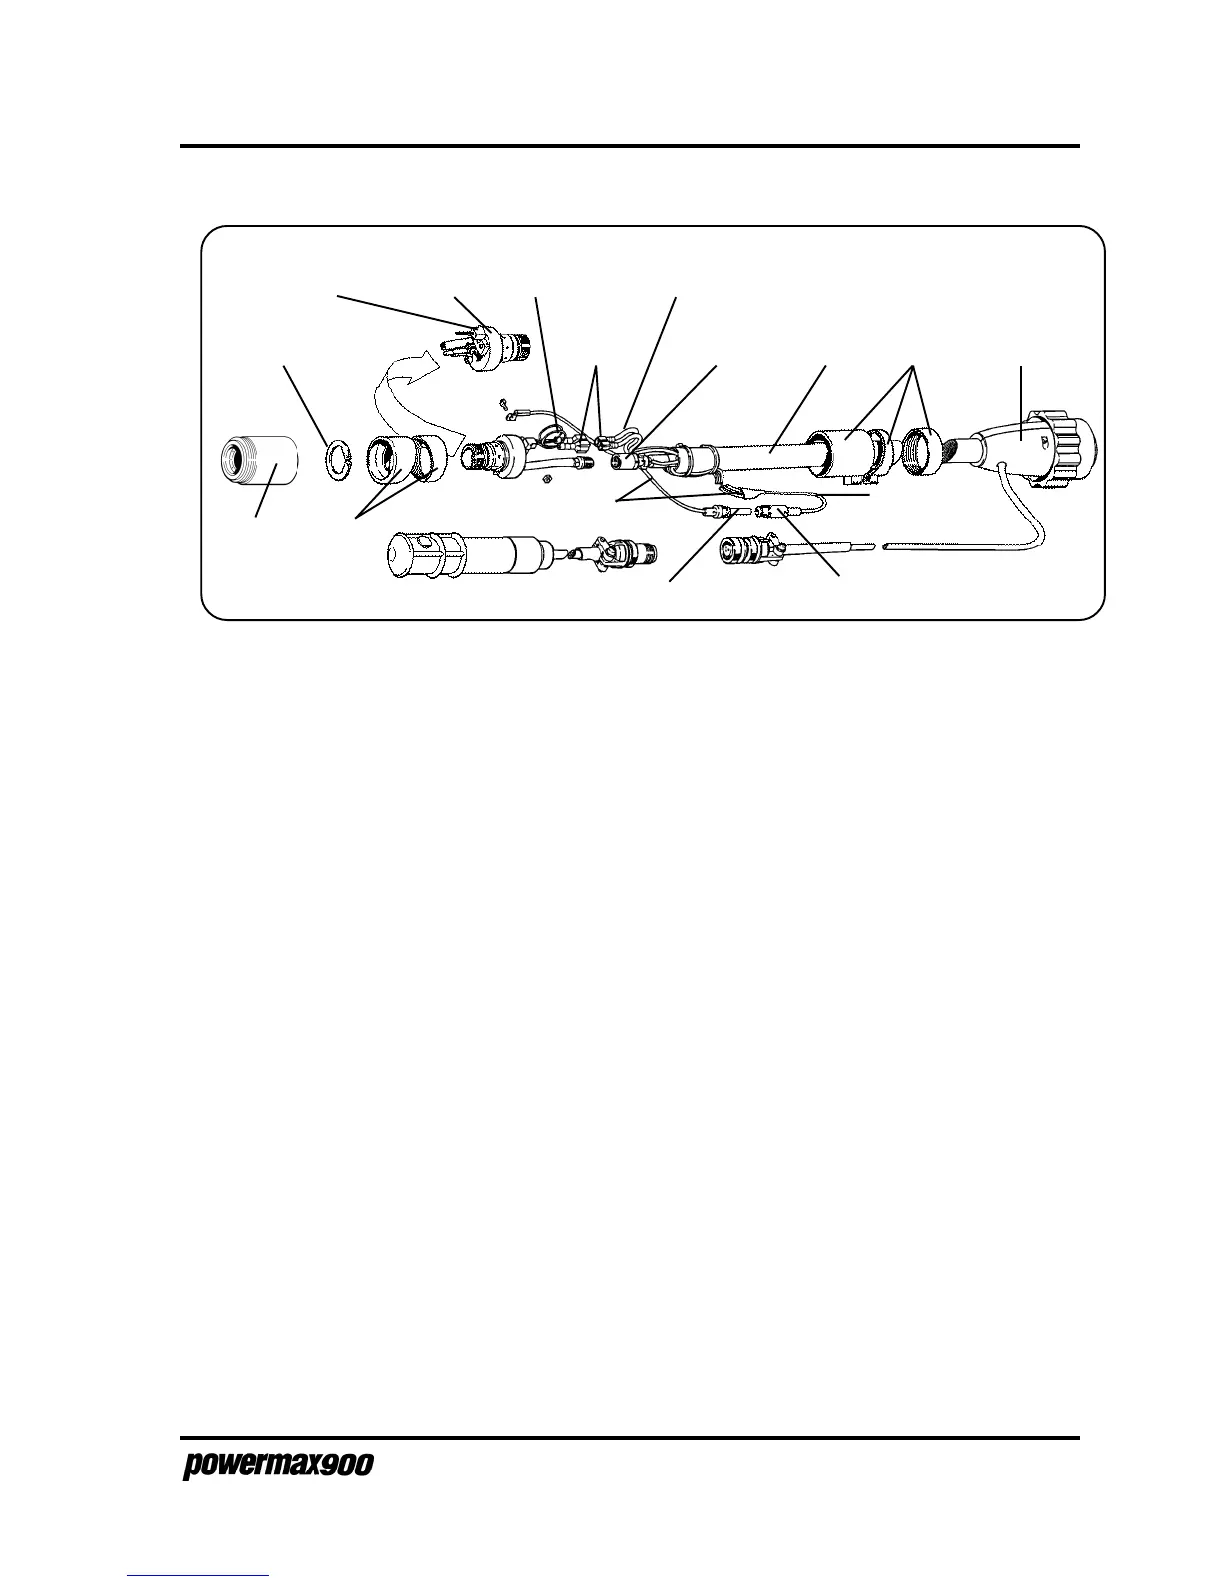
Torch
Lead
Positioning
Sleeve
Blue
Wires (2)
White
Wires (2)
High-Current Wire
Torch
Main Body
Cap Sensor
Microswitch
Torch
Sleeve
Snap Ring
Retaining
Cap
Figure 3-19 PAC125M Torch Assembly
4. Slip 2 small pieces of heat shrink over the cap-sensor microswitch wires and connect the
white wires to the blue wire terminals on the torch lead. Slide the heat shrink over the
terminals and apply heat.
5. Slip a large piece of heat shrink over the high-current wire and connect the pin to the
receptacle. Slide the heat shrink over the pin-receptacle connection and apply heat.
6. Loop the high-current wire next to the torch lead and secure with 2 plastic ties. Be certain
that there is slack between the high-current wire and the torch lead gas fitting.
7. Slide the positioning sleeve back down over the torch lead and screw it into the torch sleeve.
Be certain not to pinch any wires when screwing sleeves together.
8. Install the proper consumables into the torch. When the retaining cap is tightened, the
microswitch will click, indicating that the torch main body has been replaced correctly.
Loop these leads next
to the torch lead when
reassembling
Pin Receptacle
Torch
Lead
Connector
Torch Lead
Gas FittingTerminals

 Loading...