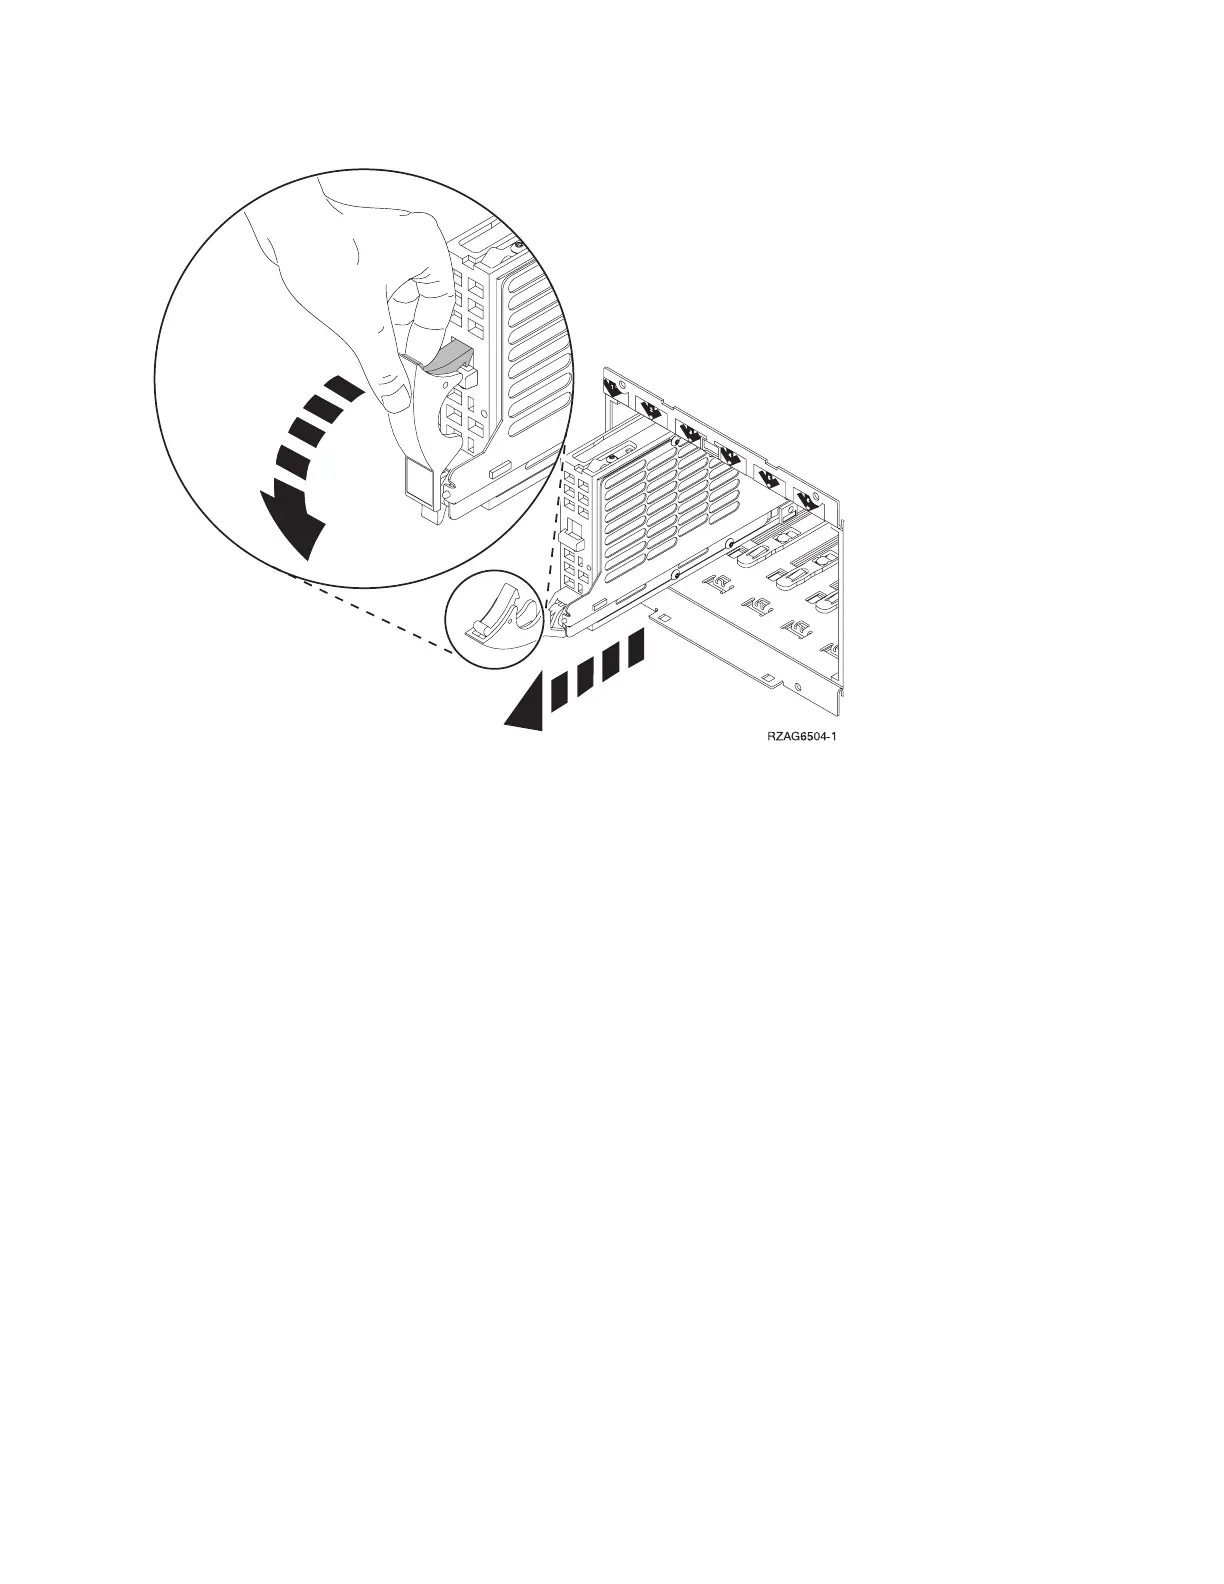
Figure 1. Removing a disk unit (dedicated)
4. Are you finished with the repair?
v No: Continue with the next step.
v Yes: Replace the covers that were removed during this procedure and return to the procedure that
sent you here.
This
ends the procedure.
5. To Install a disk unit using dedicated maintenance perform the following:
a. Power off the system. See Power on/off the system and logical partitions.
b. Disconnect the power cord.
c. Put the disk unit part way into the desired slot and rotate the handle of the disk unit towards you.
d. Push the disk unit completely into the slot and rotate the handle towards the disk unit to latch it into
the slot.
e. Replace the covers that were removed during this procedure and return to the procedure that sent
you here.
This
ends the procedure.
Model 825 - HSL card - MB1 and MB2
For use by authorized service providers.
Use this procedure to remove or replace the HSL card - MB1 or MB2 on the Model 825.
To remove or replace the HSL card MB1 or MB2:
1. Power off the system. See Power on/off the system and logical partitions.
2. Remove the left side cover. See Model 825 - Covers
3. Remove the CEC cover by unscrewing the retaining screw.
4. Remove the cards in positions M01 and M02. See Model 825 - Cards (dedicated) and Locations —
Model 825.
38 Hardware (Remove and Replace; Part Locations and Listings)
 Loading...