Note: The positioning of the remote battery depends on the type of the
remote batteries that you install.
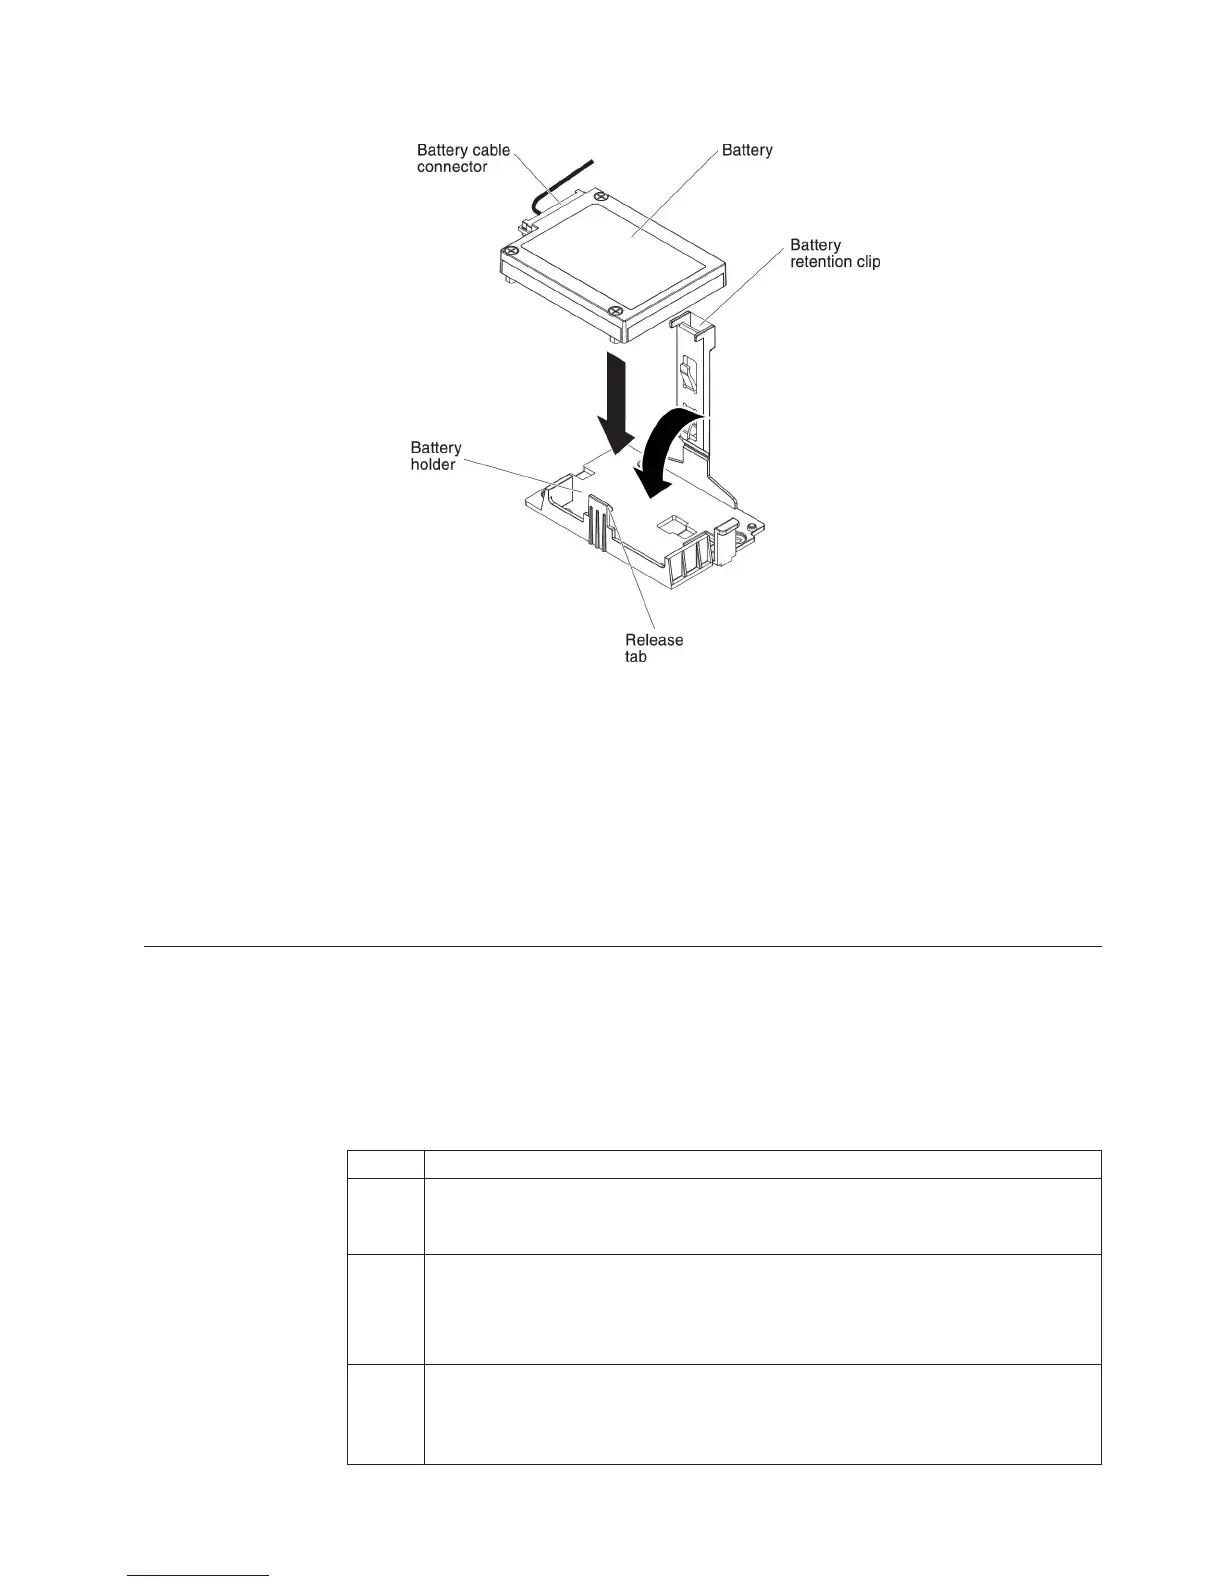
b. Connect the other end of the battery cable to the battery cable connector on
the battery.
c. Lower and press down on the retention clip until it snaps in place to hold
the battery firmly in place.
If you have other devices to install or remove, do so now. Otherwise, go to
“Completing the installation” on page 104.
Installing the microprocessor 2 expansion board
To install the microprocessor 2 expansion board, complete the following steps:
Note: While installing 16 GB 1.5 Volt/ 32 GB 1.35 Volt, please refers to the table of
fan configuration instruction.
Table 15. Fan Configuration Instruction
Fans Conditions
2 and
Rear
fan
Standard for all systems
3
1. When the second microprocessor is populated, the fan is included in the
second microprocessor kit, P/N: 00D2581 ~ 00D2589. Or
2. When more than 2 PCI-e adapters have been installed on the system, the fan
(P/N: 00D2593) will be available separately.
1 Optional redundant fan (P/N: 00D2593)
Attention: When fan 3 is installed and 16 GB 1.5V / 32 GB 1.35V DIMMs are
installed, fan 1 must also be populated.
Chapter 2. Installing optional devices 89
 Loading...