4. Press the ServeRAID-8k adapter firmly into the connector.
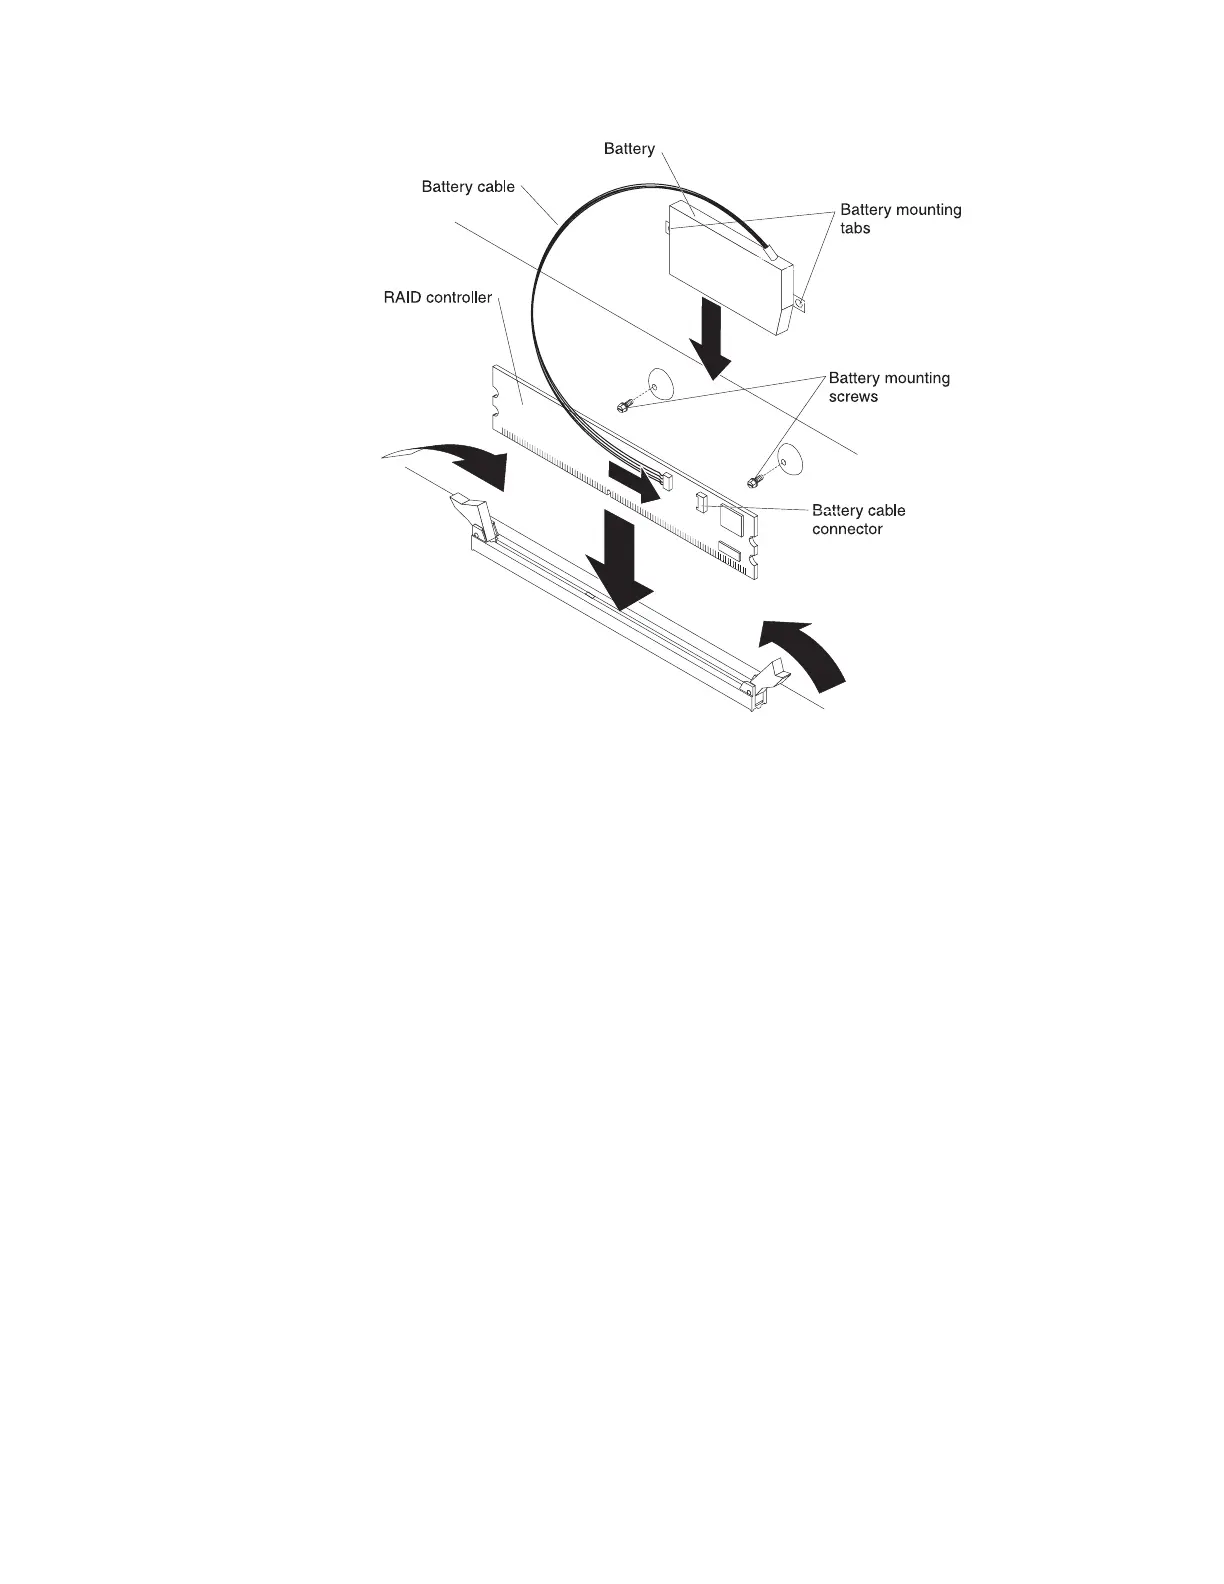
5. Mount the battery pack to the chassis, using the two mounting screws.
6. Plug the battery pack cable into the connector on the adapter.
ServeRAID-MR10is VAULT SAS/SATA Controller
The optional IBM ServeRAID-MR10is VAULT SAS/SATA controller can be installed
only in its dedicated PCI slot 2 connector on the system board, and only in server
models with eight 3.5-inch hot-swap hard disk drives. See “System-board internal
connectors and switches” on page 8 for the location of the connector on the system
board. The ServeRAID-MR10is SAS/SATA controller is not cabled to the system
board. Instructions for routing the cables are described below.
To install the ServeRAID-MR10is SAS/SATA controller and route the cables,
complete the following steps:
1. Read the safety information that begins on page “Handling static-sensitive
devices” on page 57.
2. Turn off the server and peripheral devices, and disconnect the power cords
and all external cables.
Attention: To avoid breaking the retaining clips or damaging the
ServeRAID-MR10is SAS/SATA adapter connector, open and close the clips
gently.
3. Remove the side cover (see “Removing the left-side cover and bezel” on page
57.
4. Rotate the rear adapter-retention bracket to the open (unlocked) position.
5. Remove the screw that secures the expansion-slot cover to the chassis (if no
adapter is installed in the slot). Store the expansion-slot cover and screw in a
safe place for future use.
Chapter 4. Removing and replacing server components 81
 Loading...