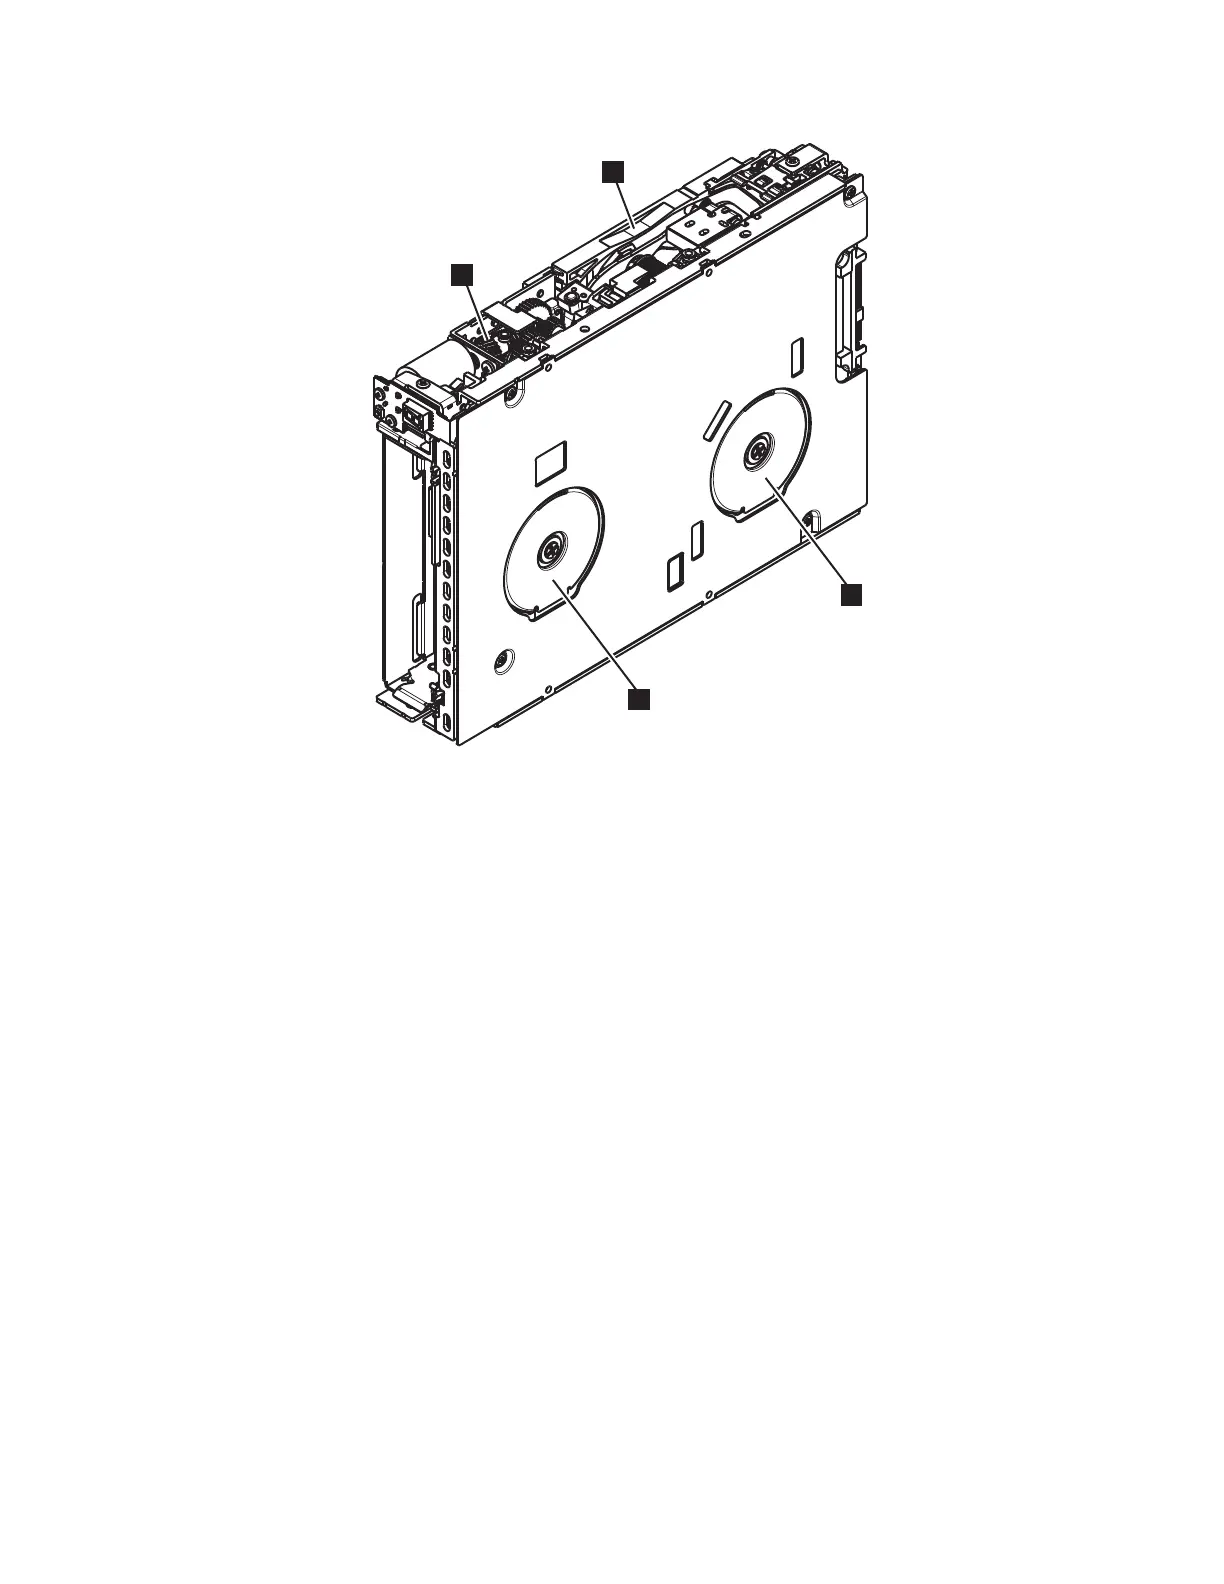
▌1▐ Loader motor worm gear ▌3▐ Takeup reel motor
▌2▐ Outer guide rail
WARNING: DO NOT TOUCH
▌4▐ Supply reel motor
3. Turn the supply reel (▌4▐ in Figure 40) clockwise.
4. Continue spooling into the cartridge until the tape is taut and remains within the flanges of the tape
guiding rollers. Turn the supply reel (▌4▐ in Figure 40) 10 turns. Ensure that you do not stretch the
tape.
5. Reassemble the chassis by following the steps in “Replacing the internal drive” on page 96.
6. Allow the drive to complete mid-tape recovery. This action takes several minutes. When this activity
completes, push Unload to eject the cartridge.
7. Test the drive (see “Function code 1: Run drive diagnostics” on page 24) to determine whether it
needs to be replaced.
No apparent failure or damage to tape
1. Set the drive on its left side with the head and tape path facing up.
Figure 40. Rewinding tape into cartridge
Appendix E. Information for trained service personnel 93
 Loading...