Installing a disk drive cage assembly
Installing a 3.5-inch disk drive cage assembly
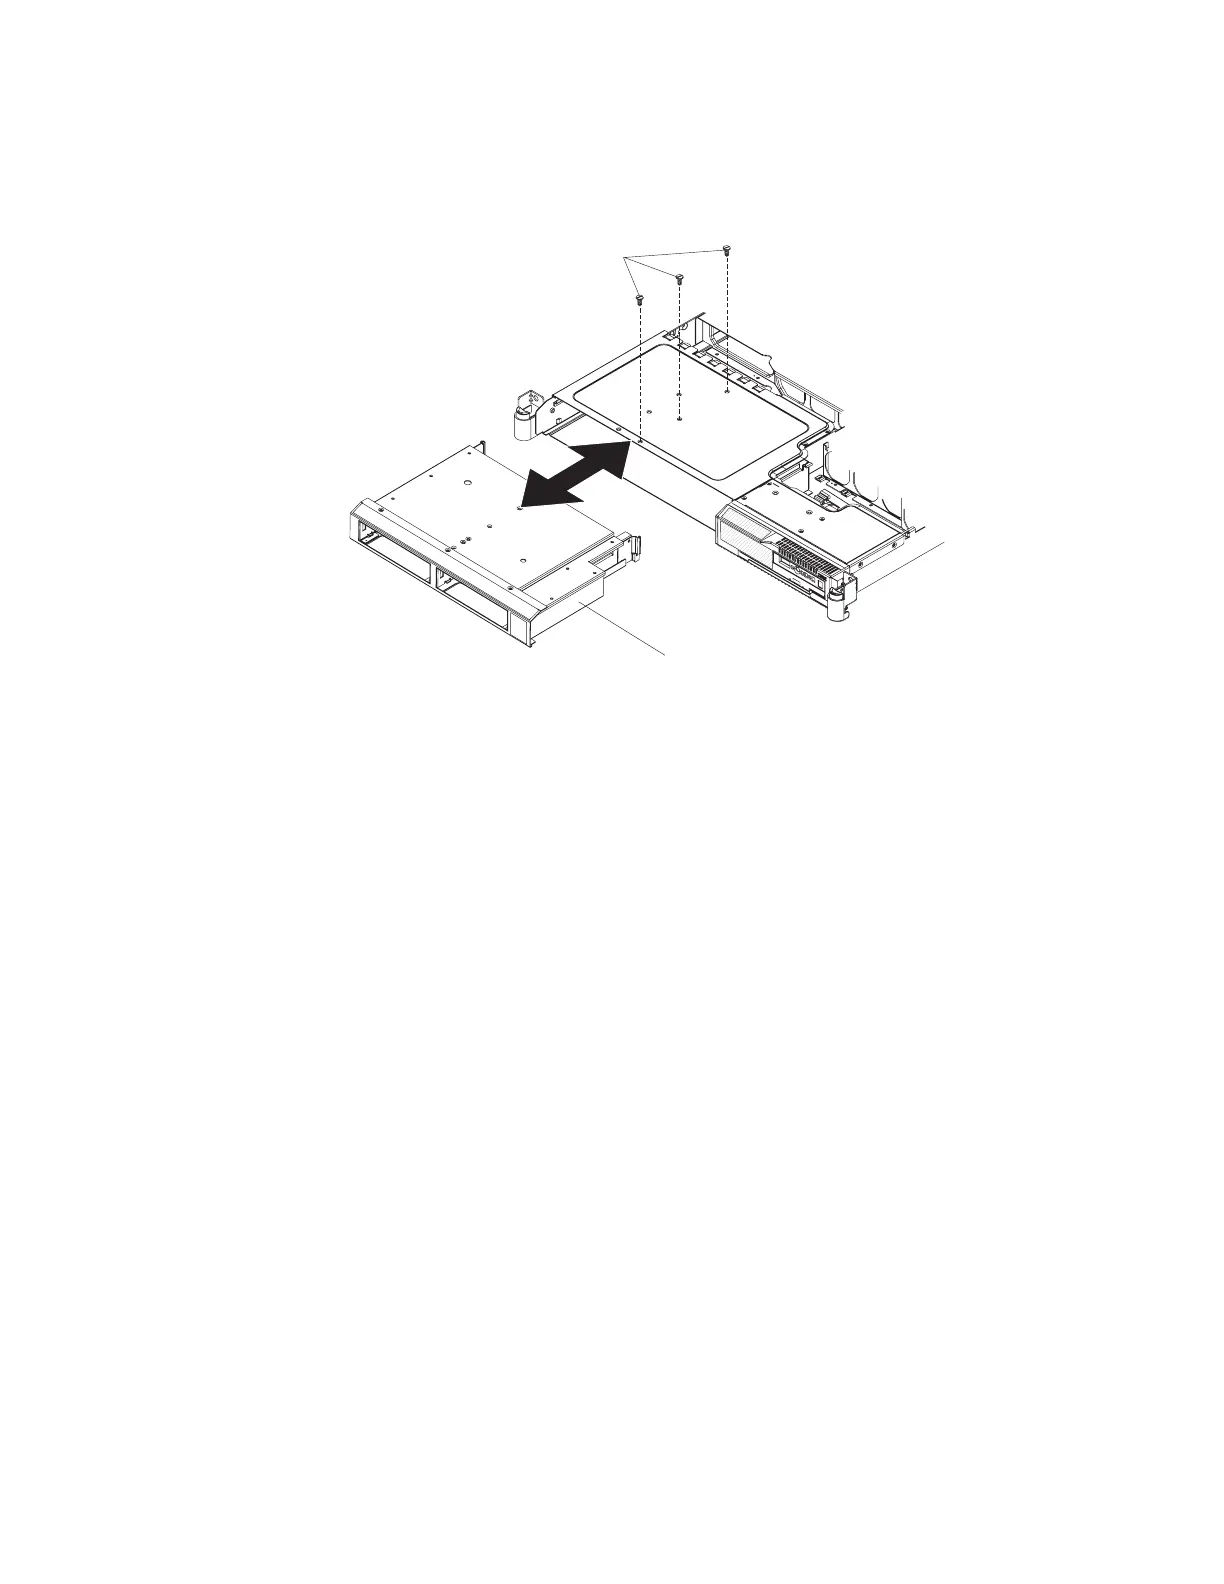
To install a 3.5-inch disk drive cage assembly, complete the following steps.
3.5-inch drive cage
Mounting screws
1. Read the safety information that begins on page vii and “Installation guidelines”
on page 39.
2. Slide the drive cage assembly forward until it seats in the server.
3. Replace the 3.5-inch backplane or backplate. (See “Installing the hot swap
backplane or simple swap backplate” on page 82).
4. Reinstall the removed drives, see “Installing a hard disk drive” on page 49.
5. Install the cover (see “Installing the cover” on page 42).
6. Slide the server into the rack.
7. Reconnect the power cords and any cables that were removed.
8. Turn on the peripheral devices and the server.
Chapter 4. Removing and replacing server components 79
 Loading...