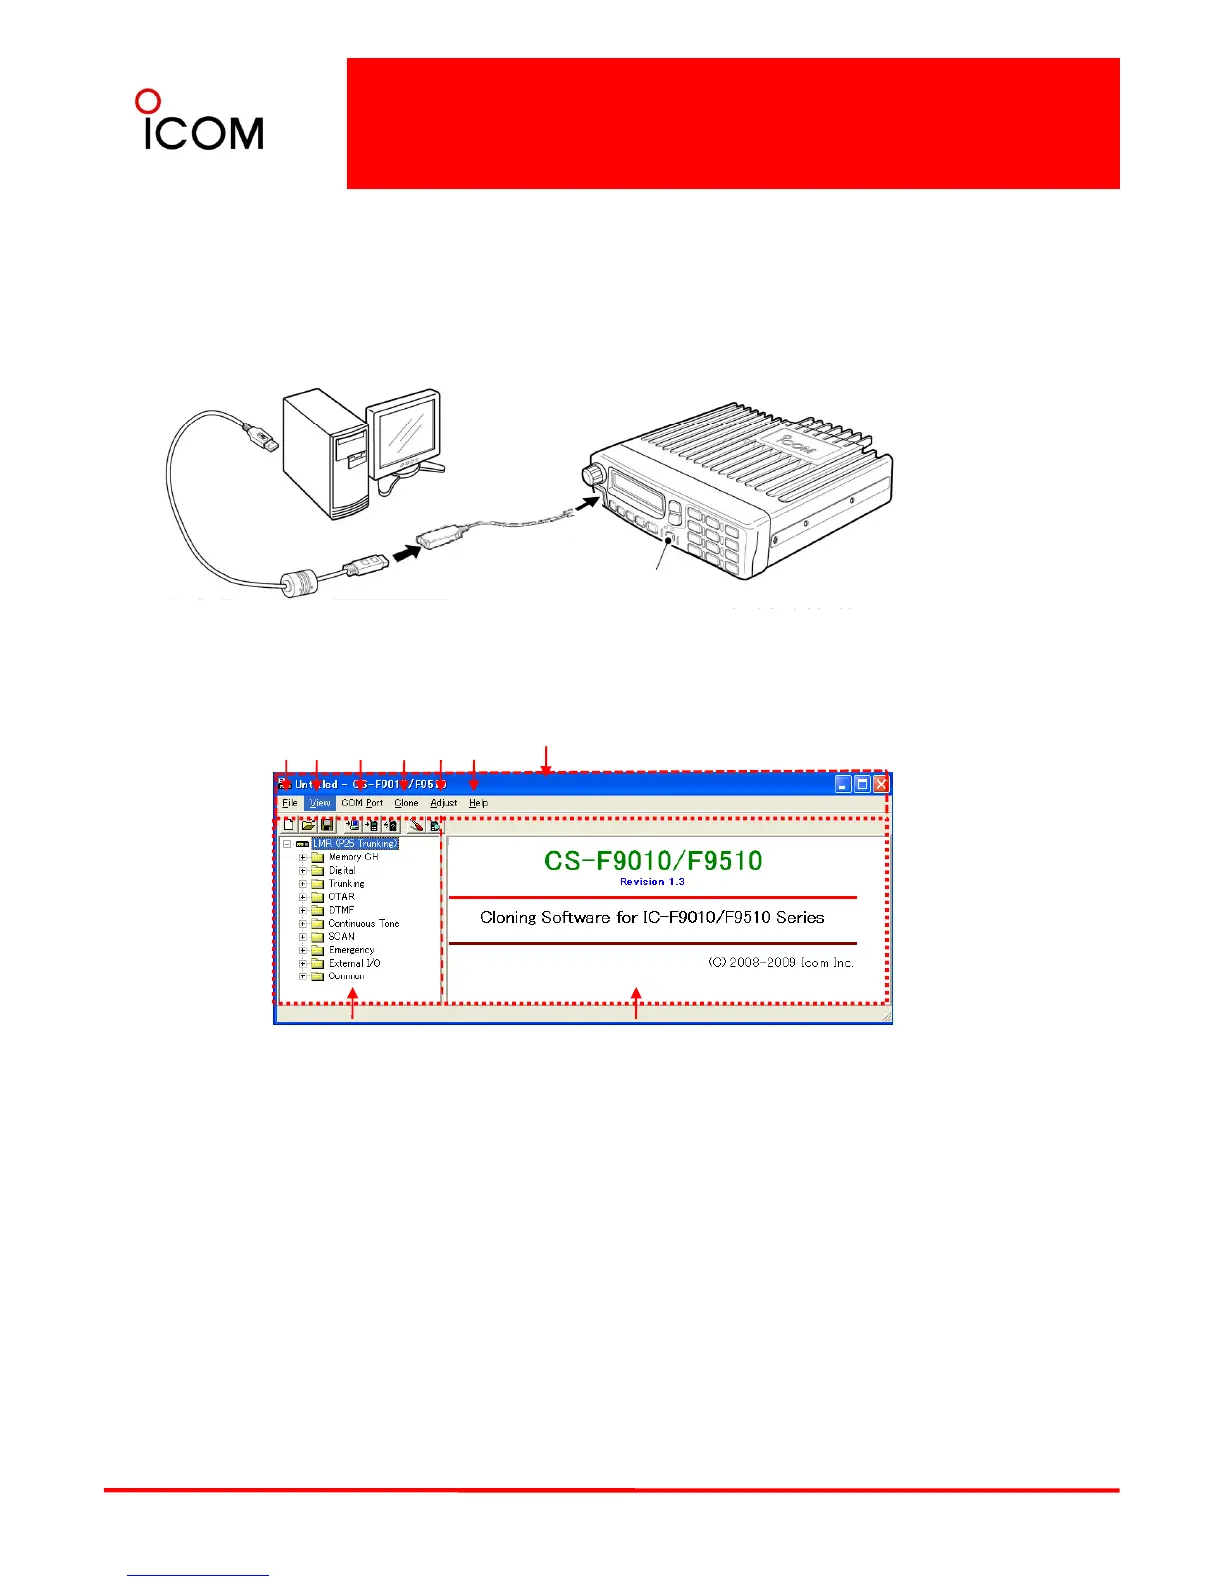
■ Connections
Basic Setup of Cloning Software
All cloning operations are performed from the computer’s keyboard — the operation required on the
transceiver side is;
1 First, connect the cloning cable as illustrated below.
2 Then, rotate [VOL] to turn power ON.
PC
to USB port
OPC-1122U
(USB type)
to the MIC
connector
[POWER]
Screen description
➊➋➌➍➎➏ ➐
TRANSCEIVER
1. FILE MENU [File]
Used for saving memory channel contents,
printing the pre-programmed information or
exiting the program, etc.
5. Adjust
Program the adjustment frequencies in the zone
screen.
➑➒
2. VIEW MENU [View]
• Selects the displayed font size.
• Turn the tool bar indication ON or OFF.
3. COM PORT MENU [COM Port]
• Click to display the COM port (1 to 4 and More)
setting dialog box.
• Set the transfer speed (Normal or High).
Click to display the help contents and cloning
software revision information.
7. TOOL BAR
Shortcut buttons appear on the tool bar when the
tool bar indication is turned ON in the [View]
menu.
63
NOTE: ‘Check the following’ dialog box appears
when the COM port is not set correctly.
4. CLONING MENU [Clone]
Click to display the cloning menu and cloning
information dialog box.
Click the folder icon which you want to edit.
9. CONTENTS LIST SCREEN
Display the contents list (Memory CH information,
Common settings, etc.).
 Loading...