11
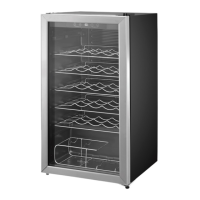
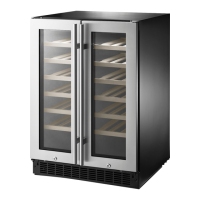
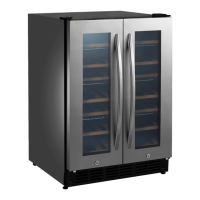
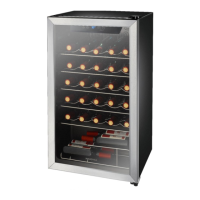
29-Bottle Wine Cooler
www.insigniaproducts.com
Consult a qualified electrician or service person if the grounding instructions are
not completely understood, or if doubt exists as to whether the cooler is properly
grounded.
Connecting to power
• Plug the appliance into a dedicated, properly installed grounded wall outlet.
This appliance should be operated on a separate electrical circuit from other
operating appliances.
• Plug in and run your cooler for three to four hours before making any
temperature adjustments and before adding wine. This allows your cooler to
reach a stable temperature.
• Do not use an extension cord with this cooler. If the power cord is too short,
have a qualified electrician install an outlet near the cooler. Use of an
extension cord can negatively affect the cooler’s performance.
Using your wine cooler
Setting the temperature
• Press the temperature up or down buttons to increase or decrease the
temperature by one degree. The temperature range is 41–65° F (5–18° C).
• Press and hold the temperature up and down buttons at the same
time to switch between Fahrenheit and Celsius.
WARNINGS:
• Improper use of the grounding plug can result in a risk of electric shock.
• Do not, under any circumstances, cut or remove the third ground prong
from the supplied power cord.
CAUTION: This unit is not designed to be installed in an RV or used with an
inverter.
Notes:
• Check your local power source. This cooler requires a 110V-120V, 60 Hz
power supply.
• Use a receptacle that accepts the grounding prong. The power cord is
equipped with a 3-prong (grounding) plug which plugs into a standard
3-prong (grounding) wall outlet to minimize the possibility of electric shock
hazard from this cooler.
• To prolong the service life of the compressor, wait for at least five minutes
before restarting the cooler after a power failure.
Notes:
• A large number of bottles will lower the cooling efficiency of the cooler.
• When you put several bottles of wine in the cooler at one time, the temperature
in the cooler may rise temporarily.
• Adjust the thermostat setting by one increment at a time. Allow several hours for
the temperature to stabilize between adjustments.
• The screen display always shows the set temperature. When adjusting the
temperature, the temperature display blinks to indicate that the temperature is
being adjusted.
 Loading...