General Section 12
Advanced Digital Trims
The PCM9X II’s digital trims feature the Direct Access
display function. While at the Normal display screen, if
a trim lever is moved, the screen will automatically
change to display the graphic position for the trim being
adjusted. The PCM9X II’s Aileron, Elevator, Throttle
and Rudder trim levers feature an audible center trim
beep. This is helpful in determining the trim levers
center position during flight.
By using the Trim Step Function located in the System
Mode, the movement of the ADT trims can be fine
tuned as needed to match your specific application
Please also note that unlike conventional mechanical
trim levers, when the PCM9X II transmitter is in the off
position, no changes can be made to the trim values
during transportation.
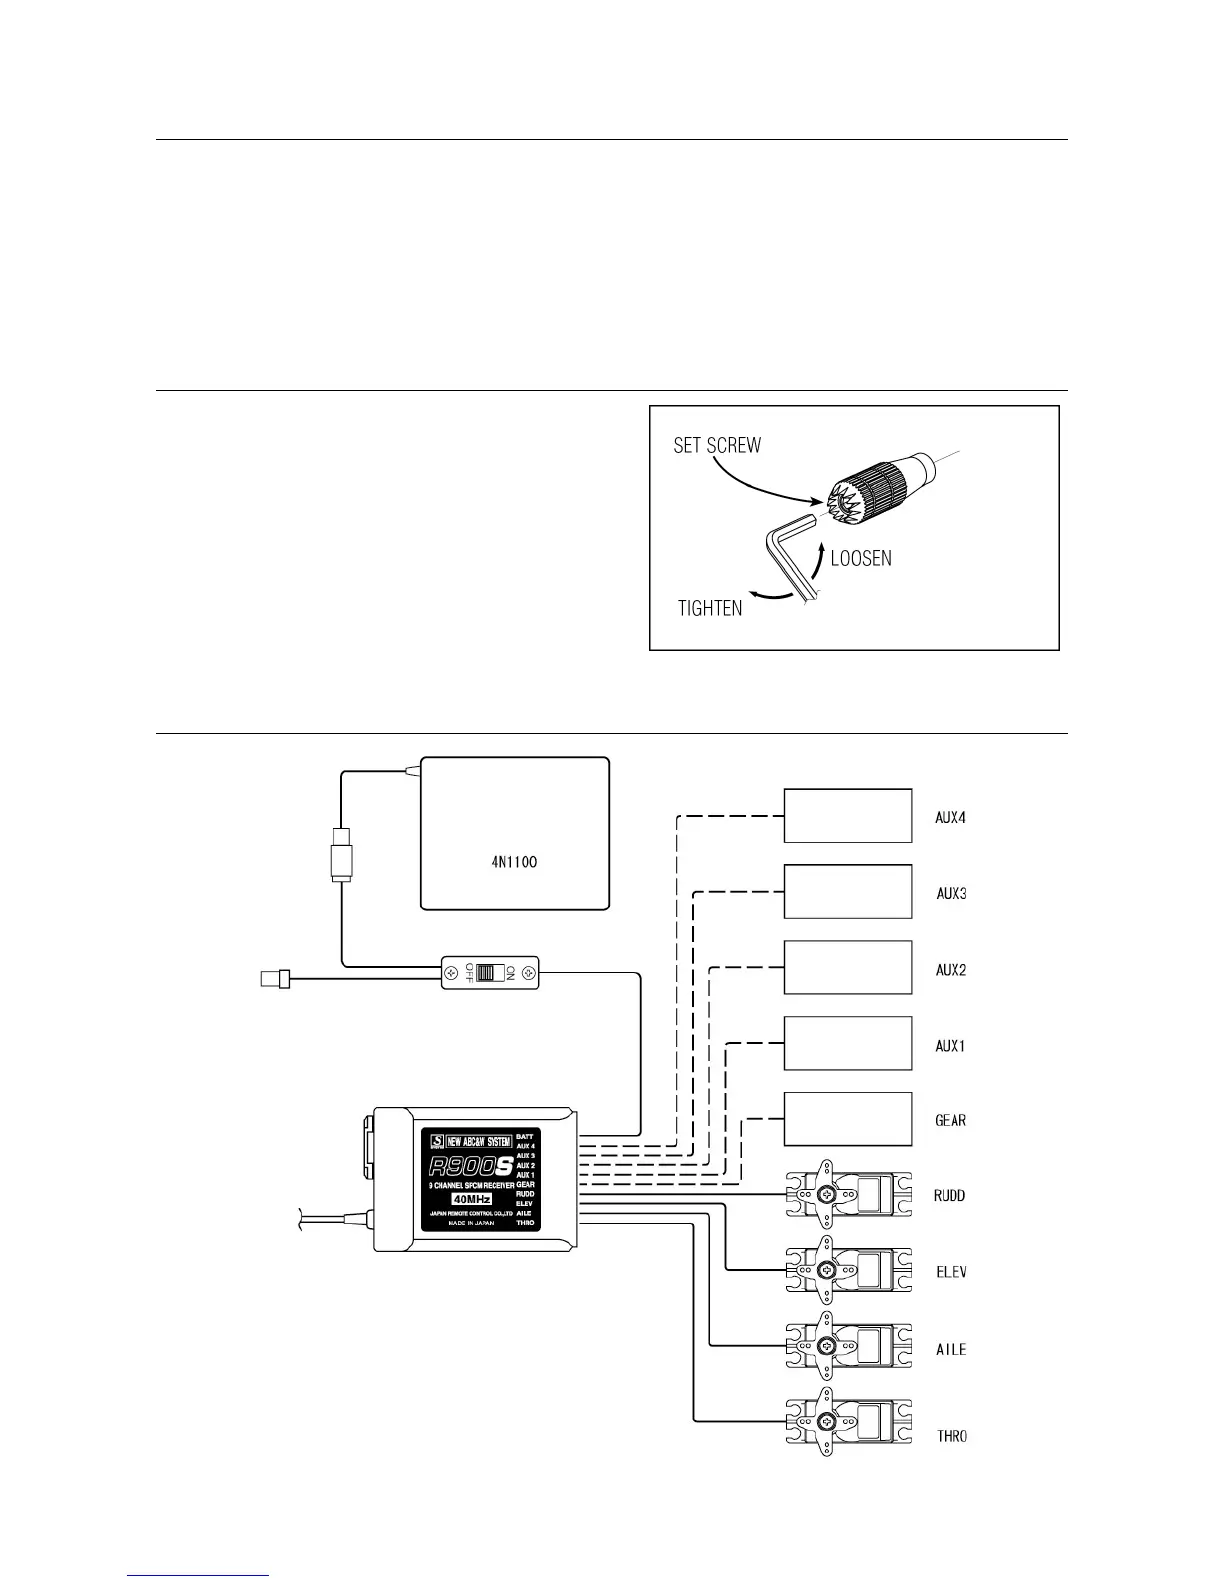
Control Stick Length
To adjust the stick length, use the 2mm Allen wrench
(supplied with your PCM9X II transmitter) to unlock the
set screw. Turn the wrench counter-clockwise to loosen
the screw. Then, turn the stick clockwise to shorten or
counterclockwise to lengthen. After the control stick
length has been adjusted to suit your flying style,
tighten the 2mm set screw.
If you desire longer sticks, JR® offers a stick
(JRPA047) that is approximately one inch longer than
standard. This stick, crafted from bar stock aluminum, is
available at your local JR dealer.
R900S Receiver Connection Diagram
To Charger
 Loading...