1)
Thread
take-up.^ring
When
fine cotton thread or synthetic
threads
(tetoron,
nylon
eic.)arc
used,
the
tension
of the
take-up
spring
may
become
too
strong
or
the
range
of
movement
of
the
spring
may
become
too
wide,
causing
skip-stitching
just
before
the
machine
stops
and
sometimes
the
machine
does
not
trim
the
thread.
Be
extremely
careful.
2) Adjusting the first thread tension disc
*When
the tension of the first thread tensionis madestronger, the thread remaining at the tip of
the
needle
eye
becomes
shorter
after
trimming
and
when
it is
made
weaker,
the
remaining
thread
becomes
longer.
*For fine threads(synthetic
fiber),
weaken
the tensionand for thick thread,
make
it stronger.
3) Adjusting the second thread tension
*
Normally,
the adjustment of this
disc
is
same
as any other lockstitching
machines.
*
However,
please
note
that
when
synthetic
thread
is
used,
if the
tension
is
adjusted
too
weak,
the thread might break at the start of sewing.
4) Adjusting the
bobbin
thread
tension.
The
adjustment
of the
bobbin
thread
tension
is
practically
same
as
any
conventional
lockstitch
ing
machine.
However,
if the
tension
istoo
weak,
the
bobbin
might
spin
idly
at the
trimming
instant,
causing
the
needle
thread
to
"float"
up
at
the
start
of
sewing,
and
for
synthetic
threads,
thread
breakage
or
slipping
out of
the
needle
thread
at thestartof
sewing
might
occur.
Be
very
careful.
*
As
a rule, this
machine
is
used
with a bobbin
case
in
which
a
magnet
is built-in to
prevent
idle
spinning
of the
bobbin.
(Part
number
is D
1837555
BAO
and
sold
separately)
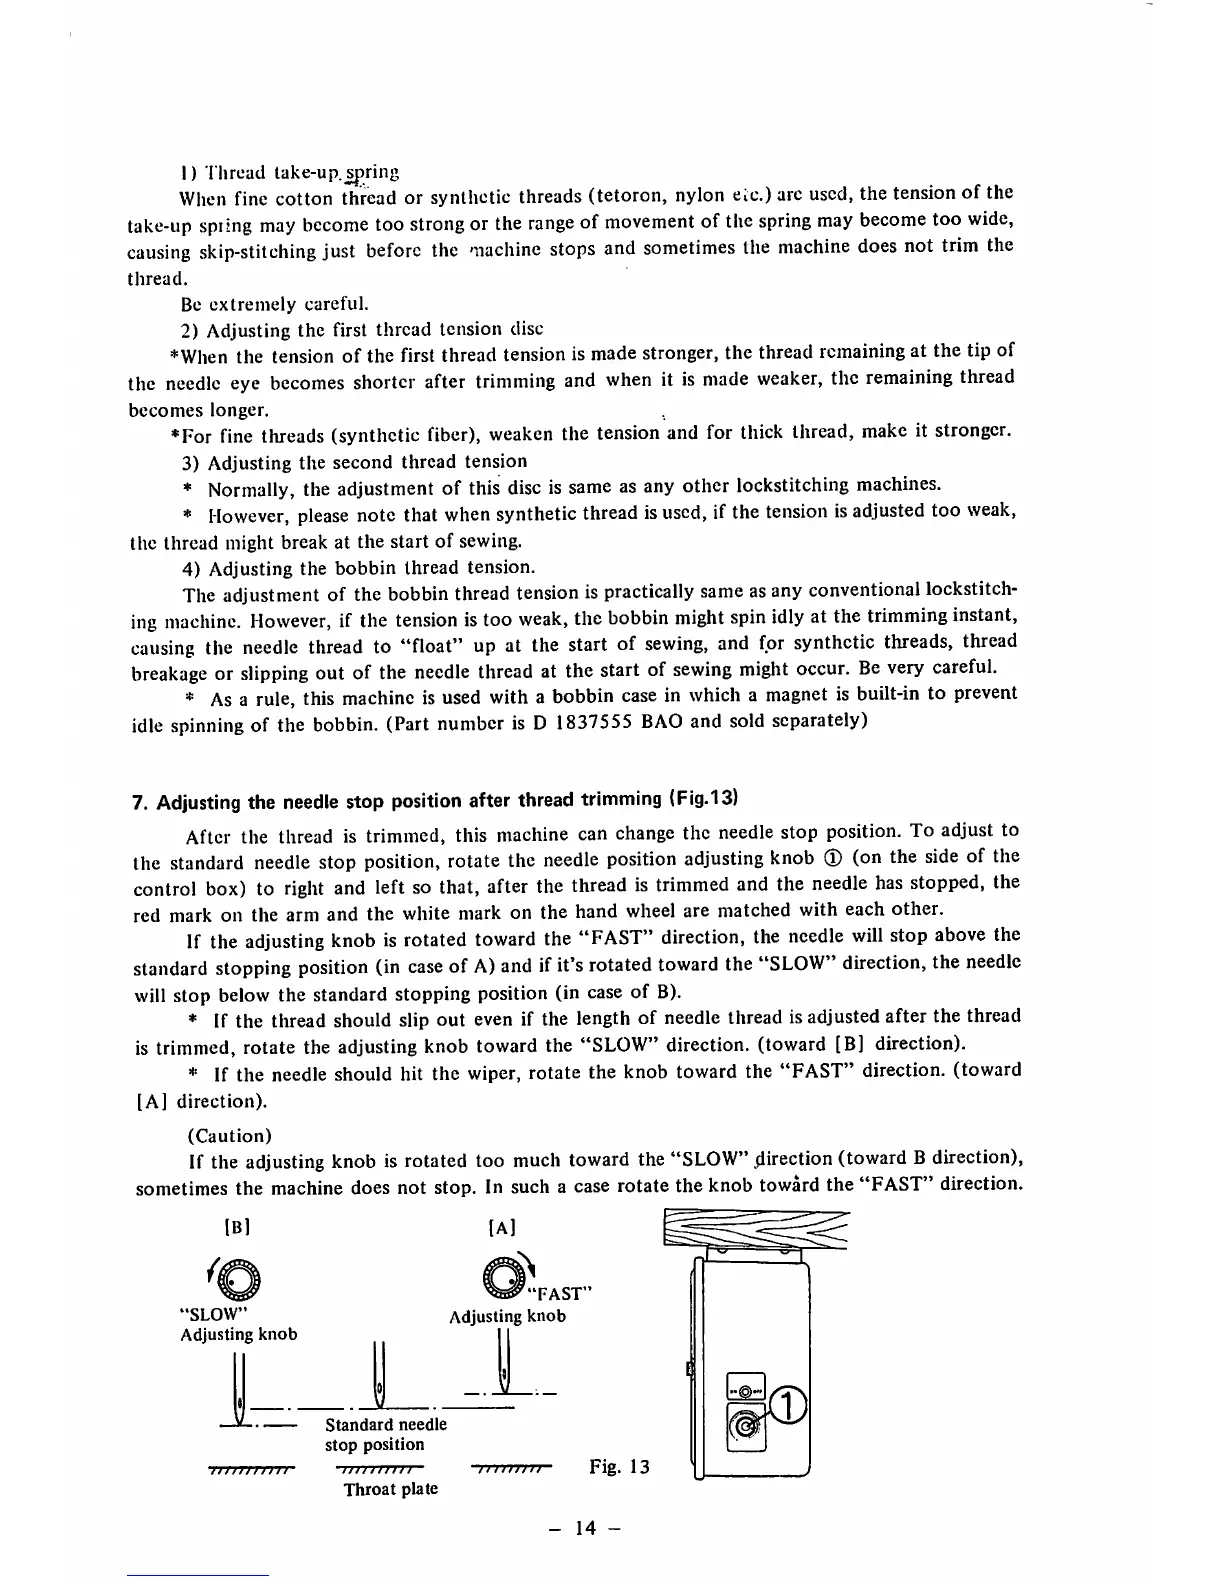
7.
Adjusting
the
needle
stop
position
after
thread
trimming
(Fig.13)
After
the thread is
trimmed,
this
machine
can
change
the
needle
stop
position.
To adjust to
the
standard
needle
stop
position,
rotate the
needle
position
adjusting
knob
(I)
(on the
side
of the
control
box)
to
right
and
left so that, after the
thread
is
trimmed
and
the
needle
has
stopped,
the
red mark on the arm and the white mark on the hand wheel are matched with each other.
If the
adjusting
knob
is
rotated
toward
the
"FAST"
direction,
the
needle
will
stop
above
the
standard
stopping
position
(in
case
of
A)
and
ifit's
rotated
toward
the
"SLOW
direction,
the
needle
will stop below the standard stopping position (in case of B).
* If the thread should slip out even if the length of needle thread isadjustedafter the thread
is trimmed, rotate the adjusting knob toward the
"SLOW"
direction, (toward [B] direction).
* If the needle should hit the wiper, rotate the knob toward the "FAST" direction, (toward
[A]
direction).
(Caution)
If the
adjusting
knob is rotated too
much
toward
the
"SLOW"
direction (toward Bdirection),
sometimes the machine does not stop. In such a case rotate the knob toward the "FAST" direction.
IB)
"SLOW"
Adjusting
knob
)iiiii)ii)i
[A]
^^"FAST"
Adjusting
knob
Standard
needle
stop
position
i/mmn
Throat
plate
Fig.
13
-
14
-
 Loading...