– 2 –
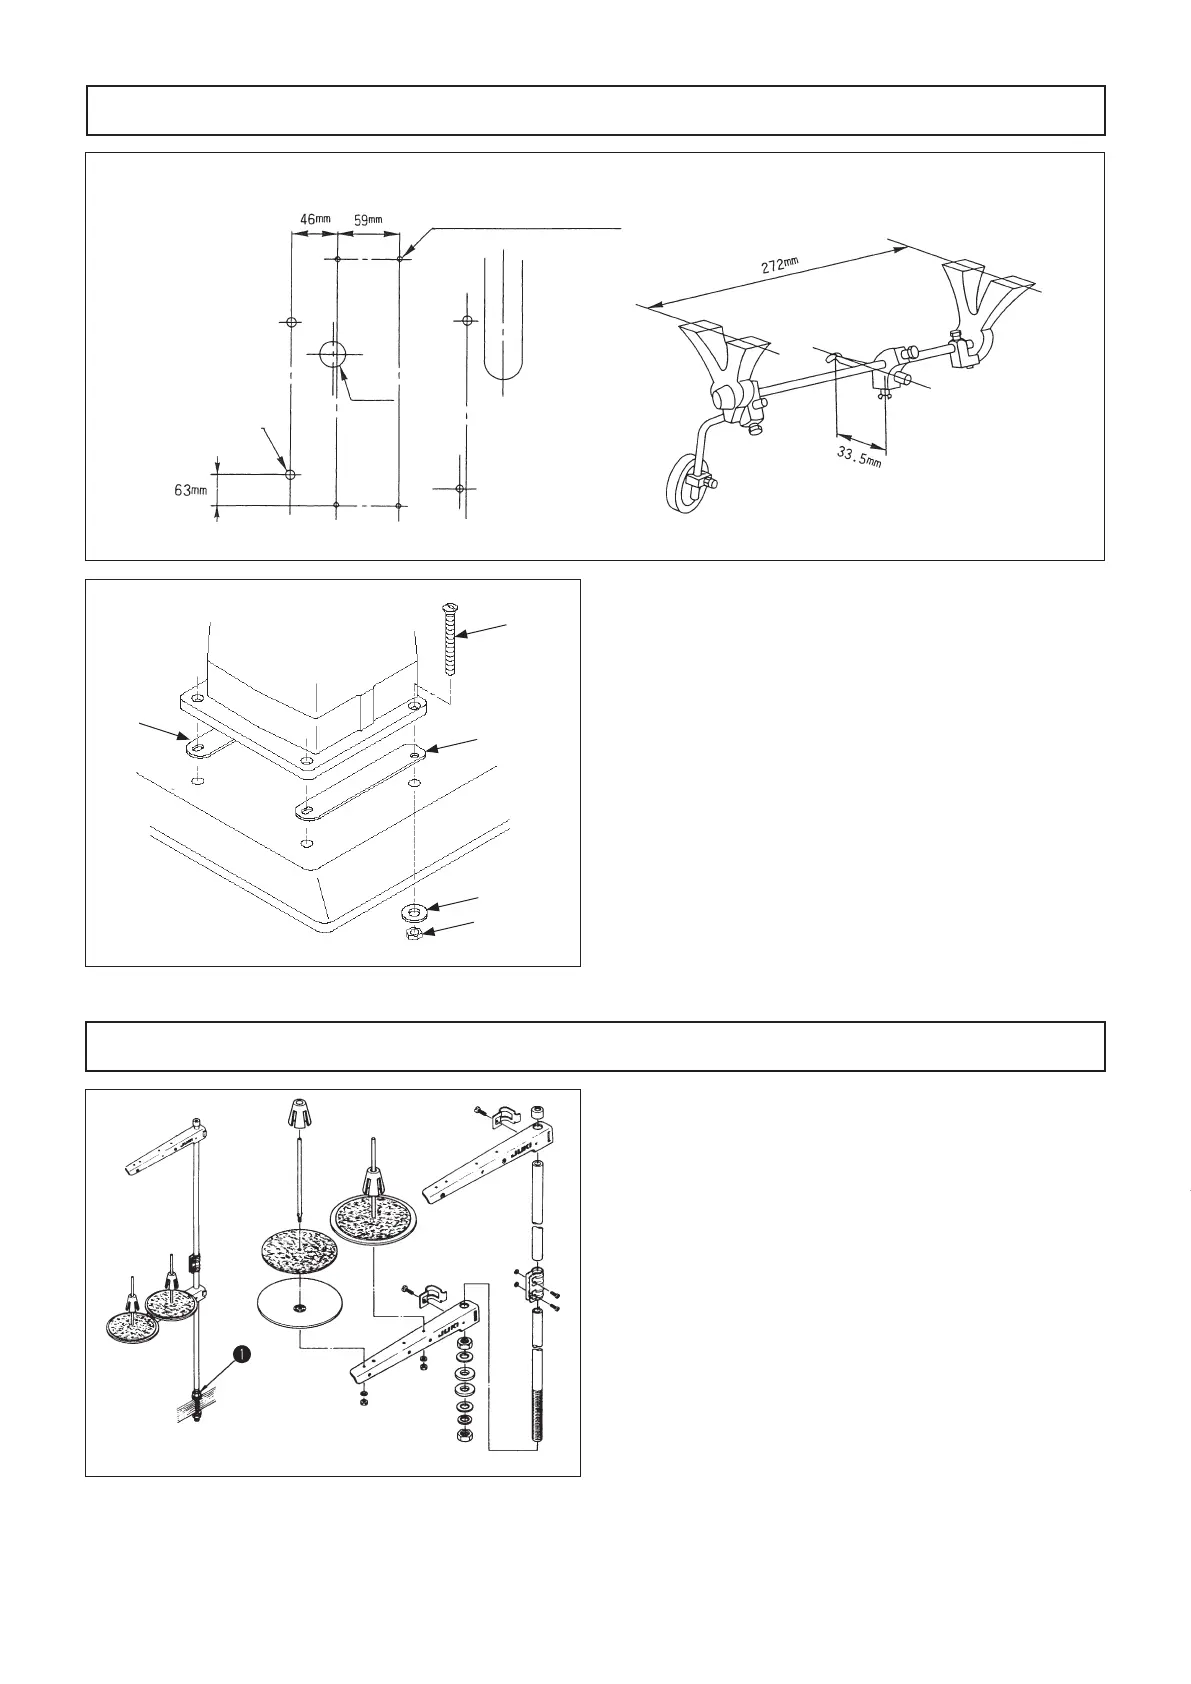
1. Mounting position of the knee lifter
(Caution)
The knee lifter should be mounted before the motor is
installed.
2. Carry the sewing machine with two persons.
(Caution) Do not hold the handwheel.
3. Do not put protruding articles such as the screw-
driver and the like at the location where the sewing
machine is placed.
4. Setting the sewing machine
Holding countersunk screw
❶
, washer
❷
and nut
❸
supplied with the unit, x the sewing machine on
the table with aligned with rubber packing
❹
at four
locations.
5. Securely attach head support rod to the table until it
goes no further.
1.SETTING UP THE SEWING MACHINE
2.INSTALLING THE THREAD STAND
1. Assemble the thread stand,and insert it in the hole
in the machine table,and x it by tightening nut
❶
.
ひざ上げ支え止め穴(4ヶ)
ミシン止め穴(4ヶ)
鎖穴
❶
❹
❷
❸
❹
Knee lifter supporting hole (4 ea.)
Machine setting hole
(4ea.)
Hole
– 11 –
19.ADJUSTING THE PRESSURE OF THE FIXED KNIFE (DSC-245-4,-7, DSC-245V-4,-7)
1. Loosen two setscrews
❶
of the xed knife and move
adjusting plate
❷
for the knife pressure to direction
A
resulting in a higher knife pressure. After adjust-
ment,tighten the setscrews.
2. The knife pressure should be increased for a thick-
er thread. However, it is advisable to minimize (by
turning the adjust screw in direction
B
) the knife
pressure as long as the knife trims threads.
● How to operate
1
.
The moment you press switch
❶
,the sewing ma-
chine performs reverse feed stitching.
2
.
The machine continues reverse feed stitching as
long as the switch is held pressed.
3
.
When you re lease the switch,the machine re-
sumes normal stitching.
● Position of the switch
1
.
Set the switch in an easy-to-operate position.
2
.
Loosen screws
❷
,and move the switch up or
down to adjust its position.
● Position of the reverse feed solenoid
1
.
Set the stitch length dial at the maximum.
2
.
Loosen two setscrews
❶
of the solenoid mounting
base.
3
.
Push feed lever
❷
down until it bottoms, and move
solenoid mounting base
❸
up or down to adjust the
inner clearance between rubber packing
❹
on the
plunger and reverse feed solenoid
❺
to 0.5 to 1mm.
Tighten setscrew
❶
.
WARNING :
Turn OFF the power before starting the work so as to prevent accidents caused by abrupt start of the
sewing machine.
WARNING :
Turn OFF the power before starting the work so as to prevent accidents caused by abrupt start of the
sewing machine.
20.ONE-TOUCH TYPE REVERSE FEED STITCHING MECHANISM (DSC-245-4,-7, DSC-245V-4,-7)
 Loading...