EasyManua.ls Logo

JUKI J-350QVP User Manual

JUKI J-350QVP
32 pages
To Next Page IconTo Next Page
To Previous Page IconTo Previous Page
Page #2 background imageLoading...
Page #2 background image
– 1 –
"IMPORTANT SAFETY INSTRUCTIONS"
When using an electrical appliance, basic safety precautions should always be followed, including the
following: Read all instructions before using this sewing machine.
"DANGER
____
To reduce the risk of electric shock:
"
1. An appliance should never be left unattended when plugged in.
2. Always unplug this appliance from the electric outlet immediately after using and before cleaning.
"WARNING
____
To reduce the risk of burns, re, electric shock, or injury to persons:
"
1. Do not allow this appliance to be used as a toy. Close attention is necessary when this appliance
is used by or near children. This appliance can be used by children aged from 8 years and above
and persons with reduced physical, sensory or mental capabilities or lack of experience and
knowledge if they have been given supervision or instruction concerning use of the appliance
in a safe way and understand the hazards involved. Children shall not play with the appliance.
Cleaning and user maintenance shall not be made by children without supervision.
2. Use this appliance only for its intended use as described in this manual. Use only attachments
recommended by the manufacturer as contained in this manual.
3. Never operate this appliance if it has a damaged cord or plug, if it is not working properly, if it has
been dropped or damaged, or dropped into water. Return the appliance to the nearest authorized
dealer or service center for examination, repair, electrical or mechanical adjustment.
4. Never operate the appliance with any air openings blocked. Keep ventilation openings of the sew-
ing machine and foot controller free from the accumulation of lint, dust and loose cloth.
5. Keep ngers away from all moving parts. Special care is required around the sewing machine
needle.
6. Always use the proper throat plate. The wrong plate can cause the needle to break.
7. Do not use bent needles.
8. Do not pull or push fabric while stitching. It may deect the needle causing it to break.
9. Switch the sewing machine off ("O") when making any adjustments in the needle area, such as
threading needle, changing needle, threading bobbin, or changing presser foot and the like.
10. Always unplug sewing machine from the electrical outlet when removing covers, lubricating, or
when making any other user servicing adjustments mentioned in the instruction manual.
11. Never drop or insert any object into any opening.
12. Do not use outdoors.
13. Do not operate where aerosol (spray) products are being used or where oxygen is being adminis-
tered.
14. To disconnect, turn all controls to the off ("0") position, then remove plug from outlet.
15. Do not unplug by pulling on cord. To unplug, grasp the plug, not the cord.
16. Turn OFF the power switch before insertion/removal of any cords and any plugs.
17. Basically, the machine should be disconnected from the electricity supply when not in use.
18. If the power cord of this appliance is damaged, it must be replaced with a special cord byyour
nearest authorized dealer or service center.
"SAVE THESE INSTRUCTIONS"
This sewing machine is intended for household use only.
Use the stitch regulator made by the Grace Company.
Stitch regulator can be used on the following machine model-number.
In order to use your machine safely, be sure to read the Instruction Manual for the Sure Stitch for
JUKI J-350QVP provided by Grace Company for how to install the machine on the frame, how to con-
nect the stitch regulator and how to operate the machine.
Sewing machine model number Stitch regulator model number
J-350QVP Sure Stitch for JUKI J-350

Other manuals for JUKI J-350QVP

Question and Answer IconNeed help?

Do you have a question about the JUKI J-350QVP and is the answer not in the manual?

JUKI J-350QVP Specifications

General IconGeneral
Needle TypeDB x 1
Maximum Stitch Length5 mm
Automatic Needle ThreaderYes
Knee LifterYes
Start/Stop ButtonYes
Speed ControlYes
LightingLED
Built-in MemoryYes
Bobbin TypeRotating Hook
DisplayLCD

Summary

Important Safety Instructions

Electrical Safety Warnings

Precautions to reduce the risk of electric shock, including unplugging and not leaving unattended.

General Operational Warnings

Precautions to prevent burns, fire, shock, or injury during operation and maintenance.

Safe Usage and Precautions

Safe Operation with Pictographs

Understanding warning marks and pictographs for safe operation and injury prevention.

Needle, Thread, and Material Compatibility

Guidelines for matching needles and threads to materials to prevent breakage and ensure safety.

Environmental and Handling Precautions

Advice on placement, cleaning, and temperature for optimal performance and safety.

Machine Handling and Grounding

How to Carry the Sewing Machine

Instructions and precautions for safely lifting and moving the sewing machine.

Grounding Instructions

Explanation of grounding requirements, plug usage, and adapter use for electrical safety.

Specifications and Accessories

Machine Specifications

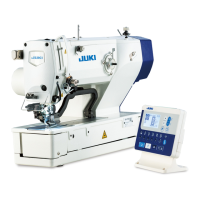
Technical details of the J-350QVP, including speed, dimensions, and power requirements.

Included Accessories

List and illustration of accessories provided with the sewing machine.

Principal Parts and Component Functions

Identification of Main Parts

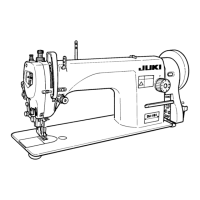
Diagrams and labels identifying the primary mechanical and electrical components of the machine.

Power Cord, Switch, and Threading Components

Details on the function of components like the power cord, switch, thread stand, and thread guide.

Installation of Thread Stand and Guide

Step-by-step instructions for assembling and installing the thread stand and thread guide.

Installation of Panel Cord and Eye Protection Cover

Procedures for managing panel cords and installing the safety eye protection cover.

Operation Adjustments

Presser Foot Adjustments

How to adjust presser foot pressure, height, and stroke for optimal sewing.

Handwheel and Tension Controller Operation

Using the handwheel and adjusting the tension controller for thread length.

Bobbin Winding and Loading

Bobbin Winding Setup and Process

Steps for setting up the thread stand and winding thread onto the bobbin.

Loading Bobbin into Bobbin Case

Correct procedure for inserting the wound bobbin into the bobbin case.

Needle Attachment and Threading

Attaching the Needle

Steps for correctly inserting and tightening the needle into the needle bar.

Threading the Machine

Detailed steps for guiding the thread through the sewing machine's threading path.

Thread Tension Adjustment

Adjusting Bobbin Case Tension

How to adjust the thread tension applied by the bobbin case.

Proper Thread Tension Management

Understanding correct thread tension and the consequences of incorrect tension.

Advanced Setup and Operation

LCD Screen Operation Panel

Navigating the LCD screen for settings like language, firmware, and calibration.

Sewing Modes and Speed Control

Setting sewing speed and selecting modes like Cruise, Baste, Precise, and Manual.

Thread Trimming and Needle Control

Using buttons for automatic thread trimming and controlling needle position.

Custom Switch and Pedal Settings

Assigning functions to custom buttons and pedals for enhanced control.

Foot Pedal and Kick Functions

Operating the foot pedal and utilizing the Kick ON/OFF function for JSS.

Bobbin Estimate Counter

Setting Bobbin Estimate Parameters

Inputting thread length and reset amounts for the bobbin estimate counter.

Thread Amount Reference Table

Table providing rough estimates of thread amounts for various thread types on a full bobbin.

Maintenance Procedures

Replacing the Blind Seal

Instructions for replacing the blind seal on the sewing machine.

Cleaning and Lubricating the Machine

Procedures for cleaning the hook, sensor, and lubricating the machine with oil.

Troubleshooting and Corrective Measures

Stitch Quality and Thread Breakage Issues

Troubleshooting steps for skipped stitches, thread breakage, and puckered stitches.

Mechanical and Performance Problems

Solutions for heavy noise, handwheel issues, and improper sewing start.

Related product manuals