– 13 –
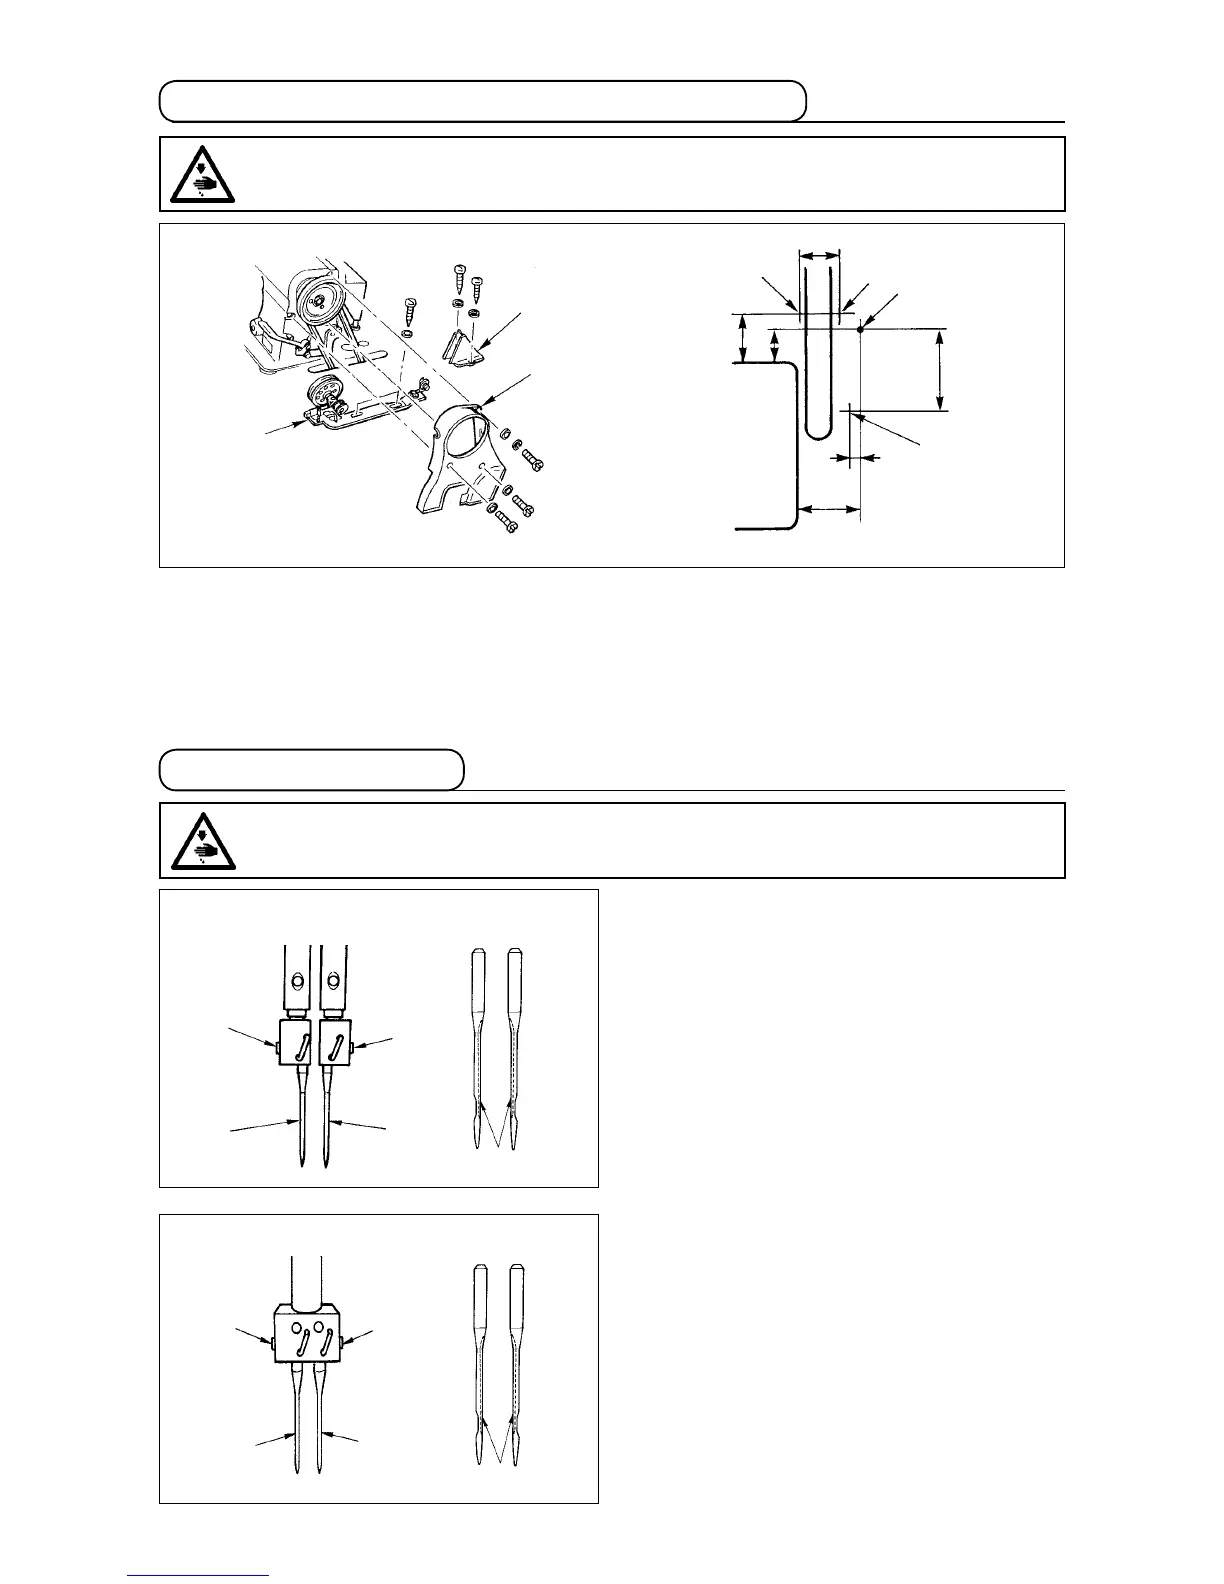
4-7. Attaching the needles
[LH-3568, 3568-7]
[LH-3528, 3528-7]
Switch "off" the motor.
Use DPx5 needles.
1) Turn the handwheel until the needle bar has
come up to the highest point of its stroke.
2) Loosen needle clamp screws
2
and pick up
two needles
1
in the way that their grooves
3
are facing outwards.
3) Insert the needles into the needle clamp as
far as they will go.
4) Tighten needle clamp screws
2
rmly.
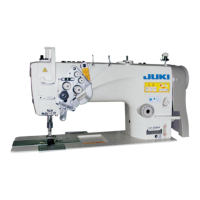
4-6. Installing the belt cover and the bobbin thread winder
1) Drill guide holes
A
,
B
,
C
and
D
of wood screws in the table.
2) Adjust the position of bobbin thread winder
3
, and x it to the place of guide holes
A
and
B
with
wood screws.
3) Temporarily x belt cover B
1
to the place of guide holes
C
and
D
.
4) Install belt cover A
2
to the arm installing section.
5) Adjust the position of belt cover B
1
and x it with wood screw.
A
C
B
D
67
44
95
75.5
12
(mm)
1
2
3
47
3
3
1
2
2
1
1
2
2
1
WARNING :
To protect against possible personal injury due to abrupt start of the machine, be sure to start the
following work after turning the power off and ascertaining that the motor is at rest.
WARNING :
To protect against possible personal injury due to abrupt start of the machine, be sure to start the
following work after turning the power off and ascertaining that the motor is at rest.
 Loading...