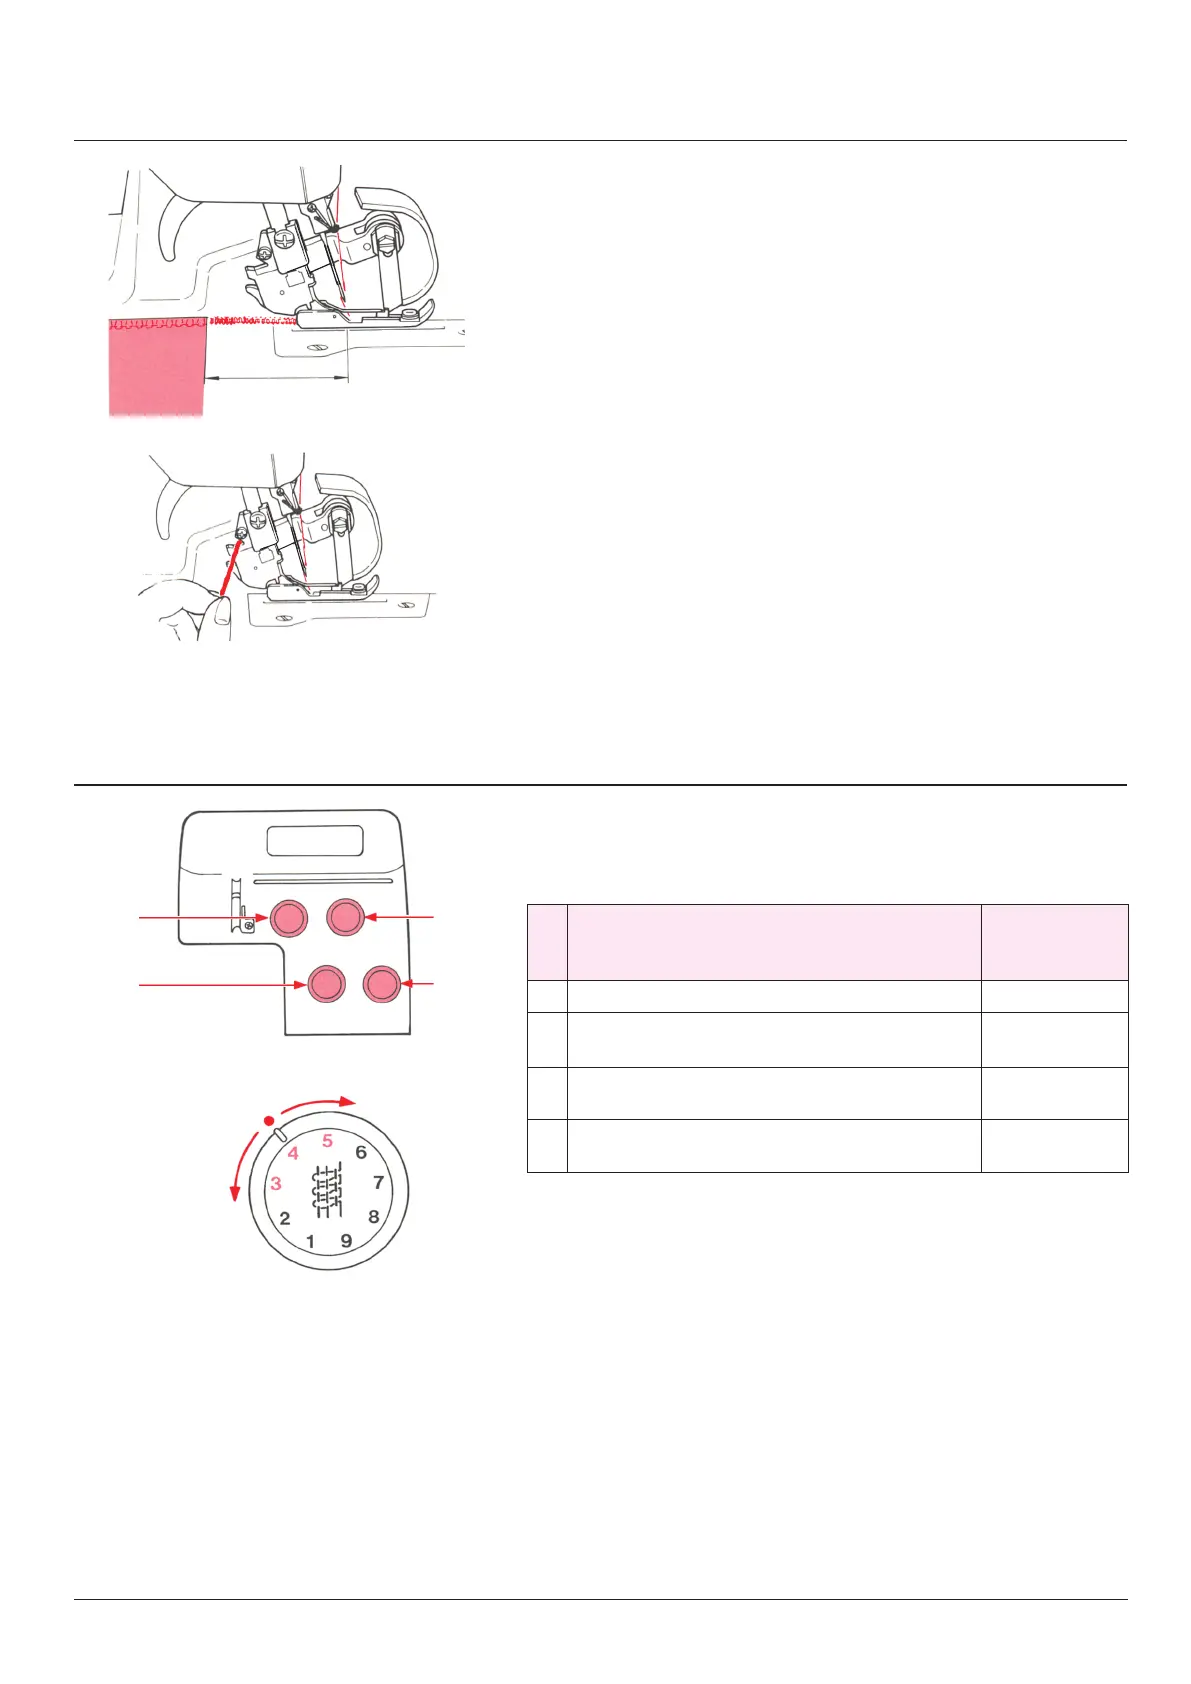
Trial sewing
Thread tension dial
After threading, make a trial sewing
Be sure to use a double layer of fabric in order to check whether the
seam and thread tension are adequate.
1. Set the lower/upper looper, left-hand/right-hand needle thread
tension dial “4”.
2. Make sure that the upper knife is lowered (in the cutting posi-
tion).
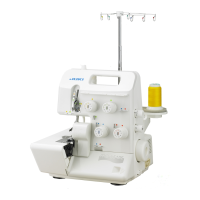
3. Raise the presser foot.
4. Place the fabric under the presser foot.
5. Lower the presser foot and sew.
6. At the end of the seam, continue sewing to from a 5 to 6 cm long
thread chain.
7. Holding the fabric with one hand, pull the thread chain over the
thread cutter on the presser foot shank.
* Thread tension dial should be properly adjusted according to the
types of fabrics and threads to be used.
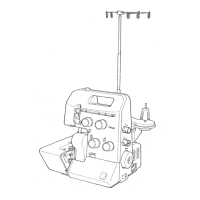
Adjusting the thread tension
Imperfect stitch formation can be corrected by adjusting the set val-
ue (1 to 9) on the thread tension dial.
A
D
B
C
Increase
Decrease
Standard of
the thread
tensioner dial
A
Upper looper thread tension adjusting dial 3 - 5
B
Lower looper thread tension adjusting dial 3 - 5
C
Right-hand needle thread tension adjusting
dial
3 - 5
D
Left-hand needle thread tension adjusting
dial
3 - 5
* When using filament thread or wooly nylon thread, adjust the
thread tension accordingly.
24