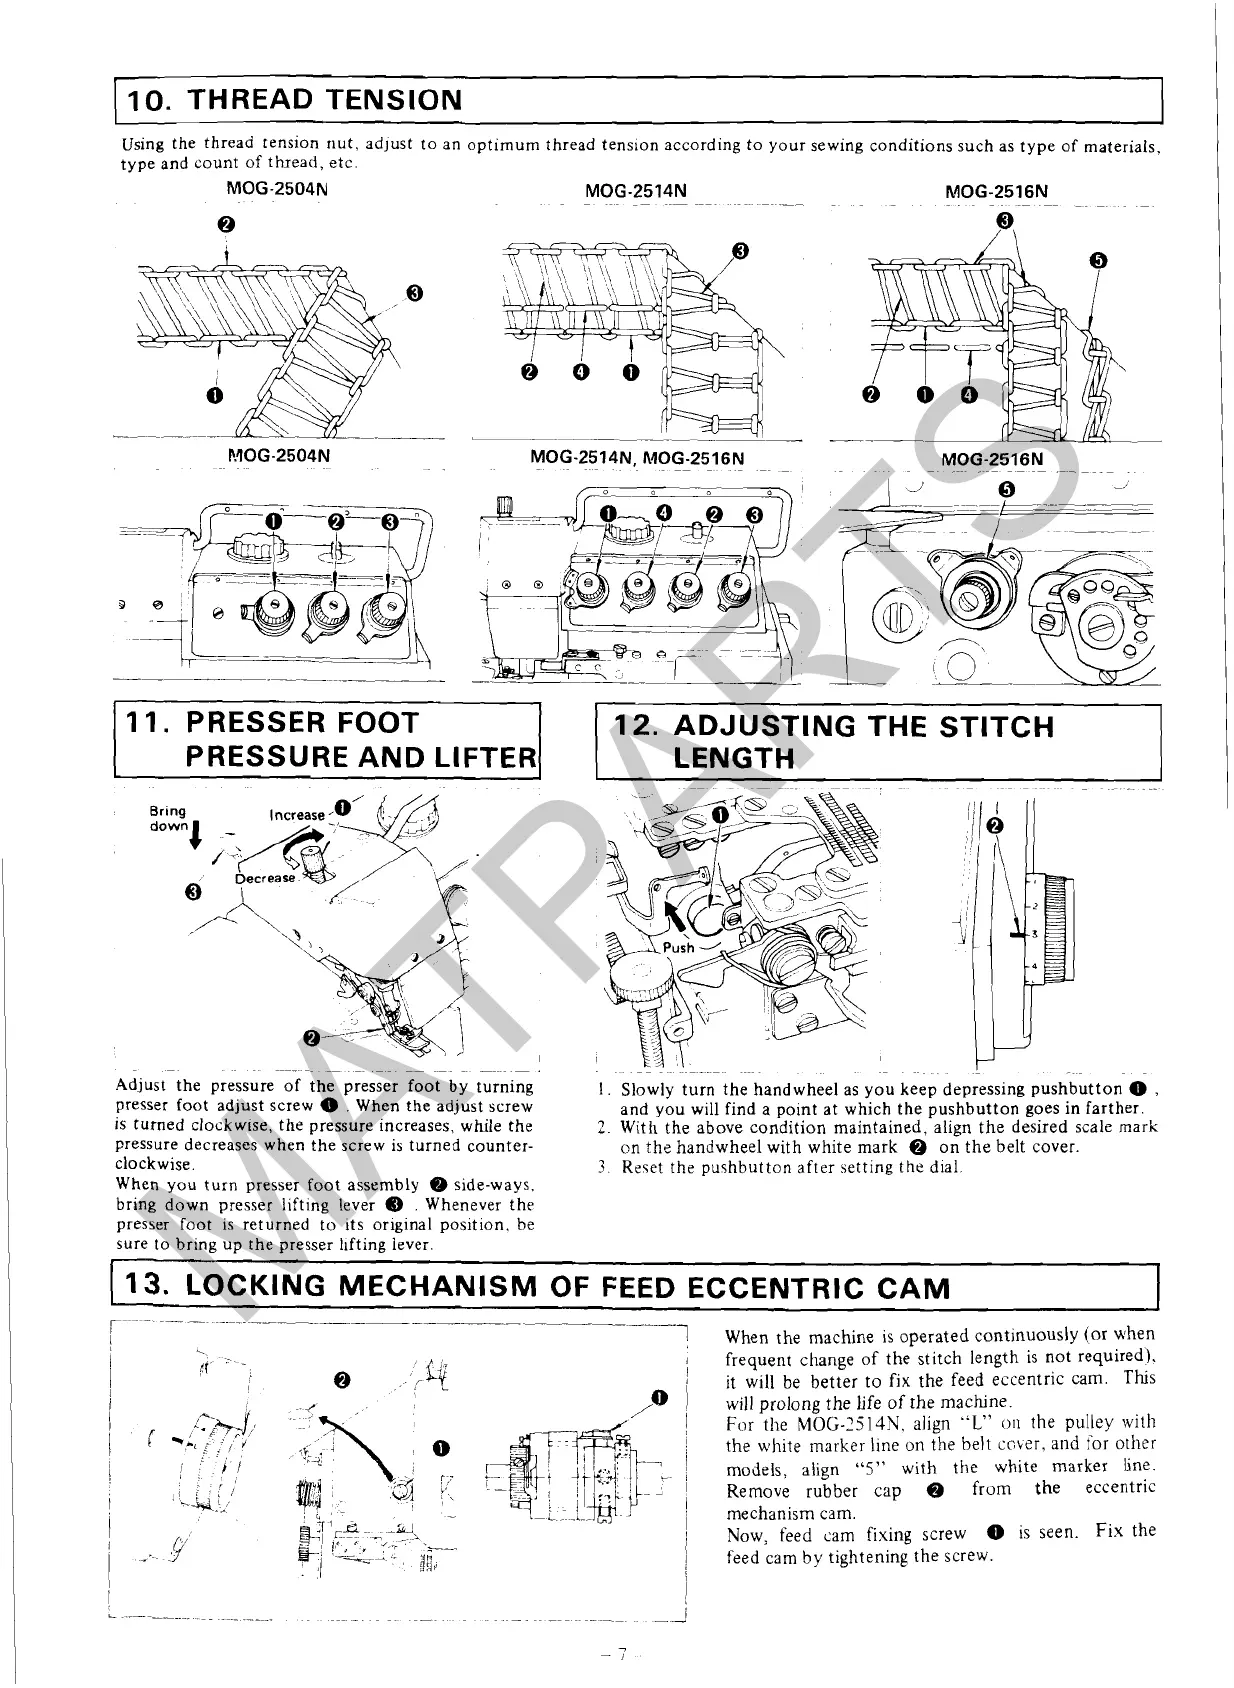
10.
THREAD TENSION
Using the thread tension nut, adjust to an optimum thread tension according to your sewing conditions such as type of materials,
type and count of thread, etc.
11.
PRESSER
FOOT
PRESSURE
AND LIFTER
12.
ADJUSTING THE STITCH
LENGTH
-
-
~
-
----
-~
--
-~
-
-
--
~
-
,
.
. .
~--~~
.-
~~~
-~
-
-
-
Adjust the pressure of the presser foot by turning
I.
Slowly turn the handwheel as you keep depressing pushbutton
0
,
presser foot adjust screw
0
.
When the adjust screw
and you will find a point at which the pushbutton goes in farther.
is
turned clockwise, the pressure increases, while the
2.
With the above condition maintained, align the desired scale mark
pressure decreases when the screw is turned counter-
on thz handwheel with white mark
@
on the belt cover.
clockwise.
3.
Reset the pushbutton after setting the dial.
When
you
turn presser foot assembly
Qb
side-ways.
bring down presser lifting lever
@
.
Whenever the
presser foot is returned to its original position, be
sure to bring up the presser
llfting lever.
I
1
1
13.
LOCKING MECHANISM OF
FEED
ECCENTRIC CAM
--
--
.~
!
<;
~,
---!
When the machine is operated continuously (or when
I
fr'
'
-
;
kj
1
frequent change of the stitch length is not required).
I
I
@
..!
/
it will be better to fix the feed eccentric cam.
This
@
1
will prolong the life of the machine.
'
I
For
the
MOG-25l4N.
align
"L"
ox
the pulley with
!
the white marker line on the belt
caber,
and
for other
.
.
.,
I
models, align
"5"
with the white marker 6ne.
1
:,
,
I
/'
Remove rubber cap
Q
from the eccentric
i
-,
~i
-A
-W
1
mechanism cam.
p/'
;;-,-i
-~-
.,,T7
~
>--
1
Now, feed cam fixing screw
0
is
seen. Fix
the
i
>*-.
.
./
&:
,--
-_-
~s
'-
I
:/
-
'
jgy
1
feed cam by tightening the screw.
1
 Loading...