.
3.
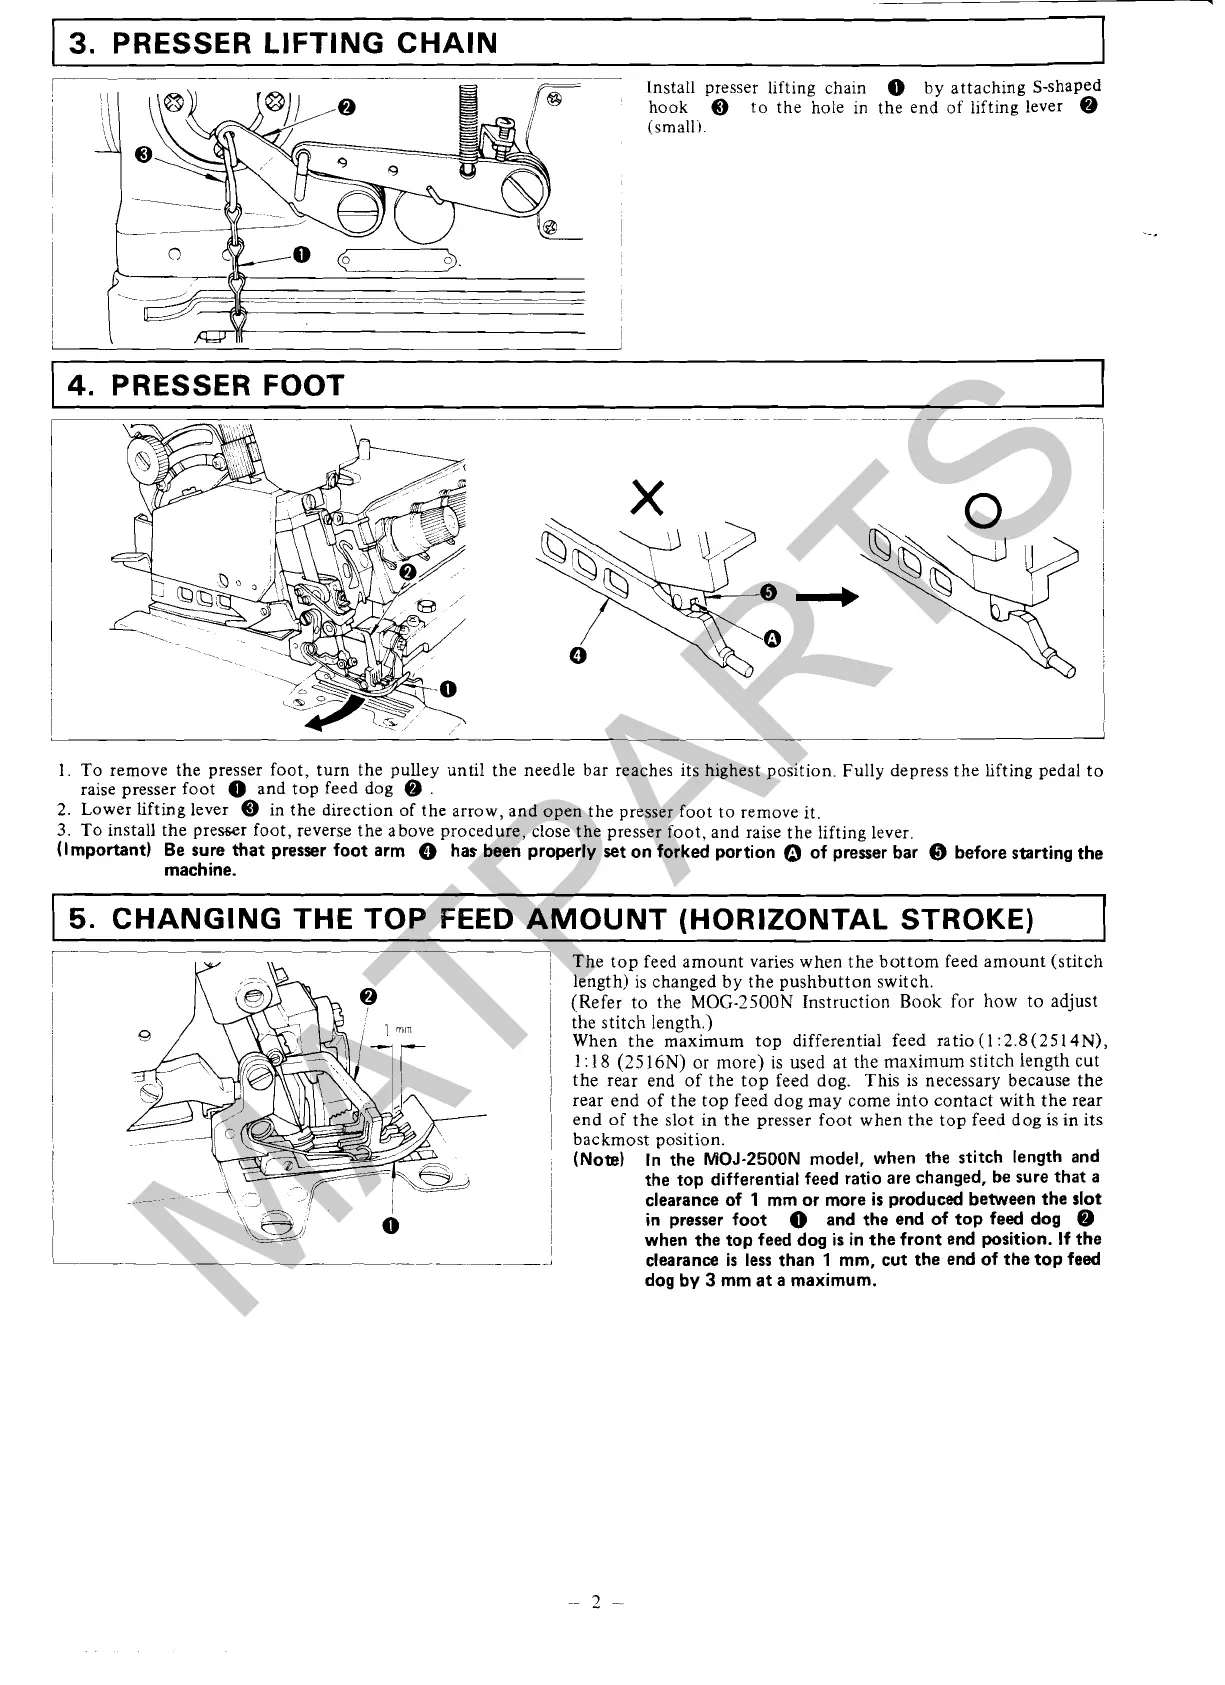
PRESSER LIFTING CHAIN
Install presser lifting chain by attaching S-shaped
hook
@
to the hole in the end of lifting lever
@
(small).
4.
PRESSER FOOT
1. To remove the presser foot, turn the pulley anti1 the needle bar reaches its highest position. Fully depress the lifting pedal to
raise presser foot
0
and top feed dog
@
.
2. Lower lifting lever
@
in the direction of the arrow, and open the presser foot to remove it.
3.
To install the presser foot, reverse the above procedure, close the presser foot, and raise the lifting lever.
(Important) Be sure that presser foot arm
@
has been properly set on forked portion
0
of presser bar
Q
before starting the
machine.
5.
CHANGING THE TOP FEED AMOUNT (HORIZONTAL STROKE)
The top feed amount varies when the bottom feed amount (stitch
length) is changed by the pushbutton switch.
(Refer to the
MOG-2500N
Instruction Book for how to adjust
the stitch length.)
When the maximum top differential feed
ratio(l:2.8(2514N),
1:
18
(2516N)
or more) is used at the maximum stitch length cut
the rear end of the top feed dog.
This is necessary because the
rear end of the top feed dog may come into contact with the rear
end of the slot in the presser foot when the top feed dog is in its
backmost position.
(Note) In the
MOJ-2500N
model, when the stitch length and
the top differential feed ratio are changed, be sure that a
clearance of
1
mm or more
is
produced between the slot
in presser foot
and the end of top feed dog
@
when the top feed dog
is
in the front end position. If the
clearance
is
less
than
1
mm, cut the end of the top feed
dog by
3
mm at a maximum.
 Loading...