–
5
–
5. MAIN circuit board asm.
Preparation
™
Remove arm cover asm.
™
Remove MAIN circuit board case
cover and lamp connector.
Note)
3
Setscrew to set the
circuit board and cover
to circuit board case
Do not insert in the
r e v e r s e d i r e c t i o n .
(See page 15.)
D o not loosen this
screw.
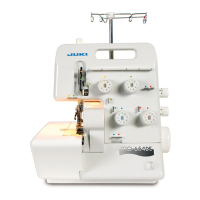
4. Bed cover mas. asm.
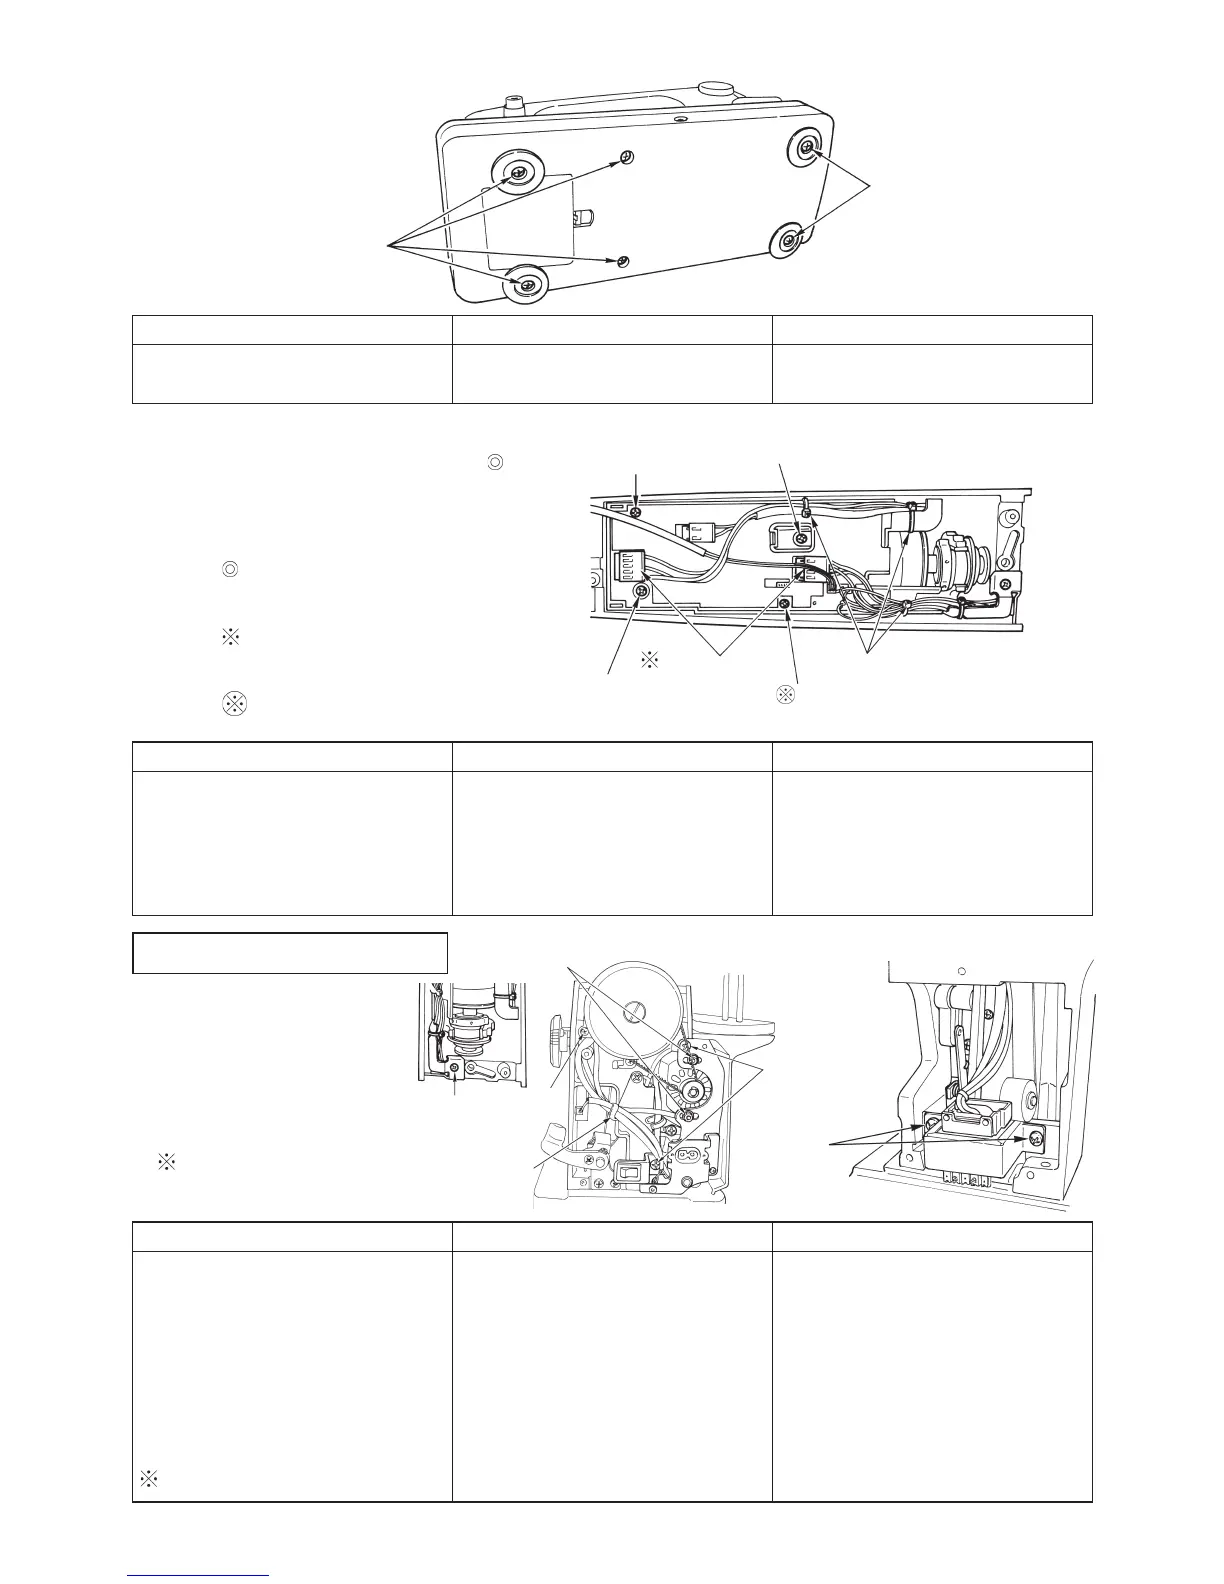
1. Motor asm. and
transformer asm.
Preparation
™
Remove arm cover asm.
™
Remove belt cover and
motor cover respectively.
Make a memorandum of
cord wiring.
1
Bed cover setscrew
SM5051255SN
1
Bed cover setscrew
Function Components
2
Power
transformer
setscrew
SM5040855SN
3
Motor setscrew nut
1
Motor asm.
setscrew
SM5050855SN
5
-1
5
Cord guide
plate setscrew
SM5030655SN
4
2
MAIN circuit board case setscrew A
SL5030831SF
3
MAIN circuit board setscrew
4
MAIN circuit board case
setscrew B SM5031401SE
Porality exists.
Never loosen this screw.
6
clip band (3 places)
Disassembly Assembly Point
™
Remove six
1
setscrews and re-
move bed cover.
™
Attach bed cover and tighten set-
screws.
Disassembly Assembly Point
™
Remove 7 connectors of each
lead wire.
™
Cut
6
clip bands (3 places).
™
Remove
2
setscrews and
4
set-
screw, and remove circuit board.
™
Press play of circuit board to at-
tach circuit board to the front side
and tighten two setscrews.
™
Insert each lead wire into con-
nectors.
™
Read the note and understand it.
™
Ther are color indications on the
circuit board for inserting connec-
tors.
Disassembly Assembly Point
™
Remove cord guide plate
5
set-
screws and
5
-1 in previous item,
and cut
6
clip band.
™
Loosen
4
cord presser.
™
Remove two
1
setscrews and
remove motor asm.
™
Remove two
2
setscrews and
remove transformer asm.
Make sure of wiring route.
™
Attach transformer and tighten
3
setscrews.
™
Attach motor asm. and tighten
1
setscrews.
™
Fix it with
4
cord presser.
™
Attach cord guide plate asm. and
tighten
5
and
5
-1 setscrew.
™
Connect cord guide plate and
cord.
™
Loosen
3
nuts to adjust motor
tension.
™
Belt tension : the belt should sag
3 to 4 mm when center of belt is
applied with 1.96N load.

 Loading...