– 23 –
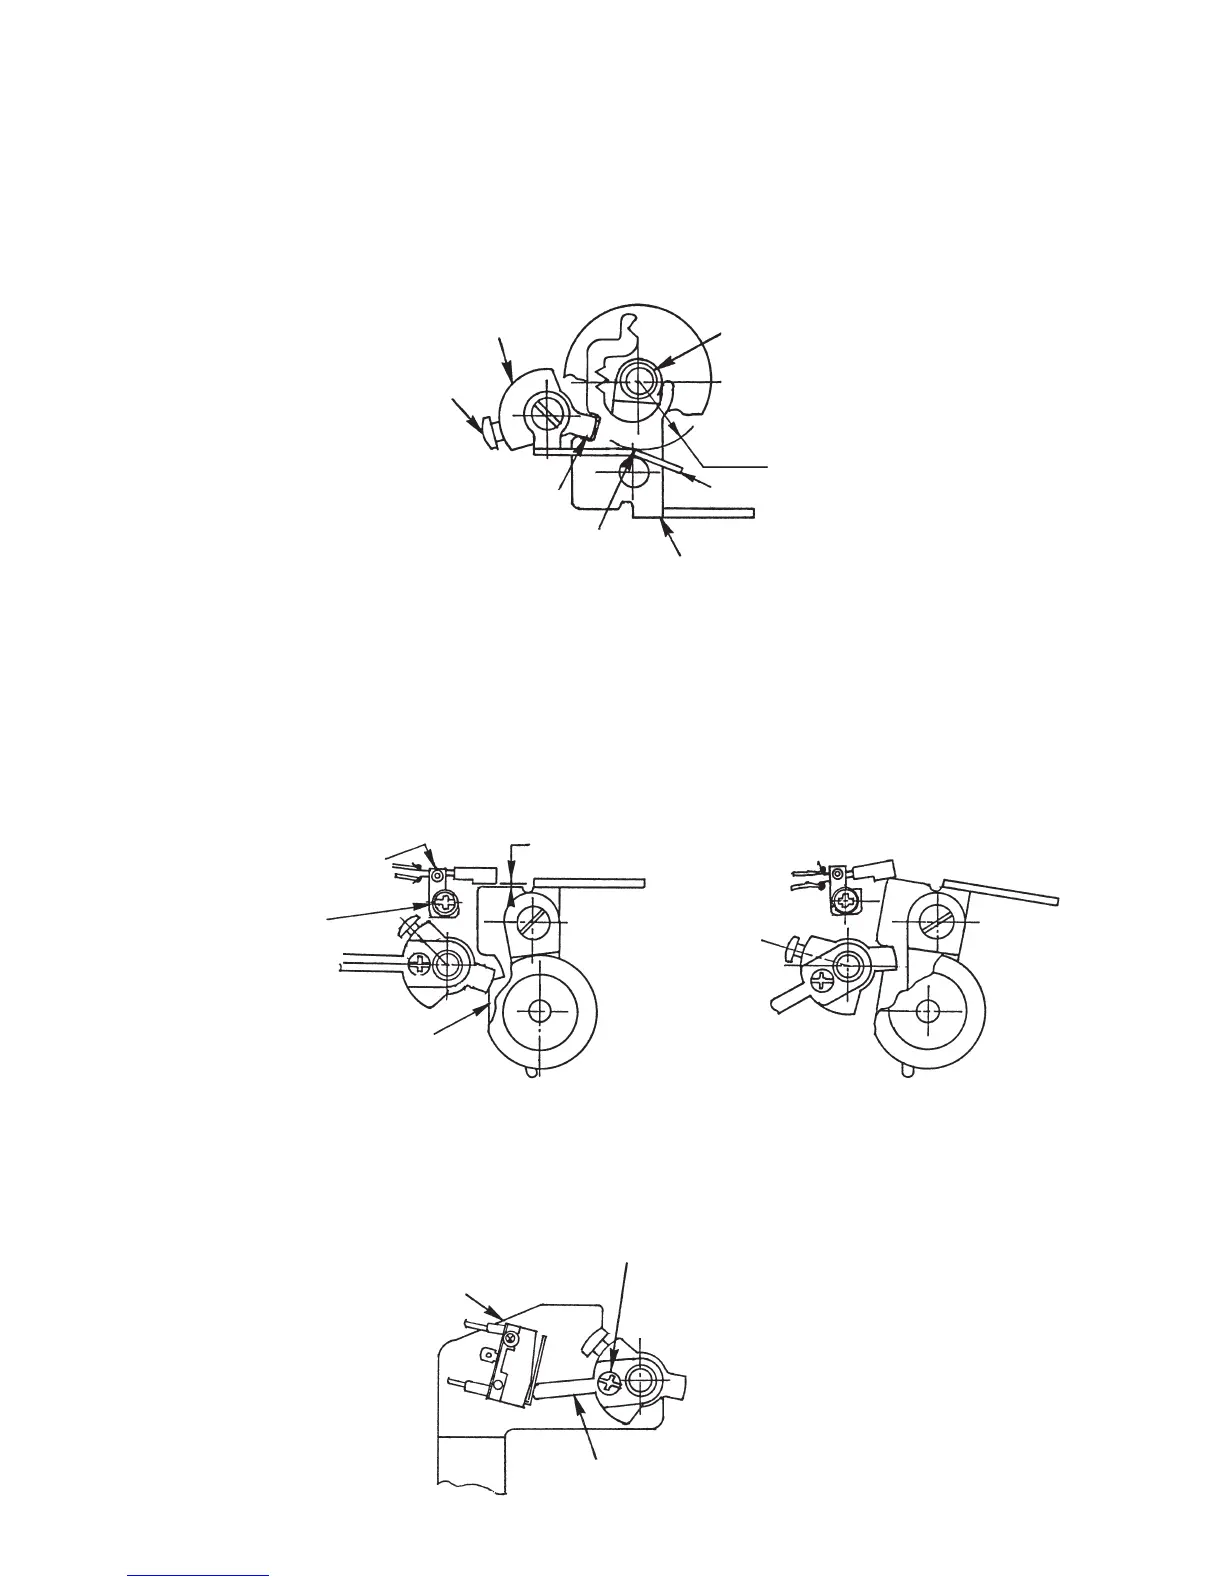
13. Adjustment of bobbin winder
[Position of disengaging bobbin winder]
How to adjust
1. Set 1 bobbin presser to the position where it is 16 mm away from 2 bobbin winding shaft.
2. Tighten 4 bobbin winder controller asm. with setscrew when concave portion of 3 bobbin winding shaft base
adjusting plate is engaged with convex portion of 4 bobbin winder controller asm..
[Position of leaf switch]
How to adjust
1. Adjust so that a clearance of 0.9 mm or more should be provided between 1 leaf switch and 2 bobbin winding
shaft base adjusting plate when bobbin winding shaft is ON and so that leaf switch is securely turned ON when
bobbin winding shaft is OFF.
Then tighten leaf 3 switch setscrew.
How to adjust
1. Tighten 1 bobbin winder switch contactor plate with setscrew at the position where 2 bobbin winder switch is
turned OFF when amount of bobbin thread wound round bobbin becomes 18 mm in diameter.
2 Bobbin winding shaft
base adjusting plate
Bobbin winding shaft OFF (leaf SW ON)
To strike
3 Bobbin winding shaft base adjusting plate
1 Bobbin presser
2 Bobbin winding shaft
4 Bobbin winder controller asm.
Setscrew
To engage with each other
16 mm
Bobbin winding shaft ON (leaf SW OFF)
[Adjustment of amount of bobbin thread wound round bobbin]
3 Leaf SW setscrew
1 Leaf SW
0.9 mm or more
2 Bobbin winder SW
3 Bobbin winder SW contactor setscrew
1 Bobbin winder SW contactor plate

 Loading...