– 25 –
Automatic Thread Trimmer Mechanism
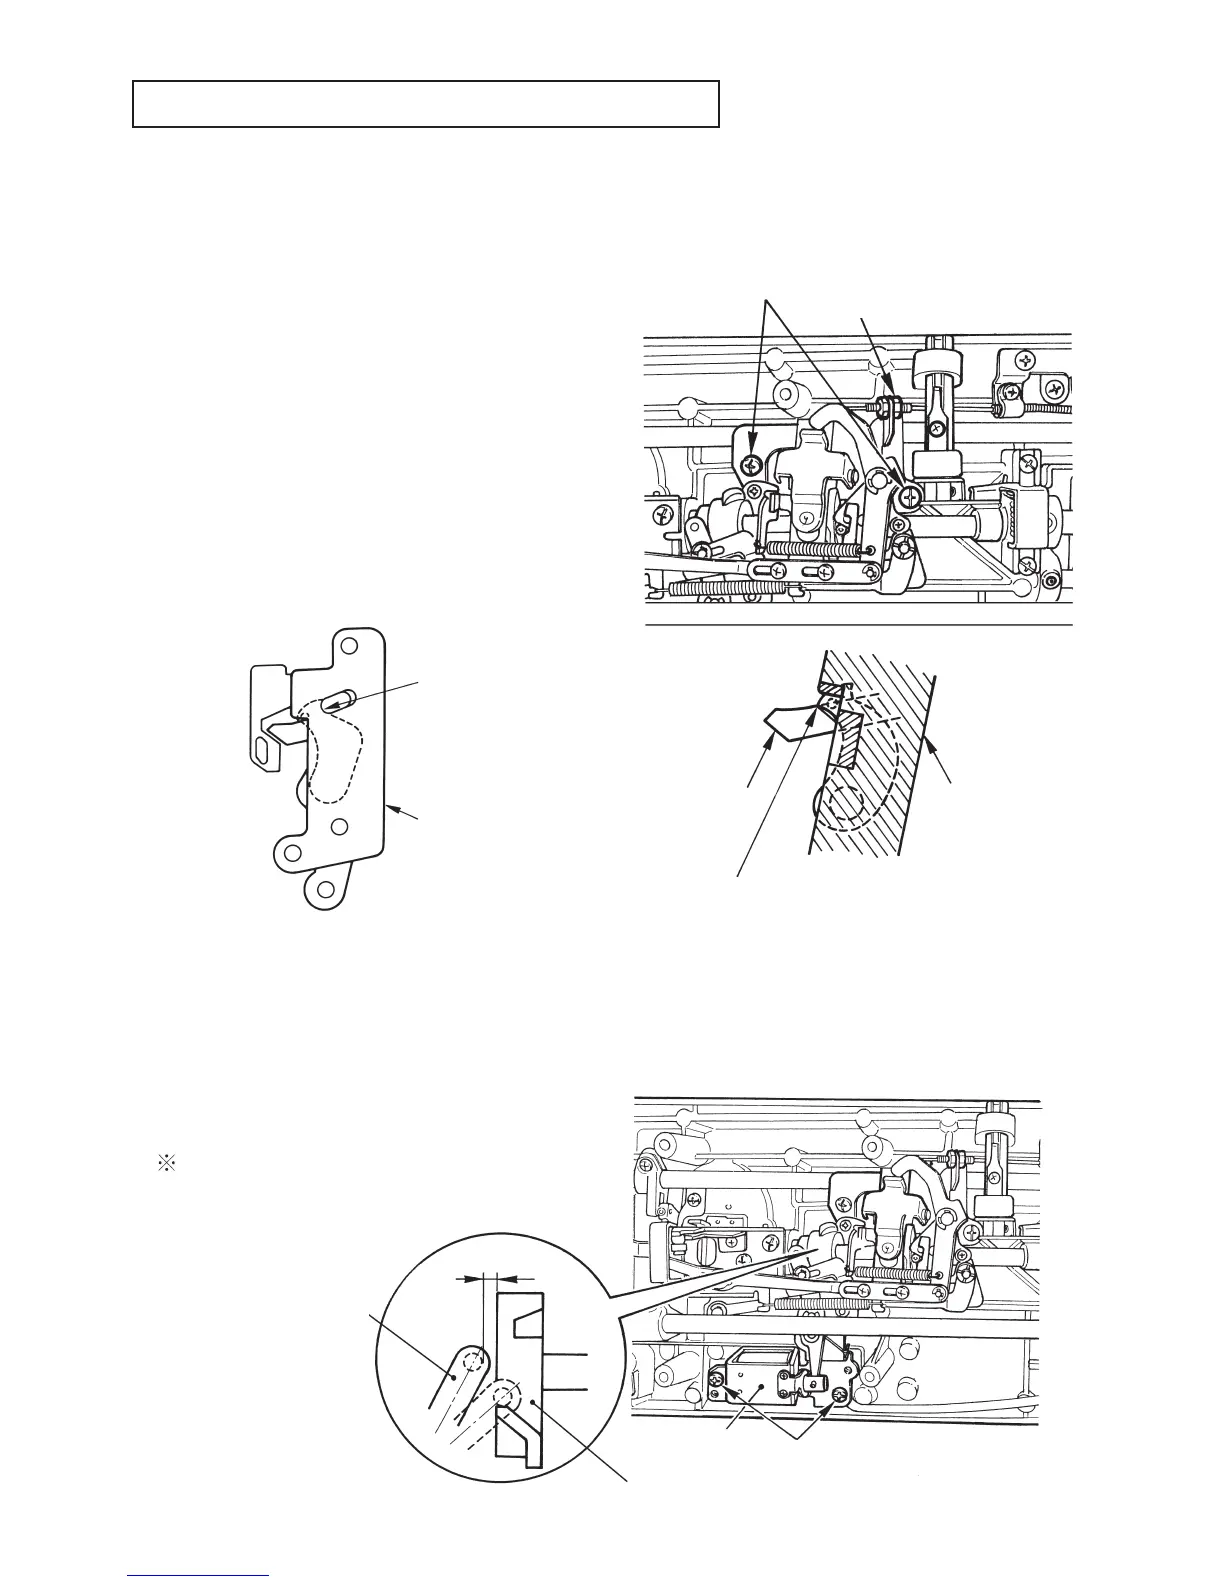
1. Positioning of moving knife arm installing plate
(Adjustment of position of moving knife)
™ Loosen 1 nut of setscrew
™ Loosen 2 setscrews in installing plate and move
installing plate to the right or left to obtain position
A.
™ Tighten 2 setscrews in installing plate.
Reference (substitution)
Position of moving knife (see from under side of bed.)
Overlapping amount of slot 4 of moving knife base
with portion R of moving knife is 0 to 0.5 mm.
(To such an extent that portion R of moving knife is
slightly seen from slot 4)
2. Installing position of thread trimmer SOL (solenoid)
™ Move 3 thread trimmer solenoid asm. to the right
and left to adjust so that clearance between 1
thread trimmer auxiliary link and 2 thread trimmer
auxiliary cam is 0.5 to 1.0 mm, and tighten it with
4 setscrews.
When thread trimmer solenoid asm. is set to ON, it
has to interlock thread trimmer auxiliary cam.
Moving knife base
4
2 Moving knife arm
installing plate setscrew
1 Nut of setscrew
3 Thread trimmer
solenoid
4 Thread trimmer solenoid setscrew
0.5 to 1.0
Moving knife base
Counter knife
Align top end of moving knife with border of black coloring
section and polished plane of counter knife.....A
Figure observed from the
rear after removing hook.
2 Thread trimmer auxiliary cam
1 Thread trimmer
auxiliary link
TL-98Q

 Loading...