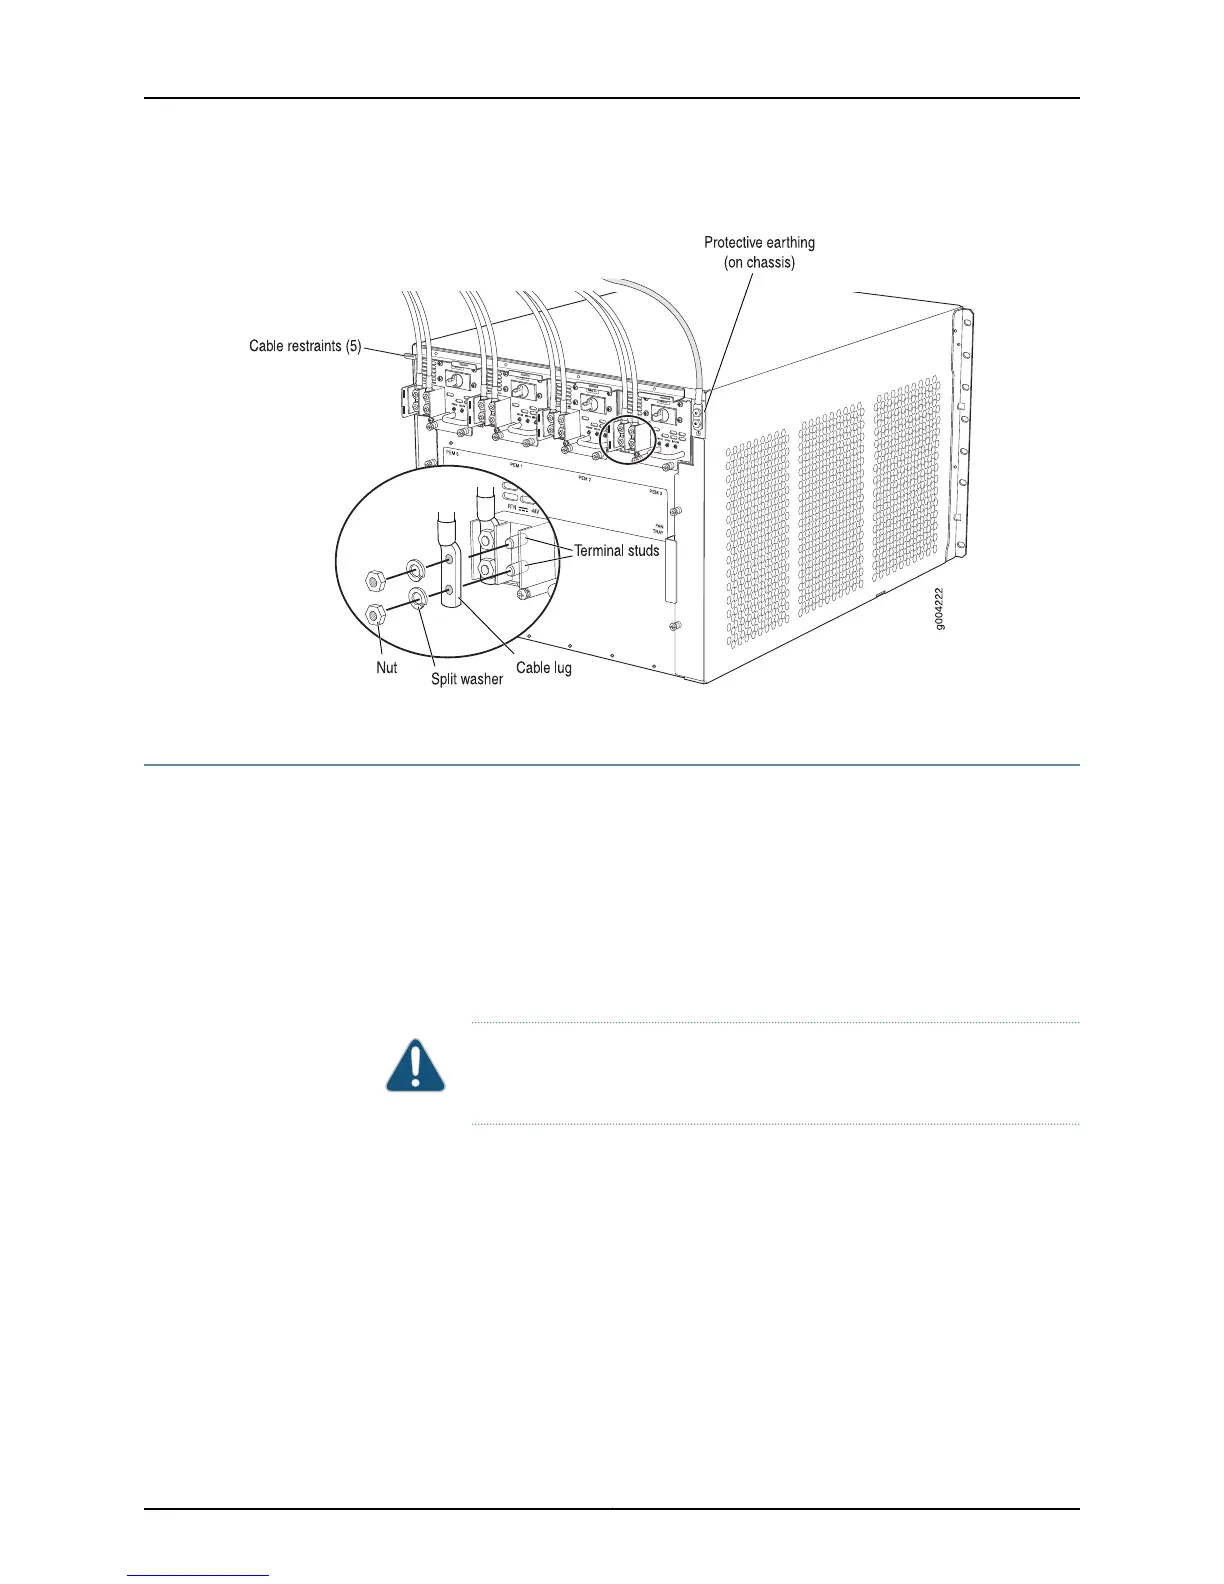
Figure 17: Connecting DC Power to the Router
Upgrading the MX960 AC Power Supplies Overview
To upgrade the MX960 AC power supplies:
1. Remove one existing old power supply from either slot 0 or slot 3 (either far left or far
right), and replace it with a high-capacity power supply.
2. On the high-capacity power supply, rotate the metal cover away from the input mode
switch to expose the switch.
3. Move the input mode switch to position 0 for one feed or position 1 for two feeds (see
Figure 18 on page 23).
CAUTION: Do not use a pencil, because fragments can break off and cause
damage to the power supply.
4. Attach power feeds and power up the power supply.
5. Remember to turn on both switches while upgrading the MX960 AC power supply
(the one on the power supply and the one on the Power Distribution Module [PDM]).
6. Continue by removing an adjacent existing power supply and replacing it with a
high-capacity power supply.
Copyright © 2010, Juniper Networks, Inc.22
Upgrading MX240, MX480, and MX960 3D Universal Edge Router Power Supplies and Fan Trays

 Loading...