EasyManuals Logo
Home>Juniper>Gateway>SRX320

Juniper SRX320 Quick Start Guide

Juniper SRX320
12 pages
To Next Page IconTo Next Page
To Previous Page IconTo Previous Page
Page #8 background imageLoading...
Page #8 background image
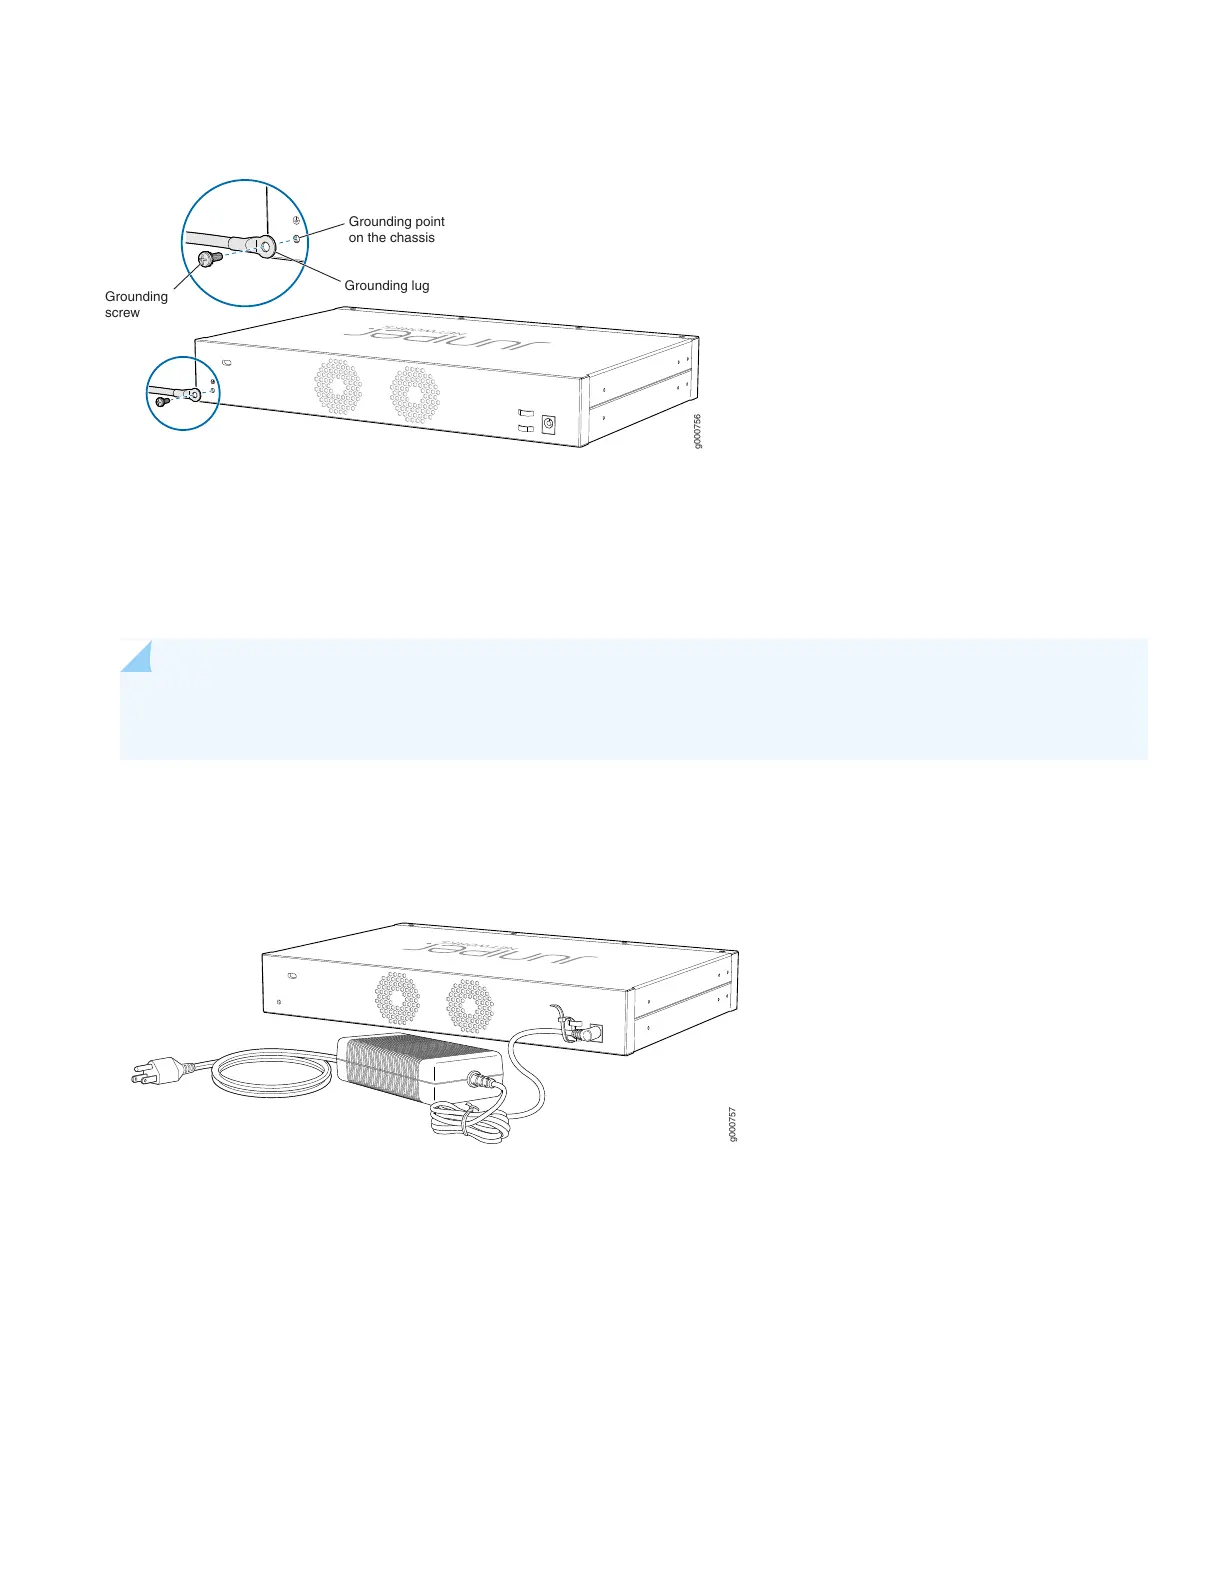
Figure 6: Connecting the Grounding Cable
g000756
Grounding point
on the chassis
Grounding lug
Grounding
screw
Power On the Device
NOTE: Before connecting the device to the power supply, attach an ESD strap to an ESD point and place the
other end of the strap around your bare wrist.
1. Plug the DC connector end of the power cable into the power connector on the rear of the device.
Figure 7: Connecting the Power Cable
g000757
2. Plug the AC adapter end of the power cable into an AC power outlet.
3. Turn on the power to the AC power receptacle.
4. Note the following LED indications. Wait until the STAT LED is solid green before proceeding to the next step.
8

Other manuals for Juniper SRX320

Questions and Answers:

Question and Answer IconNeed help?

Do you have a question about the Juniper SRX320 and is the answer not in the manual?

Juniper SRX320 Specifications

General IconGeneral
Firewall throughput1000 Mbit/s
Number of users50 user(s)
Quality of Service (QoS) supportYes
Mobile VPN IPSec250
IPS/IDS throughput100 Mbit/s
USB 2.0 ports quantity1
Connectivity technologyWired
SFP module slots quantity2
Ethernet LAN (RJ-45) ports6
Internal memory4000 MB
Flash memory8000 MB
Storage media typeFlash
Power consumption (typical)27 W
Heat dissipation157 BTU/h
Concurrent connections64000
Mean time between failures (MTBF)284700 h
Storage temperature (T-T)-20 - 70 °C
Operating temperature (T-T)0 - 40 °C
Storage relative humidity (H-H)5 - 95 %
Operating relative humidity (H-H)10 - 90 %
Routing protocolsBGP, CLNS, IS-IS, OSPF, RIP-1, RIP-2
Weight and Dimensions IconWeight and Dimensions
Weight1510 g
Dimensions (WxDxH)299.9 x 43.9 x 191 mm

Related product manuals