Adjusting to your Preferred Color (Color Management)
Based on the setting of the selected “Color Profile”, you can adjust each of the following colors according to your
preference: Red, Yellow, Green, Cyan, Blue, and Magenta.
1
Press the [MENU] button to display the menu, followed by selecting “Picture
Adjust” " “Color Profile” to display the “Color Profile” menu
2
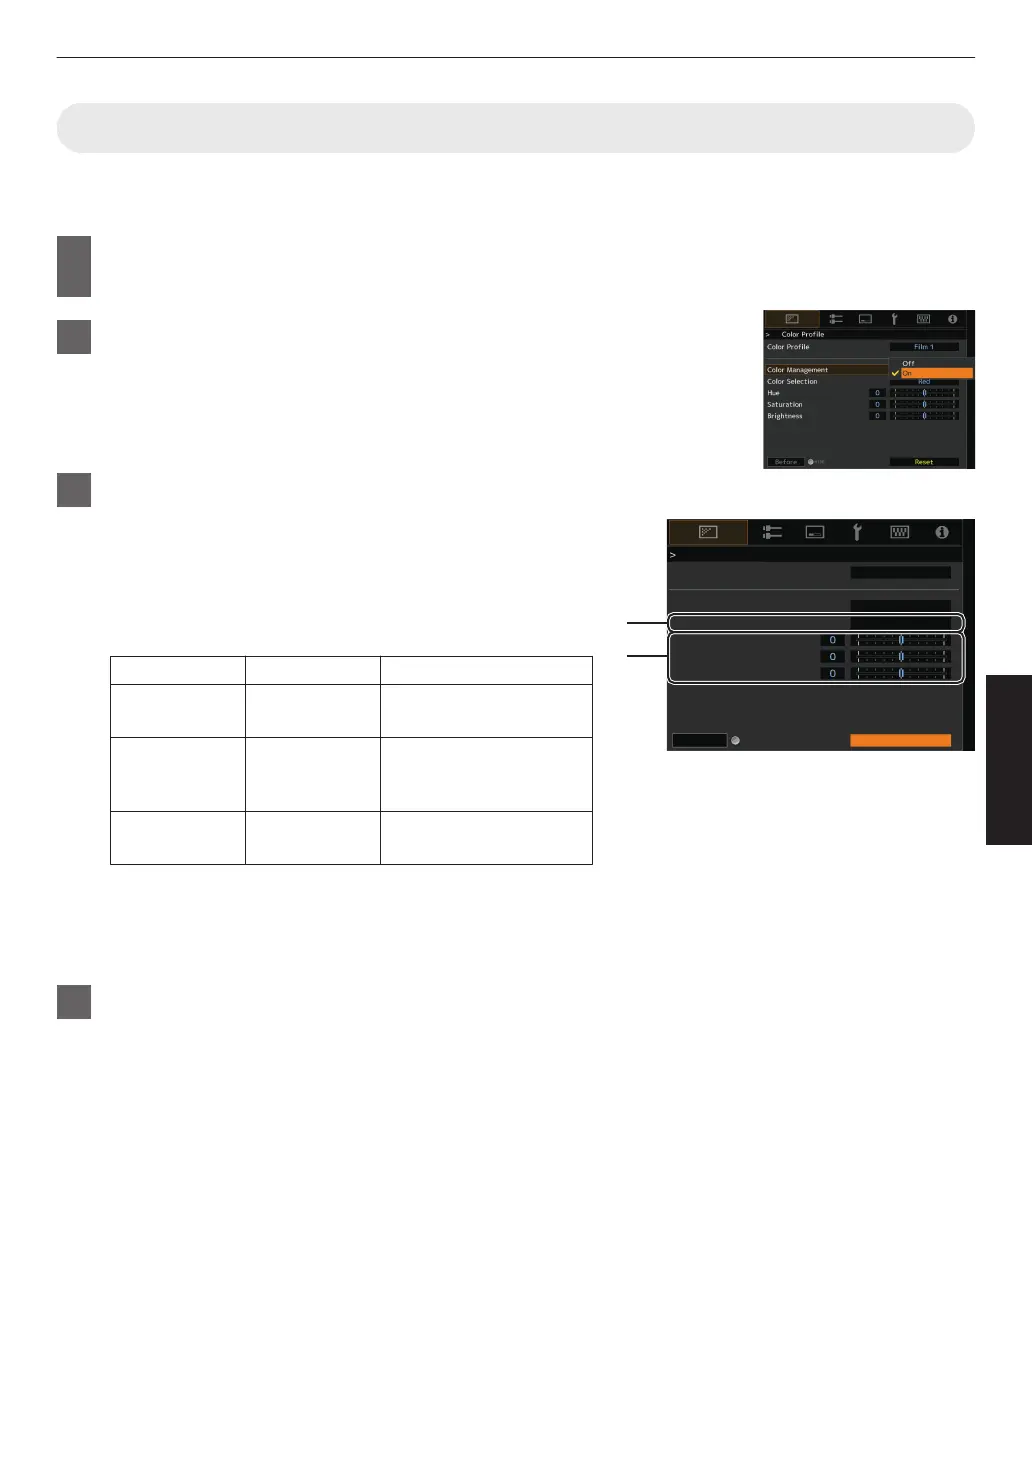
Set “Color Management” to “On”, and press the [OK] button
3
Adjust to the preferred color
A
Select “Color
Selection”, and press the H I keys to select the
color to adjust
0
For color adjustment, select the color from the following:
“Red”, “Yellow”, “Green”, “Cyan”, “Blue”, “Magenta”.
B
Adjust the selected color
Item
Setting Range
Description
Hue -30 to 30 Adjusts the hue (color
tone).
Saturation -30 to 30 Adjusts the color
saturation (vividness).
-30 (dull) to +30 (vivid)
Brightness -30 to 30 Adjusts the brightness.
-30 (dark) to +30 (bright)
0
Selecting “Reset” resets all the adjustment data.
0
Pressing the
[HIDE] button on the remote control enables
you to check the image before adjustment. Press the
[HIDE] button again to return to the adjustment screen.
4
Press the [MENU] button to exit
A
B
Color Profile
Color Profile
Color Management
Color Selection
Hue
Saturation
Brightness
Before
Reset
Film 1
Red
On
HIDE
37
Adjust/Set
 Loading...