4
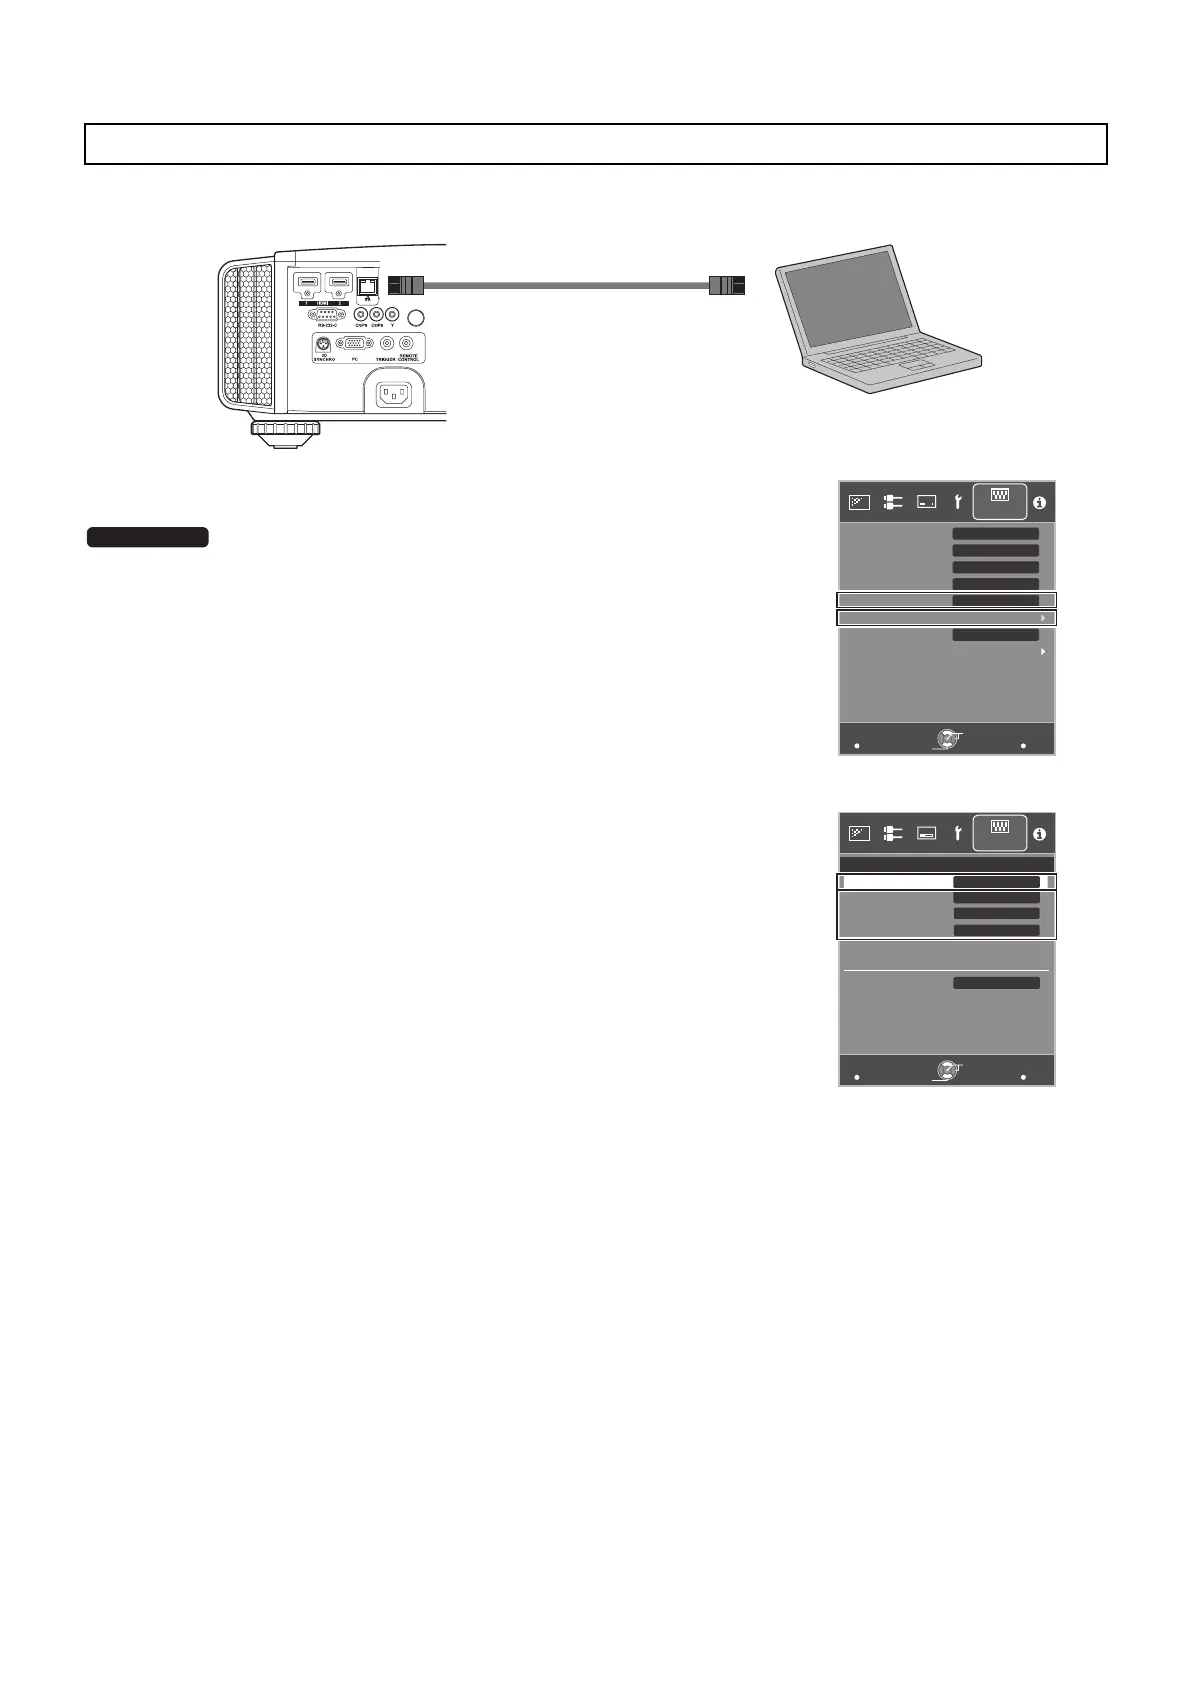
Connecting the Projector to a PC directly
Connect the projector to a PC via LAN cable.
Set “Communication Terminal” under the “Function” tab in the
menu to “LAN”.
Set the TCP/IP for the PC and “Network” of the projector.
● Network Settings of the Projector
Open the “Network” item under the “Function” tab in the menu.
Set “DHCP Client” to “Off”.
Set the “IP Address” of the projector to an address different from that of the
PC.
Example: PC [192 168 0 1 ]
Projector [192 168 0 2 ]
Set “Subnet Mask” and “Default Gateway” of this unit to the same values as
the PC.
Example: Subnet Mask [255 255 255 0 ]
Default Gateway [192 168 0 254 ]
After pressing “Set”, press OK to apply new settings.
* The IP address of the projector is required when you use this application.
* For details on the PC settings, refer to the instruction manual of the PC. Procedures for setting up Windows7 are
described in P. 16.
* If the DHCP server is running on the PC that is directly connected to the projector, set “DHCP Client” to “Off”, and
then press “Set”.
Projector and PC Setup
Laptop, etc.
Connection Cable
(Sold Separately)
Projector
To [LAN] Terminal
MENU
BACK
LAN
A
Back
Operate
Select
Exit
Function
Lamp Reset
Remote Code
Communication Terminal
Off
ECO Mode
Off
Off
Off
High Altitude Mode
Network
Off Timer
Trigger
X95R/X75R
MENU
BACK
Back
Operate
Select
Exit
Function
>
MAC Address :
AA-BB-CC-DD-EE-FF
Default Gateway
Subnet Mask
192.168.0.2
255.255.255.0
192.168.0.254
Set
IP Address
Off
DHCP Client
Network
JVC_PCS_manual.fm 4 ページ 2014年7月29日 火曜日 午後6時50分
 Loading...