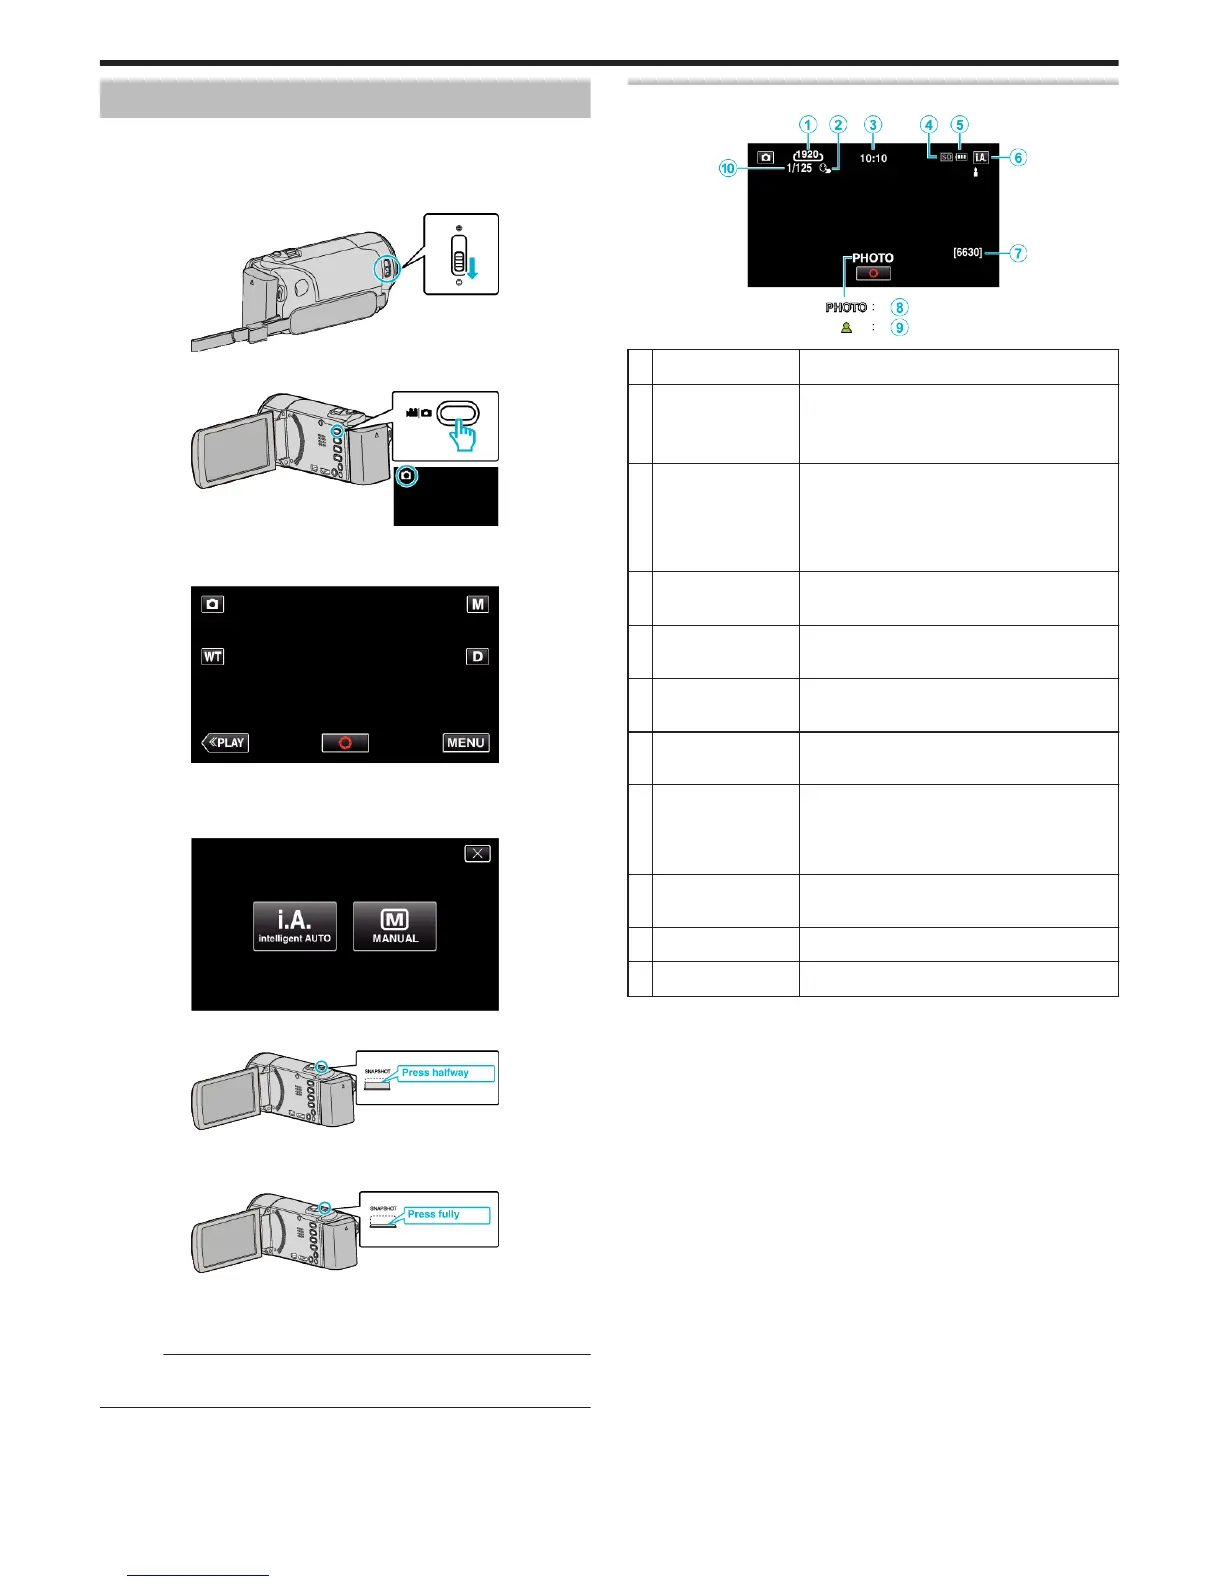
Taking Still Images in Auto Mode
You can record without worrying about the setting details by using the
Intelligent Auto mode.
1
Open the lens cover.
.
2
Open the LCD monitor.
.
0
Check if the recording mode is
B
.
3
Check if the recording mode is
P
Intelligent Auto.
.
0
If the mode is H Manual, tap H on the recording screen to display
the mode switching screen.
Tap P to switch the recording mode to Intelligent Auto.
.
4
Set the focus on the subject.
.
0
When focused, the focus icon lights up in green.
5
Take a still image.
.
0
PHOTO lights up when a still image is being captured.
0
Some displays disappear after approximately 3 seconds.
Use the n button to change the displays.
Memo :
0
Depending on the subject and shooting conditions, recording may not be
performed properly even in the Intelligent Auto mode.
Indications During Still Image Recording
.
Display Icon Description
A
Image Size Displays the icon of the image size.
0
The size of still images can be changed.
“ IMAGE SIZE ” (A p. 101)
B
TOUCH PRIORITY
AE/AF
Displays the setting of “TOUCH PRIORITY AE/
AF”. By default, it is set to “FACE TRACKING”
.
“Capturing Subjects Clearly (TOUCH
PRIORITY AE/AF)” (A p. 42)
C
Time Displays the current time.
“Clock Setting” (A p. 19)
D
Recording Media Displays the icon of the media where still
images are recorded to.
E
Battery Indicator “Checking the Remaining Recording Time”
(A p. 56)
F
Recording Mode Displays the current recording mode of P
(Intelligent Auto) or H (Manual).
G
Remaining Number
of Shots
Displays the remaining number of shots for still
image recording.
“Approximate Number of Still Images (Unit:
Number of Shots)” (A p. 57)
H
Recording in
Progress
“PHOTO” appears when a still image is being
captured.
I
Focus Lights up in green when focused.
J
Shutter Speed Displays the shutter speed.
Recording
28
 Loading...