60
6w
TW
12:34
Insert Editing
You can insert snapshots and other scenes in previously recorded footage.
4
START RECORDING
Press RECORDING START/STOP to begin
editing.
•Confirm the insert at the time code you
checked in step 1.
5
PAUSE DURING EDITING
Press RECORDING START/STOP. Press again
to resume editing.
6
STOP EDITING
Press RECORDING START/STOP, then press
STOP.
NOTES:
●
When performing Insert Editing, the tape’s Video
Area and Sub-Code Area (
Z
pg. 7) are rewritten,
so the date and time information changes.
●
If you perform Insert Editing onto a blank space
on the tape, the audio and video may be
disrupted. Make sure you only edit recorded
areas.
1
FIND EDIT OUT POINT
Confirm the time code at this point.
(Z pg. 49)
2
FIND EDIT IN POINT
Press REW until the point is located, then press
PAUSE.
3
PREPARE FOR INSERT EDITING
Press and hold INSERT on the remote control,
then press PAUSE. “6w” and the Time Code
(min.:sec.) appear in the viewfinder.
NOTE:
●
To see the on-screen characters on a connected
TV, press DISPLAY on the remote control.
(
Z
pg. 52)
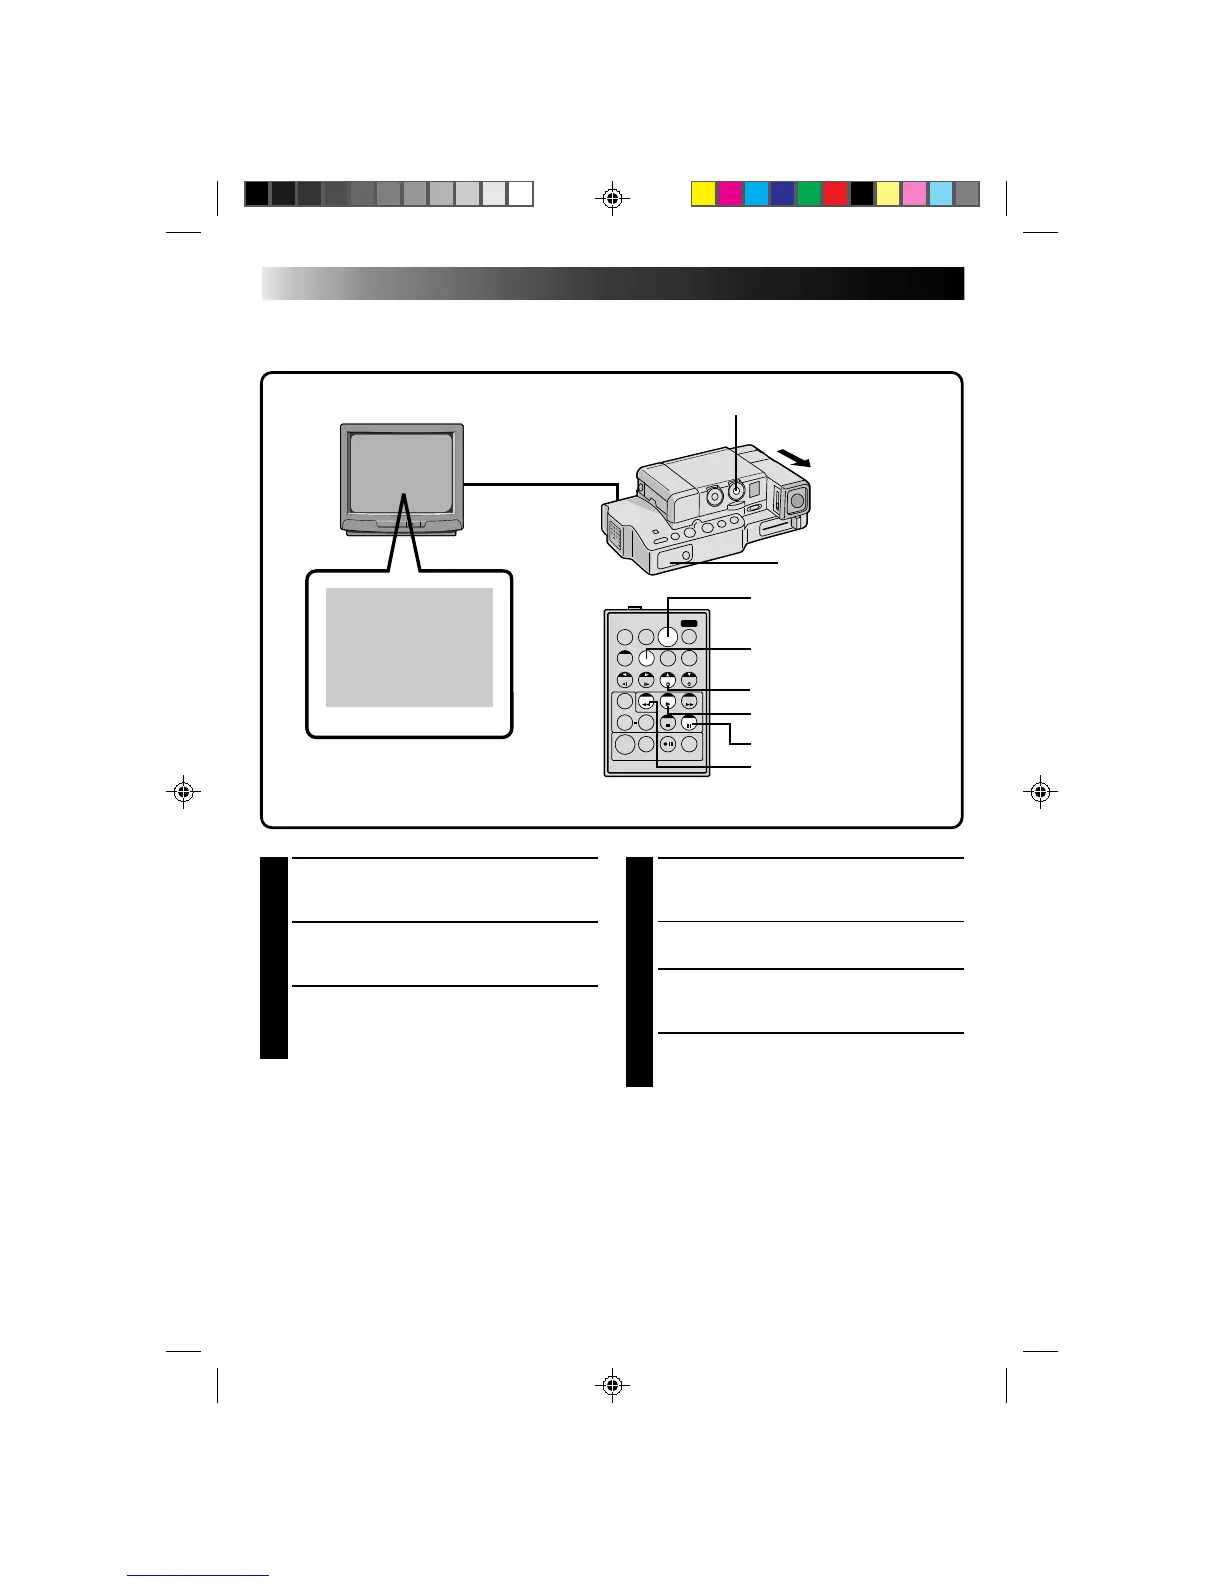
POWER DIAL
REMOTE SENSOR
DISPLAY BUTTON
PLAY BUTTON
PAUSE BUTTON
RECORDING START/STOP
BUTTON
INSERT BUTTON
EDITING (Cont.)
REW(IND) BUTTON
RM-V708U (provided)
 Loading...