4
INITIAL SETTINGSINITIAL SETTINGS
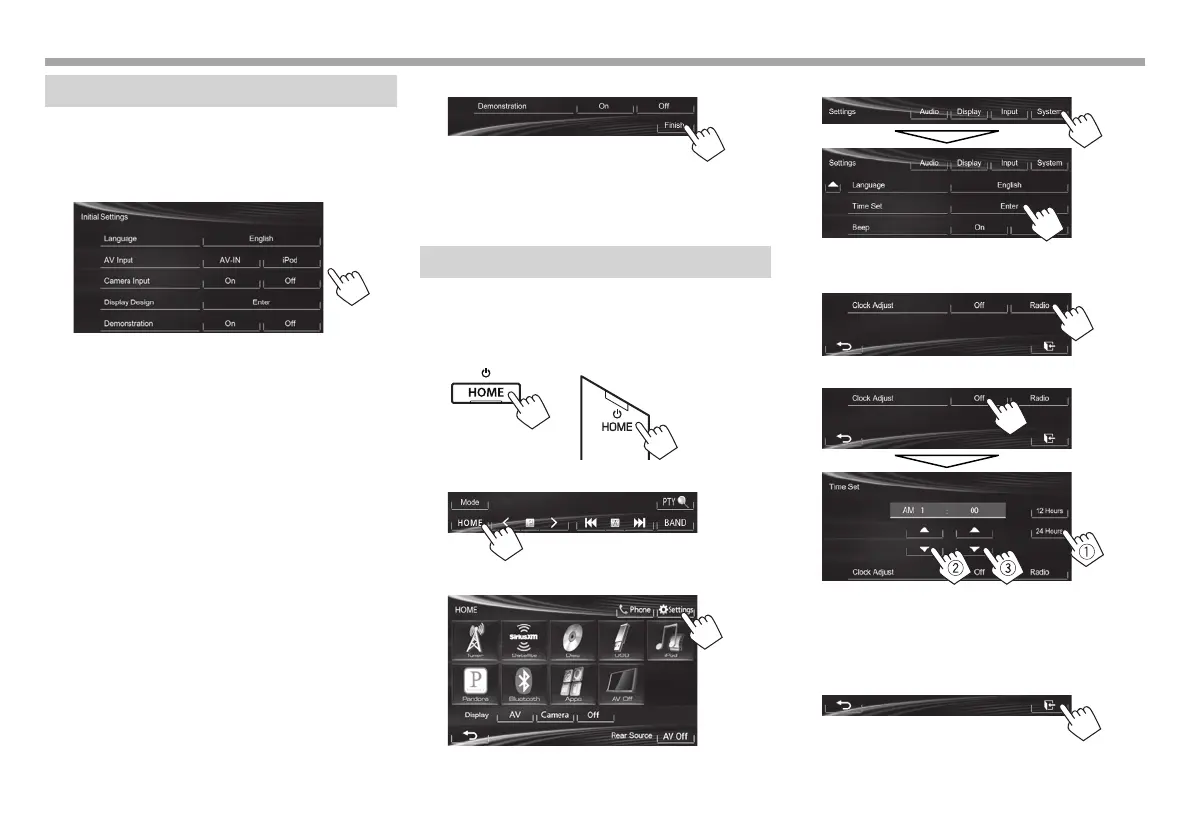
Initial setup
When you power on the unit for the first time or
reset the unit, the initial setting screen appears.
• You can also change the settings on the
<Settings> screen. (Page44)
1
<Language>
(Page46)
Select the text language
used for on-screen
information.
• Set <GUI Language>
to display the operation
buttons and menu items
in the selected language
([Local]: initially
selected) or English
([English]).
<AV Input>
(Page45)
Select an external
component connected
to the AV-IN1 terminal to
play.
<Camera Input>
(Page45)
Select [On] when
connecting the rear view
camera.
<Display Design>
(Page45)
Select the background
and the colors of the text,
touch panel buttons and
the monitor panel buttons.
<Demonstration>
(Page45)
Activate or deactivate the
display demonstration.
2 Finish the procedure.
The <HOME> screen is displayed.
• [AV Off] is selected initially. Select the
playback source. (Page8)
Clock settings
1 Display the <HOME> screen.
On the monitor panel:
KW-V40BT KW-V20BT/KW-V200BT/
KW-V10/KW-V100
On the source control screen:
2 Display the <Settings> screen.
3 Display the <Time Set> screen.
4 Set the clock time.
To synchronize the clock time with FM RBDS
To set the clock manually
1
Select the time display format.
2
Adjust the hour.
3
Adjust the minute.
5 Finish the procedure.
KW-VEntryJ.indb4KW-VEntryJ.indb4 2013/10/3016:042013/10/3016:04
 Loading...