MX-K3
1-11
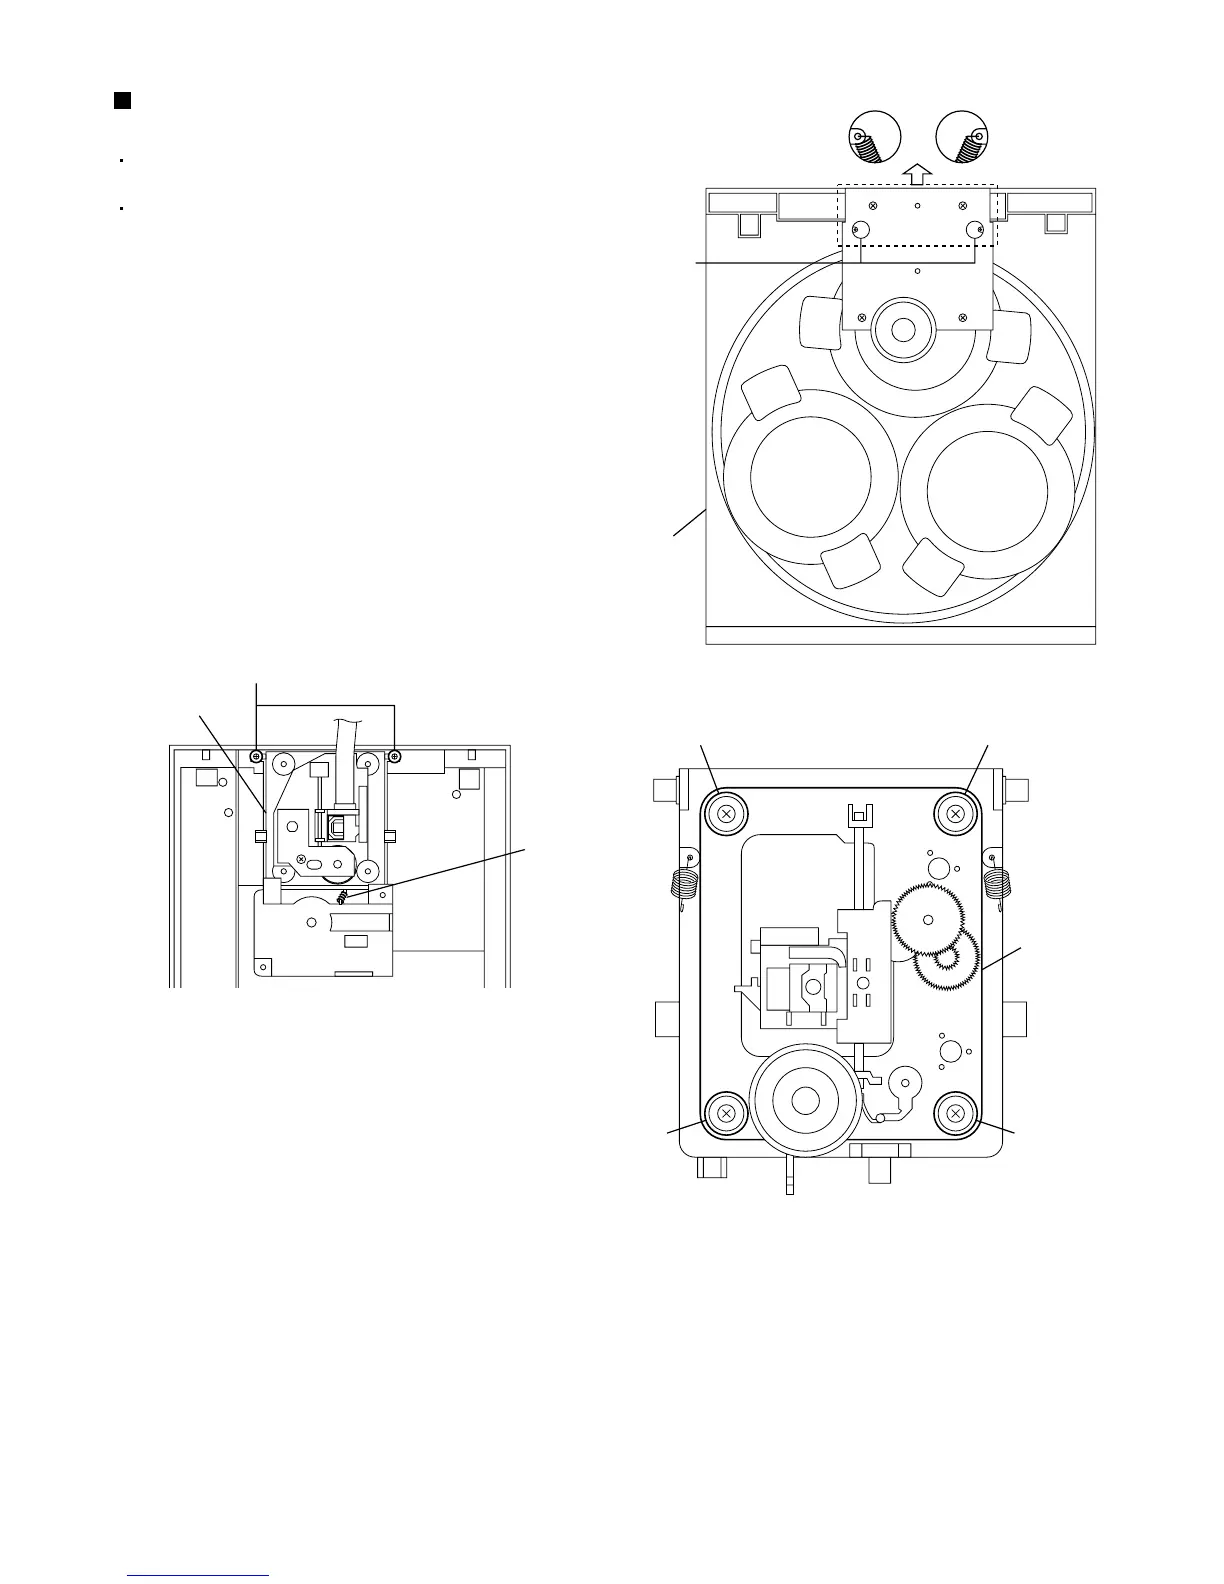
Fig.15
Prior to performing the following procedures,
remove the top cover.
Also remove the CD changer unit.
1.
2.
3.
Remove the spring "d" from the front surface of the
CD changer mechanism unit.
Turn the CD changer mechanism unit upside down,
and remove the spring "e" connecting the unit to
the CD changer mechanism assembly.
Remove the two screws with the washer "L"
retaining the CD changer mechanism assembly.
Removing the CD changer mechanism
assembly (See Fig.15 to 17)
Fig.17
Fig.16
[Caution] When replacing the CD changer
mechanism assembly, be sure not to
mistake the positions of the red and blue
dampers.
[Note] When re-assembling after the disassembly
work, apply bonding agent on the spring to
prevent it from slipping off.
[Note]
Spring d
CD changer
unit
CD changer
mechanism
assembly
[Note]
Spring e
L
Red Red
CD changer
mechanism
assembly
BlueBlue
 Loading...