8
English
RL
AUX
L
R
L
R
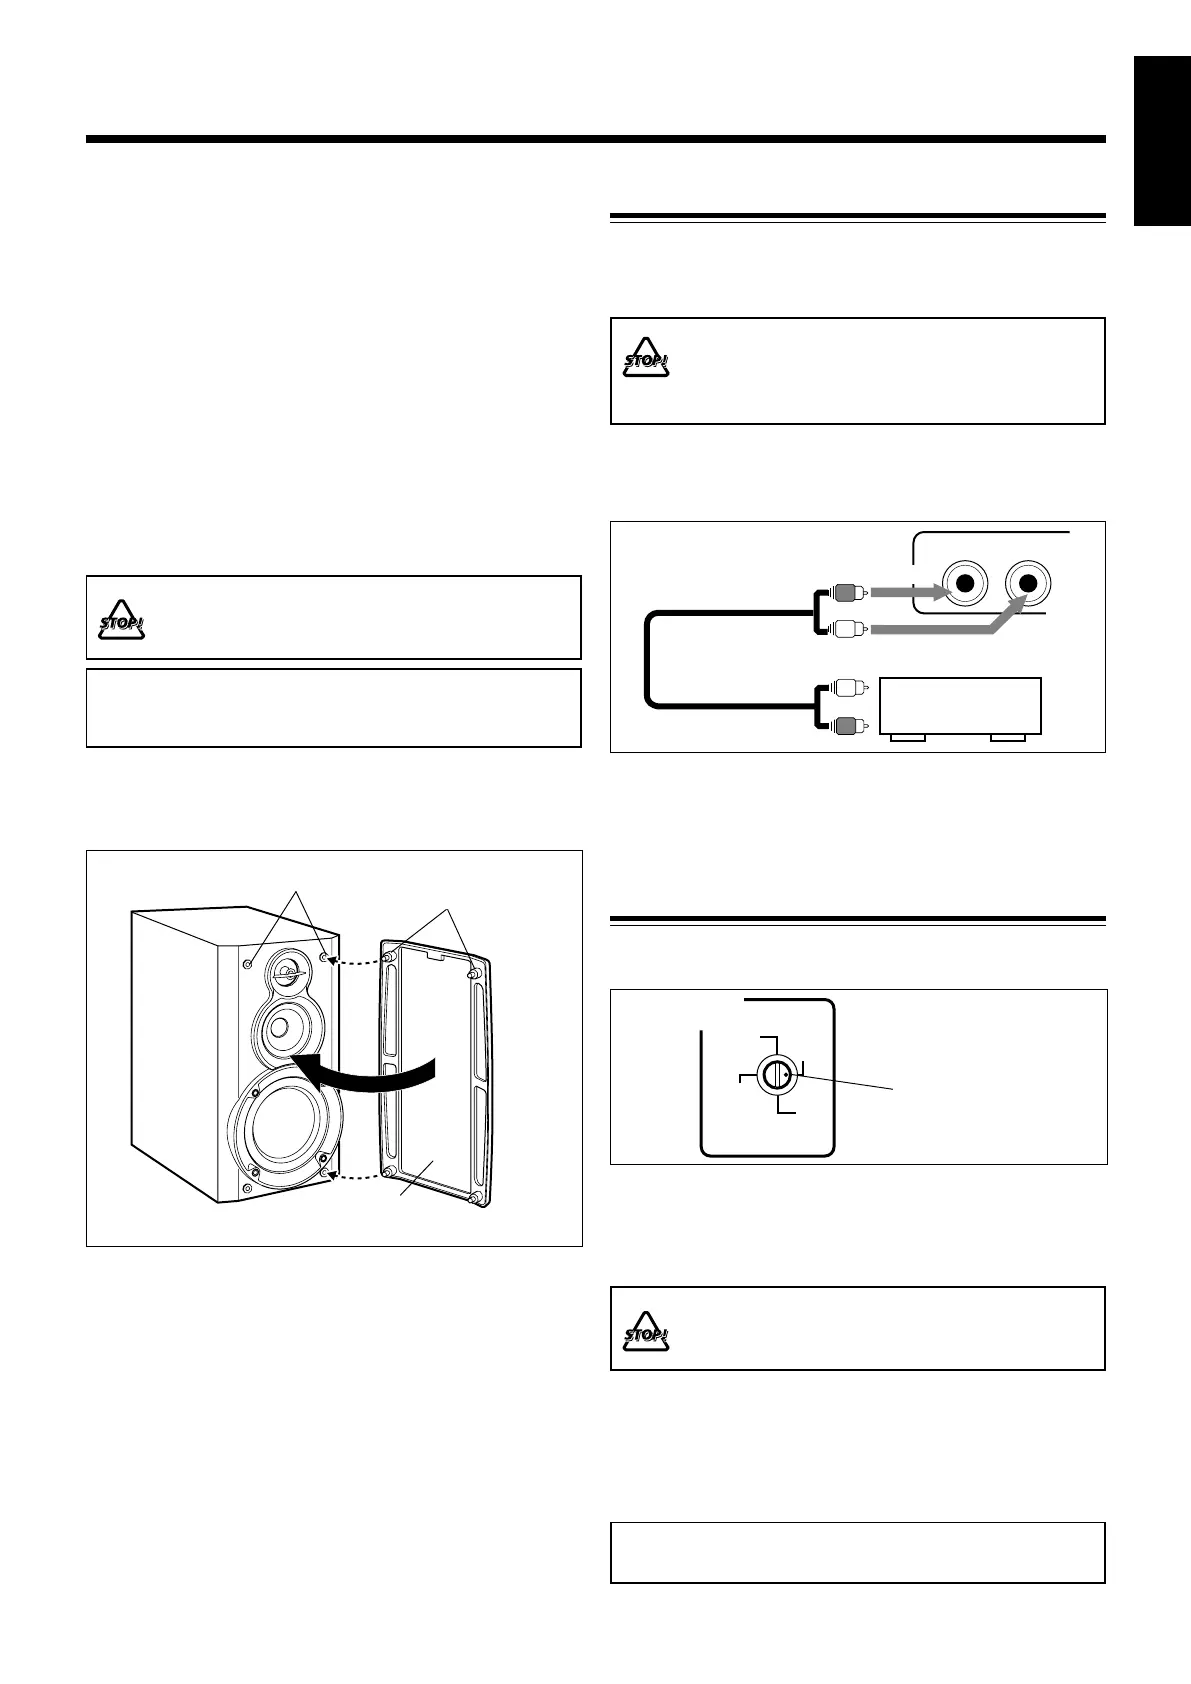
Speaker grille
To remove the speaker grille, insert your fingers at the top
of the speaker grille, pull towards you. Then pull the bottom
towards you.
To attach the speaker grille, put the projections of the
speaker grille into the holes of the speaker.
Holes
Projections
1 If the cords are covered with insulation,
remove a short section of insulation at the
end of each cord by twisting and pulling it
off.
2 Press and hold the clamp of the speaker
terminal as illustrated.
3 Insert the end of the speaker cord into the
terminal.
Match the polarity between the unit and the speaker
terminals: ª to ª and · to ·.
4 Release your finger from the clamp.
• DO NOT connect speakers while the power is on.
• DO NOT connect more than one speaker to each
speaker teminal.
IMPORTANT: Use only speakers with the same speaker
impedance as shown on the speaker terminals on the
rear of the unit.
To remove the speaker grilles
The speaker grilles are removable.
Connecting Other Equipment
To connect an audio equipment
You can connect audio equipment—used only as a playback
device.
• DO NOT connect any equipment while the power
is on.
• DO NOT plug in any equipment until all
connections are complete.
Be sure that the plugs of the audio cords are colored: White
plugs and jacks are for left audio signals, and red ones for
right audio signals.
To audio output
Audio equipment
For playing other equipment through this unit, connect
between the audio output jacks on the other equipment and
AUX jacks by using audio cords (not supplied).
Adjusting the Voltage Selector
Before plugging in the unit, set the correct voltage for your
area with the voltage selector on the rear of the unit.
Use a screwdriver to rotate the voltage selector so the voltage
number the voltage mark is pointing at is the same as the
voltage where you are plugging in the unit. (See the back
cover page.)
DO NOT plug in before setting the voltage selector
on the rear of the unit and all connection
procedures are complete.
Now, you are ready to plug in the unit
and any other connected equipment.
• If the wall outlet does not match the AC plug, use the
supplied AC plug adaptor (except for Argentina).
IMPORTANT: Be sure to check all connections to be
done before plugging the AC power cord into a wall outlet.
VOLTAGE
SELECTOR
110V
127V
220V
230V
-240V
Voltage mark
EN01-13_UX-J60&50[UW]f.pm6 03.3.13, 7:07 PM8
 Loading...