9
English
Common Operations
Setting the Clock
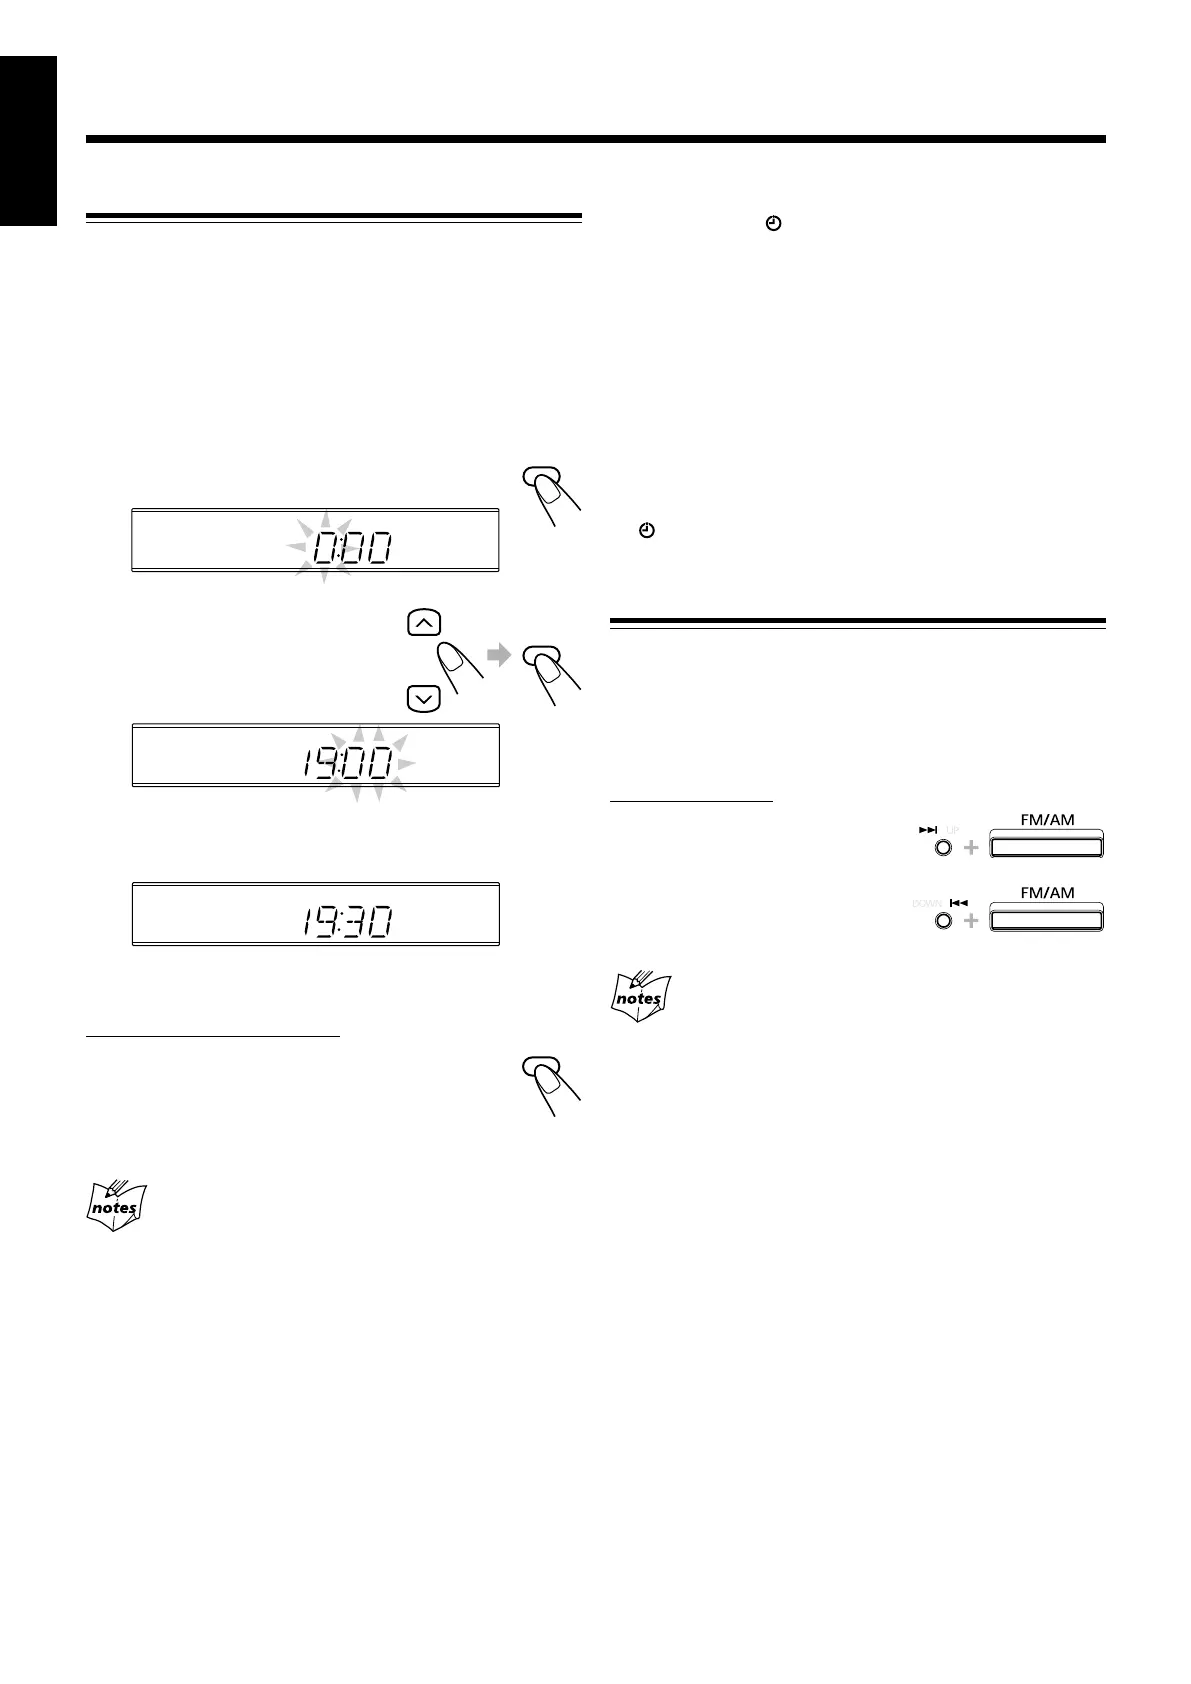
Before operating the unit any further, first set the unit’s clock.
When you plug the AC power cord into the wall outlet,
“0:00” starts flashing on the display.
You can set the clock whether the unit is on or off.
• There is a time limit in doing the following steps. If the
setting is canceled before you finish, start over from step
1
.
• For UX-J60 only, you can also use CLOCK/TIMER on the
unit for this operation.
1
Press CLOCK/TIMER.
The hour digits start flashing on the display.
2
Press UP or DOWN to
adjust the hour, then
press CLOCK/TIMER.
The minute digits start flashing.
3
Press UP or DOWN to adjust the minute,
then press CLOCK/TIMER.
To check the clock time during play
On the remote control ONLY:
Press DISPLAY (grey-colored).
• Each time you press the button, the source
indication and the clock time alternate on the
display.
• When you unplug the AC power cord or if a power failure
occurs
The clock is reset to “0:00” right away. If this happens, set the
clock again.
• The clock may gain or lose 1 to 2 minutes per month
If this happens, reset the clock.
To change the clock
1 Make sure the (timer) indicator is not lit on the
display.
• If it is lit, press and hold CLOCK/TIMER until it goes
off.
2 Press CLOCK/TIMER repeatedly until the unit enters
the clock setting mode (the hour digits start flashing
on the display).
First time you press CLOCK/TIMER, the unit enters the
timer setting mode. (See page 20.)
3 Repeat steps
2
and
3
of the procedure of “Setting the
Clock.”
4 Press and hold CLOCK/TIMER again so that the
(timer) indicator goes off.
Setting the AM Tuner Interval Spacing
Some countries space AM stations 9 kHz apart, and some
countries use 10 kHz spacing.
When shipped, the built-in AM tuner is set to 9 kHz spacing.
You can change it to 9 kHz or 10 kHz spacing only while the
unit is on standby.
On the unit ONLY:
To select 10 kHz intervals, press
FM/AM while holding ¢.
To select 9 kHz intervals, press
FM/AM while holding 4.
When you change the setting
The preset stations are erased. You will need to preset the stations
again. (See page 12.)
DISPLAY
CLOCK
/TIMER
UP
DOWN
CLOCK
/TIMER
EN01-13_UX-J60&50[UW]f.pm6 03.3.13, 7:07 PM9
 Loading...