0
“10
\
HIOUTPUT
f
INPUT
LO OUTPUT
LO
0)
I
MODEL
197
MODEL 343A MODEL 2500E
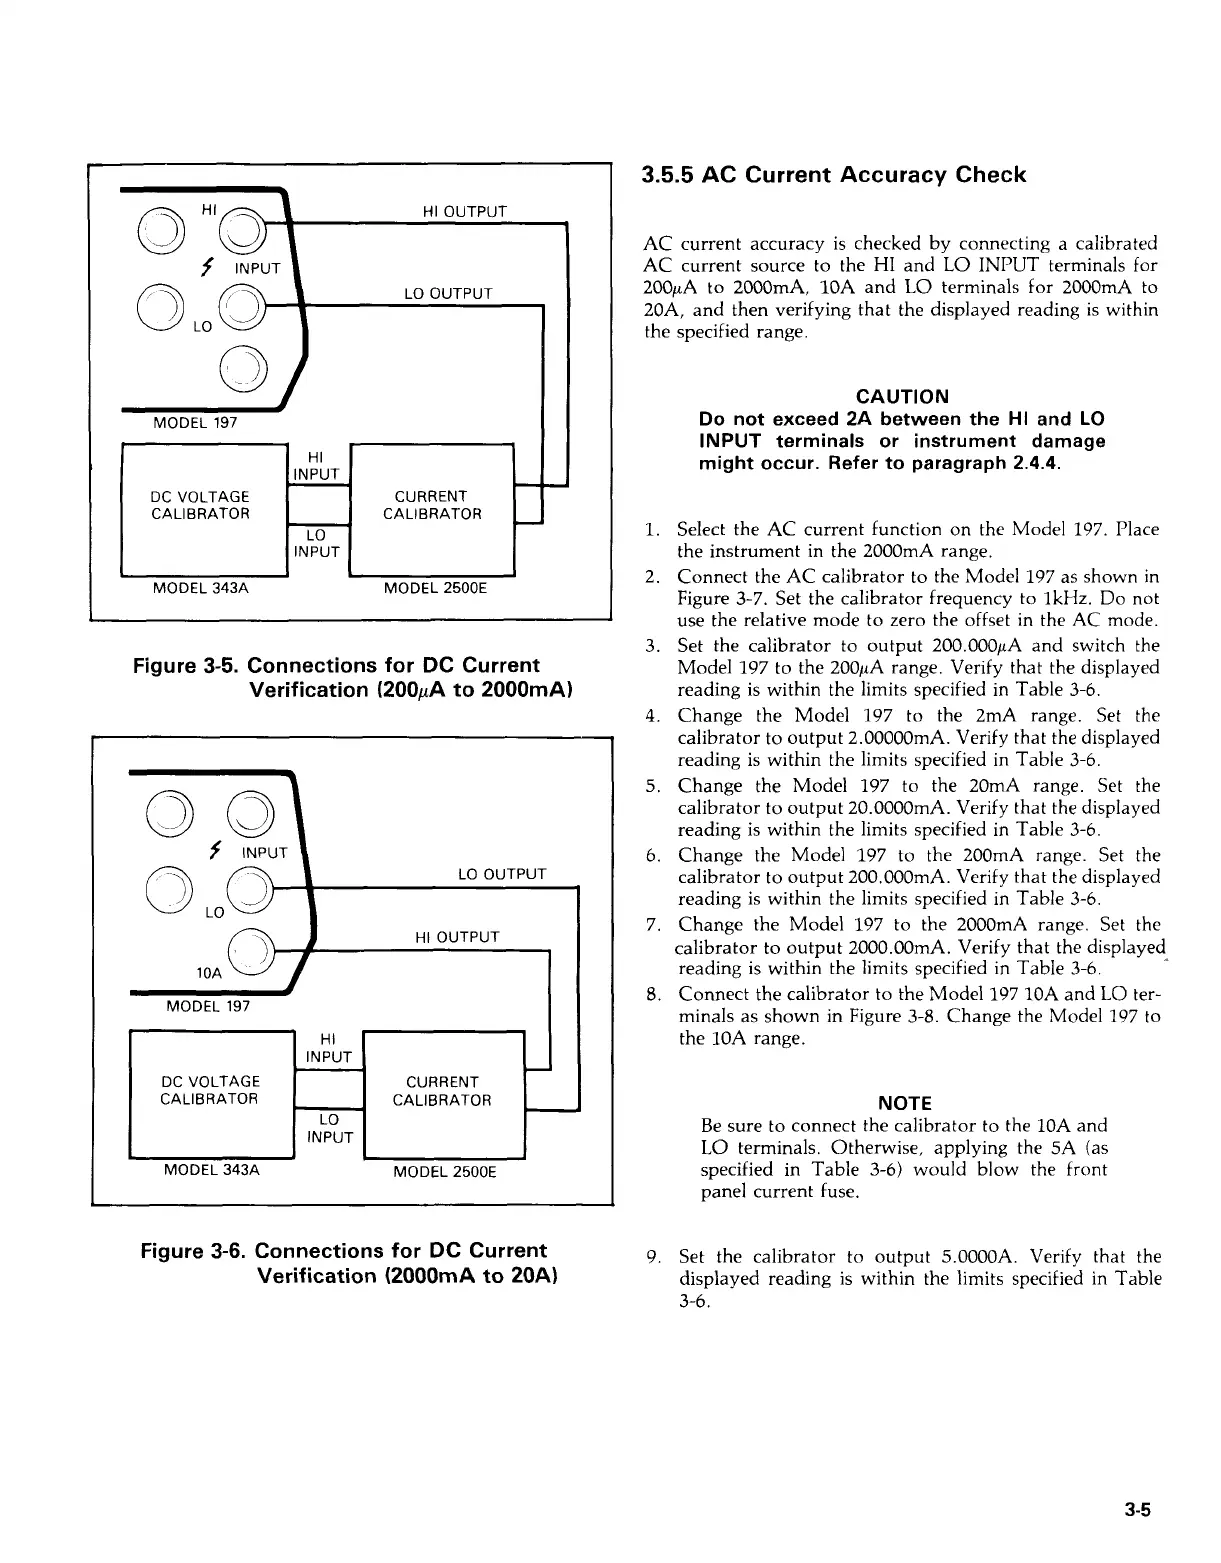
Figure
3-5.
Connections for DC Current
Verification
(200pA
to
2000mA)
INPUT
DC VOLTAGE CURRENT
CALIBRATOR CALIBRATOR
INPUT
MODEL 343A MODEL 2500E
~~ ~~ ~
Figure
3-6.
Connections for DC Current
Verification
(2000mA
to
20A)
3.5.5
AC Current Accuracy Check
AC
current accuracy is checked by connecting a calibrated
AC current source to the
HI
and
LO
INPUT terminals for
200pA to 2000mA, 10A and
LO
terminals
for
2000mA
to
20A, and then verifying that the displayed reading is within
the specified range.
CAUTION
Do
not exceed 2A between the
HI
and
LO
INPUT terminals or instrument damage
might occur. Refer to paragraph
2.4.4.
1.
2.
3.
4.
5.
6.
7.
8.
9.
Select the AC current function on the Model 197. Place
the instrument in the 2000mA range.
Connect the AC calibrator to the Model 197 as shown in
Figure 3-7. Set the calibrator frequency to
IkHz.
Do
not
use the relative mode to zero the offset in the AC mode.
Set the calibrator to output 200.000pA and switch the
Model 197 to the 200pA range. Verify that the displayed
reading is within the limits specified in Table
3-6.
Change the Model 197 to the 2mA range. Set the
calibrator to output 2.00000mA. Verify that the displayed
reading is within the limits specified in Table
3-6.
Change the Model 197 to the 20mA range. Set the
calibrator to output 20.0000mA. Verify that the displayed
reading is within the limits specified in Table
3-6.
Change the Model 197 to the 200mA range. Set the
calibrator to output 200.000mA. Verify that the displayed
reading is within the limits specified in Table
3-6.
Change the Model 197 to the 2000mA range. Set the
calibrator
to
output 2000.00mA. Verify that the displayed
reading is within the limits specified in Table
3-6.
Connect the calibrator to the Model 197
IOA
and
LO
ter-
minals as shown in Figure
3-8.
Change the Model 197 to
the 10A range.
NOTE
Be sure to connect the calibrator to the 10A and
LO
terminals. Otherwise, applying the 5A (as
specified in Table
3-6)
would blow the front
panel current fuse.
Set the calibrator to output 5.0000A. Verify that the
displayed reading is within the limits specified in Table
3-6.
3-5
Artisan Technology Group - Quality Instrumentation ... Guaranteed | (888) 88-SOURCE | www.artisantg.com

 Loading...