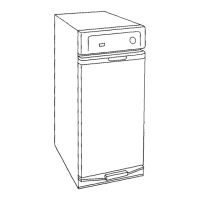
Bags
Use Sears compactor bags for
proper operation of your compactor.
These compactor bags are available
from your Sears store or service
center.
Trim for custom front panel
Special trim kits are needed if you
will be installing a custom front panel.
Kits are available from your local
Sears store or service center. See
"Installation Instructions" for custom
panel dimensions.
The custom front panels kits are:
• Part No. 9871381 (Brushed
stainless steel)
• Part No. 9871382 (White)
• Part No. 9871383 (Black)
• Part No. 9871384 (Almond)
ACCESSORIES ............ 18
ADJUSTING TOE PLATE ...... 8
AUTOMATIC LIQUID
DEODORIZER SYSTEM .... 3, 12
BAG
Bag caddy ....... 3, 11, 12, 13
Installing a new bag ........ 12
Ordering ................ 15
Removing a filled bag ...... 11
CABINET OPENING/
CLEARANCE DIMENSIONS . . . 4
CLEANING
Exterior surface ........... 13
Inside the cabinet ......... 13
Inside the drawer .......... 13
COMPACTING
Putting trash
into compactor ............ 9
Starting ................. 10
Stopping ................ 10
COMPACTOR DIMENSIONS ... 4
CUSTOM-MADE PANELS .. 8, 15
CYCLES
Normal cycle ............. 10
EXTRA PACTM cycle ..... 3, 10
DRAWER
Monitor switches ........ 3, 10
Removing ............. 6, 13
Replacing ............. 7, 13
Side latch ....... 3, 11, 12, 13
ELECTRICAL
REQUIREMENTS ............ 5
FEATURES/PARTS .......... 3
FILLED BAG
Removing ............... 11
ROW YOUR COMPACTOR
WORKS .................. 10
IFYOU NEED ASSISTANCE .. 14
INSTALLATION
INSTRUCTIONS ........... 4-8
INSTALLING A NEW BAG .... 12
KEY-KNOB .............. 3, 10
LEVELING LEGS ........ 3, 6, 7
MODEL/SERIAL
RATING LABEL .......... 3, 14
PARTS/FEATURES .......... 3
REMOVING A
FILLED BAG .............. 11
SAFETY
INSTRUCTIONS .2, 4, 5, 7, 9, 11, 13
SERVICE .............. 14, 16
EXTRA PACTM CYCLE ....... 10
STARTING COMPACTOR ..... 10
STEP-ON
DRAWER OPENER ........ 3, 9
STOPPING COMPACTOR .... 10
TOOLS AND
MATERIALS NEEDED ........ 4
TROUBLESHOOTING ....... 14
UNDERCOUNTER
INSTALLATION ......... 4, 6, 7
WARRANTY ............... 16

 Loading...