Installation Instructions conL
Adjusting toe plate
If toe plate rubs floor covering, the
toe plate clearance may be changed
as follows:
a. Mark on each side of toe plate the
amount of toe plate that rubs floor
covering.
b. Remove drawer from compactor.
(See Step 3, Page 6.)
c. Use a ruler and a pencil or chalk
to draw a line between the marks on
each side of toe plate.
d. Use utility knife or scissors to cut
toe plate along line.
e. Replace drawer. (See Step 10,
Page 7.) If toe plate still rubs floor
covering, repeat Steps a-e.
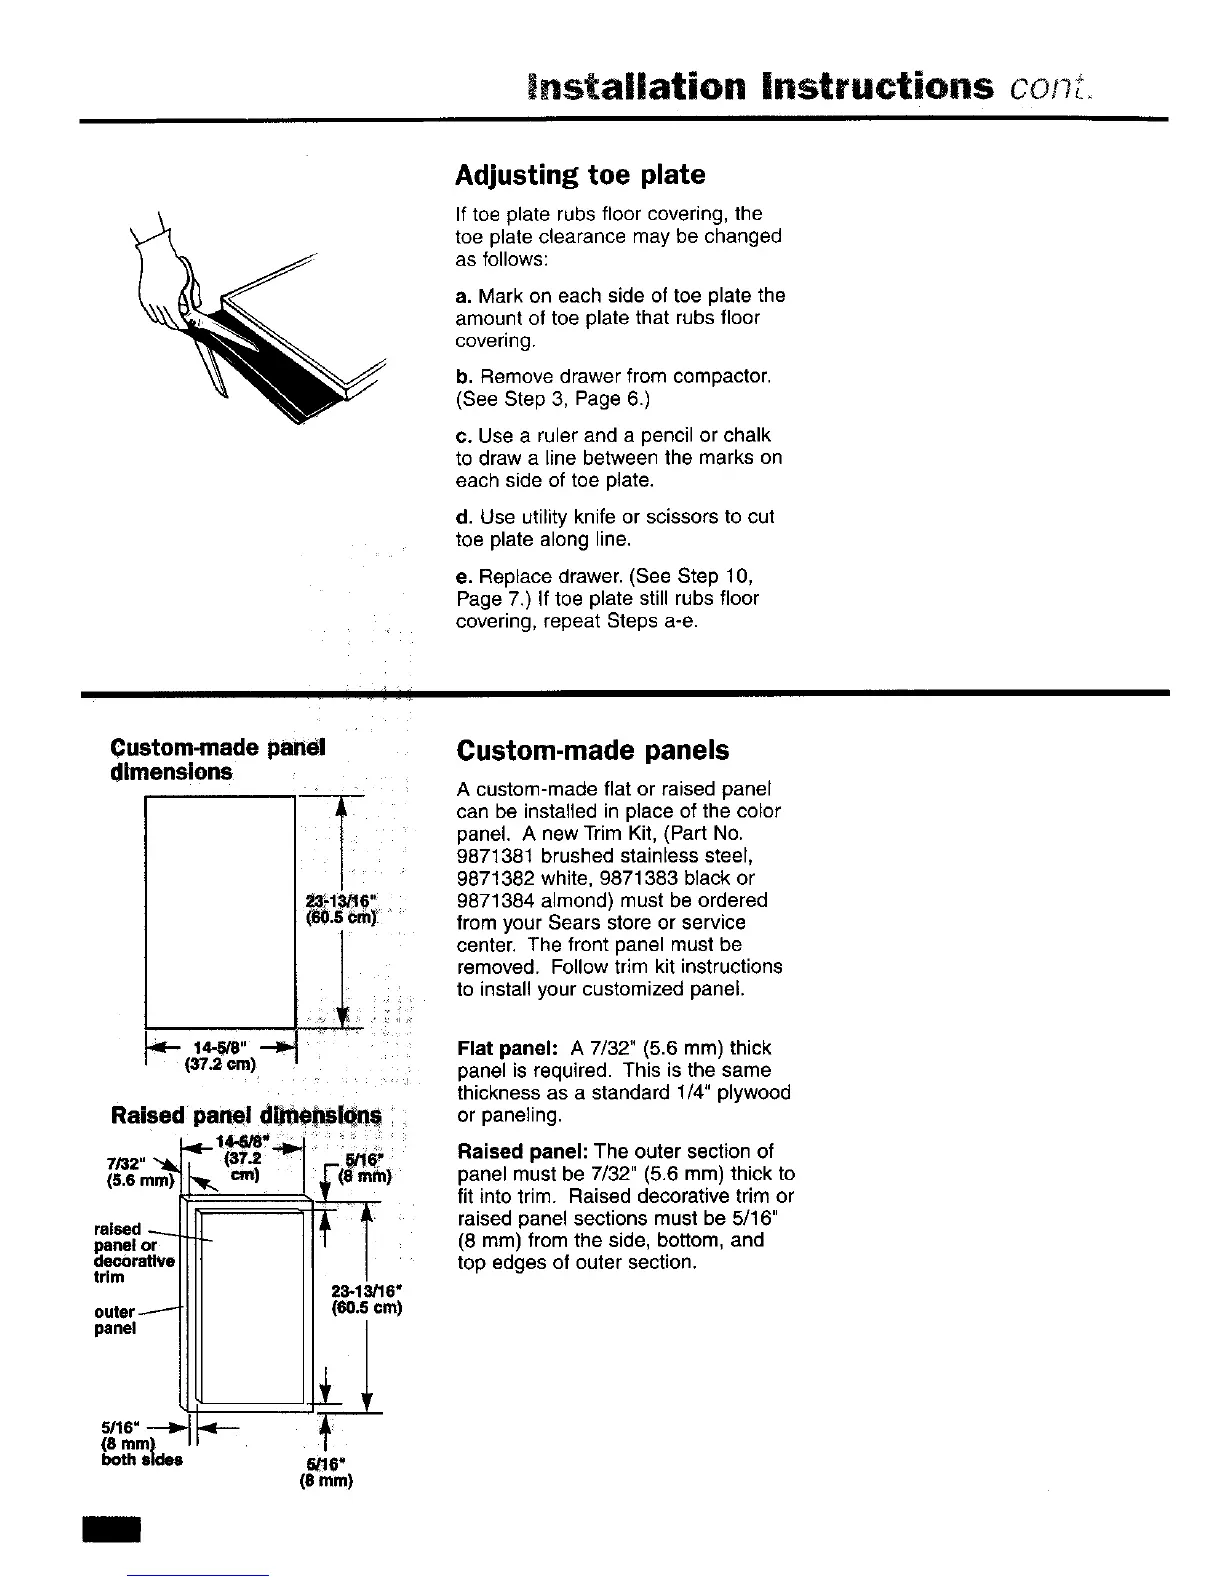
Custom-made panel
dimensions
T
___1_6 ....
i .....
(_t.2 c.m) '
7t32"-_1,- (aT= _'-I ,-_
panelor II [- I I"
decoratlveII I I
,r,m III II ,,,-1,,1
outer1_l I / (®,'c,
-111
5/16"-_ _
(8 mm)
bothsides _6"
(8ram)
Custom-made panels
A custom-made flat or raised panel
can be installed in place of the color
panel. A new Trim Kit, (Part No.
9871381 brushed stainless steel,
9871382 white, 9871383 black or
9871384 almond) must be ordered
from your Sears store or service
center. The front panel must be
removed. Follow trim kit instructions
to install your customized panel.
Flat panel: A 7/32" (5.6 mm) thick
panel is required. This is the same
thickness as a standard 1/4" plywood
or paneling.
Raised panel: The outer section of
panel must be 7/32" (5.6 mm) thick to
fit into trim. Raised decorative trim or
raised panel sections must be 5/16"
(8 mm) from the side, bottom, and
top edges of outer section.
 Loading...