TP-6907 5/16 95Section 7 Disassembly/Reassembly
7.5 Alternator Disassembly
Hot engine and exhaust system.
Can cause severe injury or death.
Do not work on the generator set until
it cools.
WARNING
Servicing the alternator. Hot parts can cause severe
injury or death. Avoid touching the alternator field or exciter
armature. When shorted, the alternator field and exciter
armature become hot enough to cause severe burns.
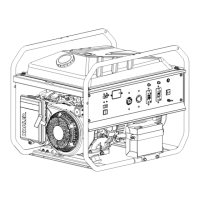
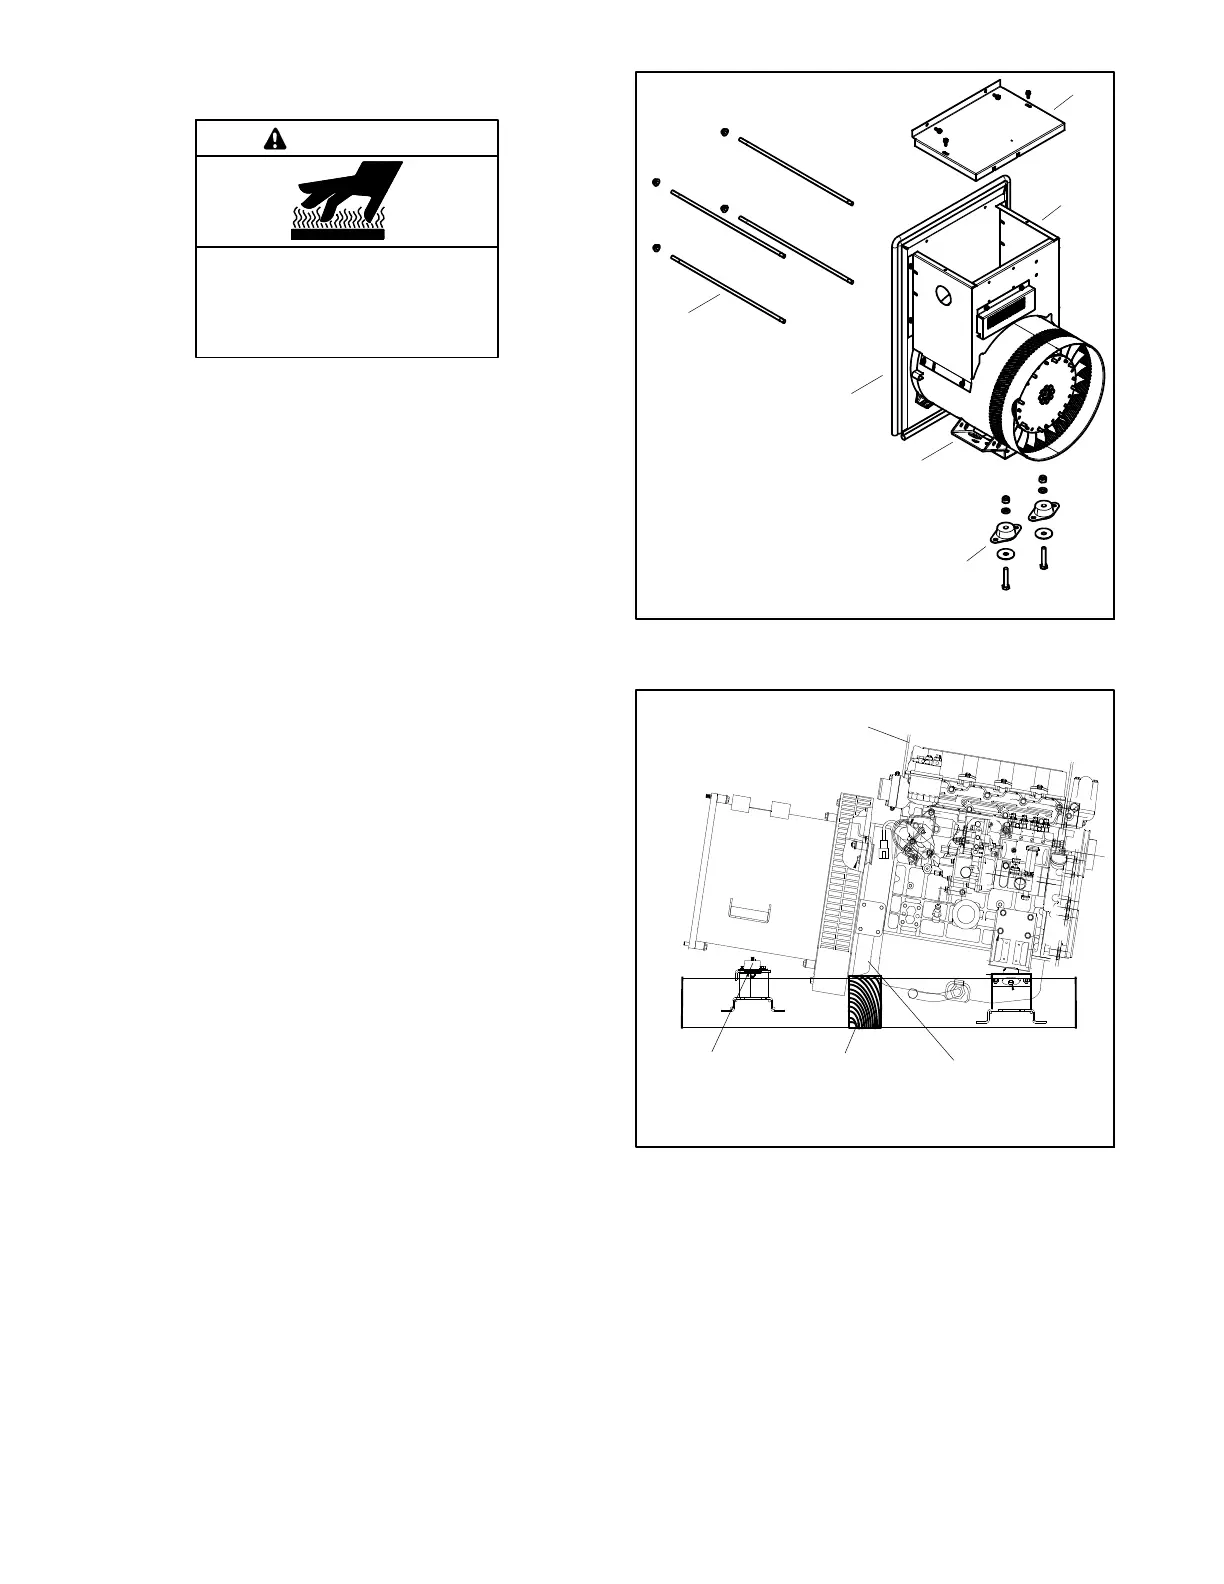
The alternator is shown in Figure 7-4. The following
instructions cover the general steps for disassembling
the alternator. See the alternator service manual for
detailed disassembly/assembly instructions and torque
specifications.
1. Be sure to perform the initial steps described in
Section 7.2 before p roceeding.
2. Remove the grounding strap connecting the
alternator to the skid.
3. Remove the alternator studs.
4. Remove the air duct intake.
5. Remove the saddle box.
6. To lift the alternator end of the generator:
a. Attach a hoist to the stator.
Note: Use a hoist or lifting device that is rated for
the weight of the generator set. See section
7.2.
b. Remove the two vibromount bolts securing the
alternator to the skid. See Figure 7-5.
c. Raise the alternator end and place a wood
block under the adapter plate. Lower the
alternator until the wood block supports the
adapter plate. See Figure 7-5.
7. Disassemble the end bracket, stator, and rotor.
See the alternator service manual for detailed
disassembly/assembly instructions and torque
specifications.
Note: To detach the alternator from the engine, the
alternator must be disassembled to access the
adapter plate bolts.
3
2
1
4
1. Saddle box top cover
2. Saddle box
3. Vibromount
4. Alternator assembly
5. Air duct intake
6. Hex cap stud
6
GM87474--MA1
5
Figure 7-4 Alternator Components
558866
1
3
24
1. Lift hook
2. Backplate
3. Wood block
4. Vibromounts
Figure 7-5 Supporting the Generator, Typical
 Loading...