TP-6774 2/14a 33Section 5 Cooling System
6. While installing the impeller, always rotate the drive
shaft and the impeller together in the same
direction as the engine rotation.
7. Inspect the coverplate and gasket for corrosion
and/or damage. Replace components as
necessary.
8. Lubricate the gasket with silicon grease and attach
the gasket and coverplate to the seawater pump
housing.
9. Open the seacock.
10. Start the generator set and check for leaks.
11. Stop the generator set and repair leaks or replace
components as necessary.
5.8 Belt Tension
Hazardous voltage.
Can cause severe injury or death.
Operate the generator set only when
all guards and electrical enclosures
areinplace.
Moving parts.
WARNING
Servicing the generator set when it is operating. Exposed
moving parts can cause severe injury or death. Keep
hands, feet, hair, clothing, and test leads away from the belts
and pulleys when the generator set is running. Replace
guards, screens, and covers before operating the generator
set.
Check the belt tension at the interval specified in the
service schedule. If tension is not within the
specification, adjust as necessary using the following
procedure.
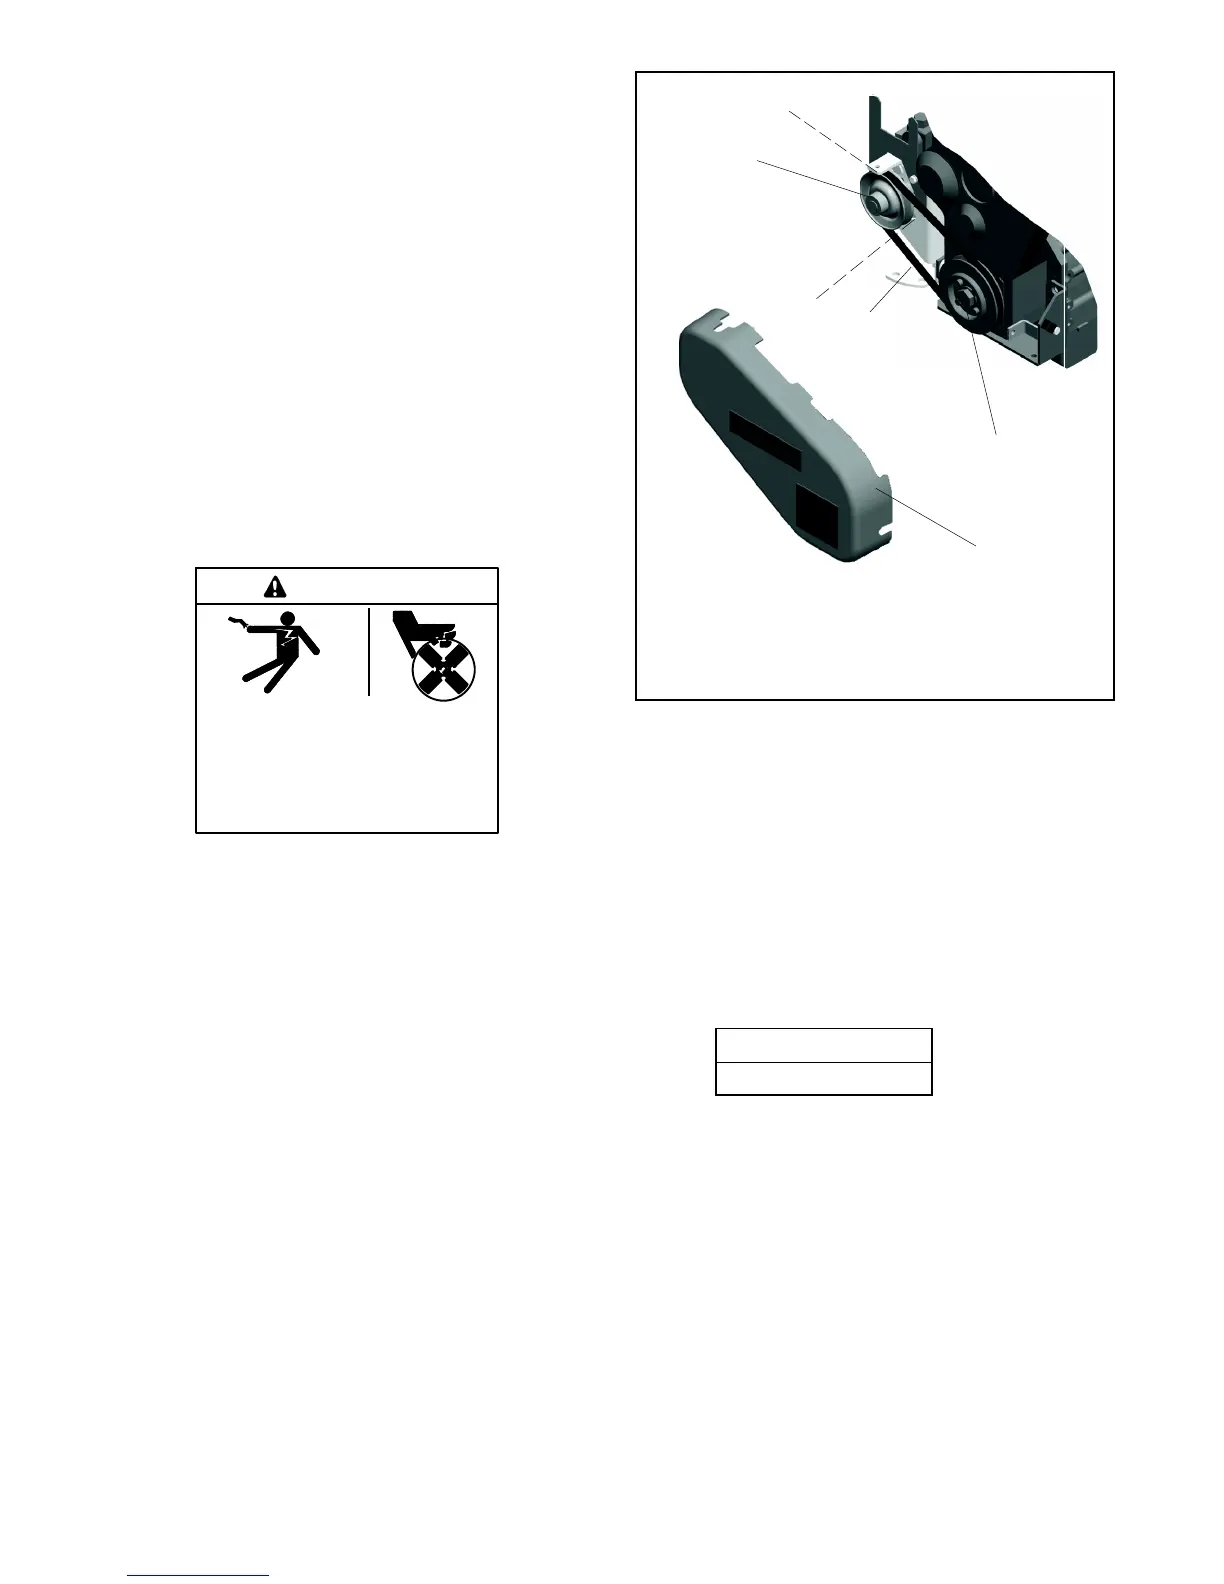
1. Seawater pump adjusting screw
2. Seawater pump pulley
3. Check the seawater pump belt deflection (tension) here
4. Crankshaft pulley
5. Pivot screw
6. Belt guard
4
3
2
5
6
1
Figure 5-21 Belt Tension
5.8.1 Seawater Pump Belt Tensioning
Procedure
1. Remove the belt guard. See Figure 5-21.
2. Check the belt tension at the midpoint of the
longest span of the belt by pressing with your finger
approx. 10 kg (22 lbs.) of force. See Figure 5-22 for
belt deflection. Recheck a new belt tension after
10 minutes of operation.
Deflection mm (in.)
10 (0.4)
Figure 5-22 Belt Specification
Note: If the belt tension is not within specification,
go to step 3. If the belt tension is within
specifications, go to step 7.
3. Loosen the pivot and adjusting screws.
4. While prying the seawater pump outward, tighten
the adjusting screw.
5. Tighten the pivot screw.
6. Recheck and adjust as necessary.
7. Replace the belt guard.
 Loading...