When the O-ring has been replaced, coat the surface with clean fuel before installing it.
11.
After the packing surface touches the seal surface of the filter cartridge, tighten transparent cup (4) 1/4 to
1/2 turn.
REMARK
If
the transparent cup is fastened too much, the O-ring will be damaged and this leads to leakage of fuel. If
it is too loose, fuel will also leak from gaps of the O-ring. Therefore, be sure to observe the tightening angle.
12.
Clean the filter head.
13.
Fill the new filter cartridge with clean fuel, thinly apply oil to the packing surface, then install it to the filter
head.
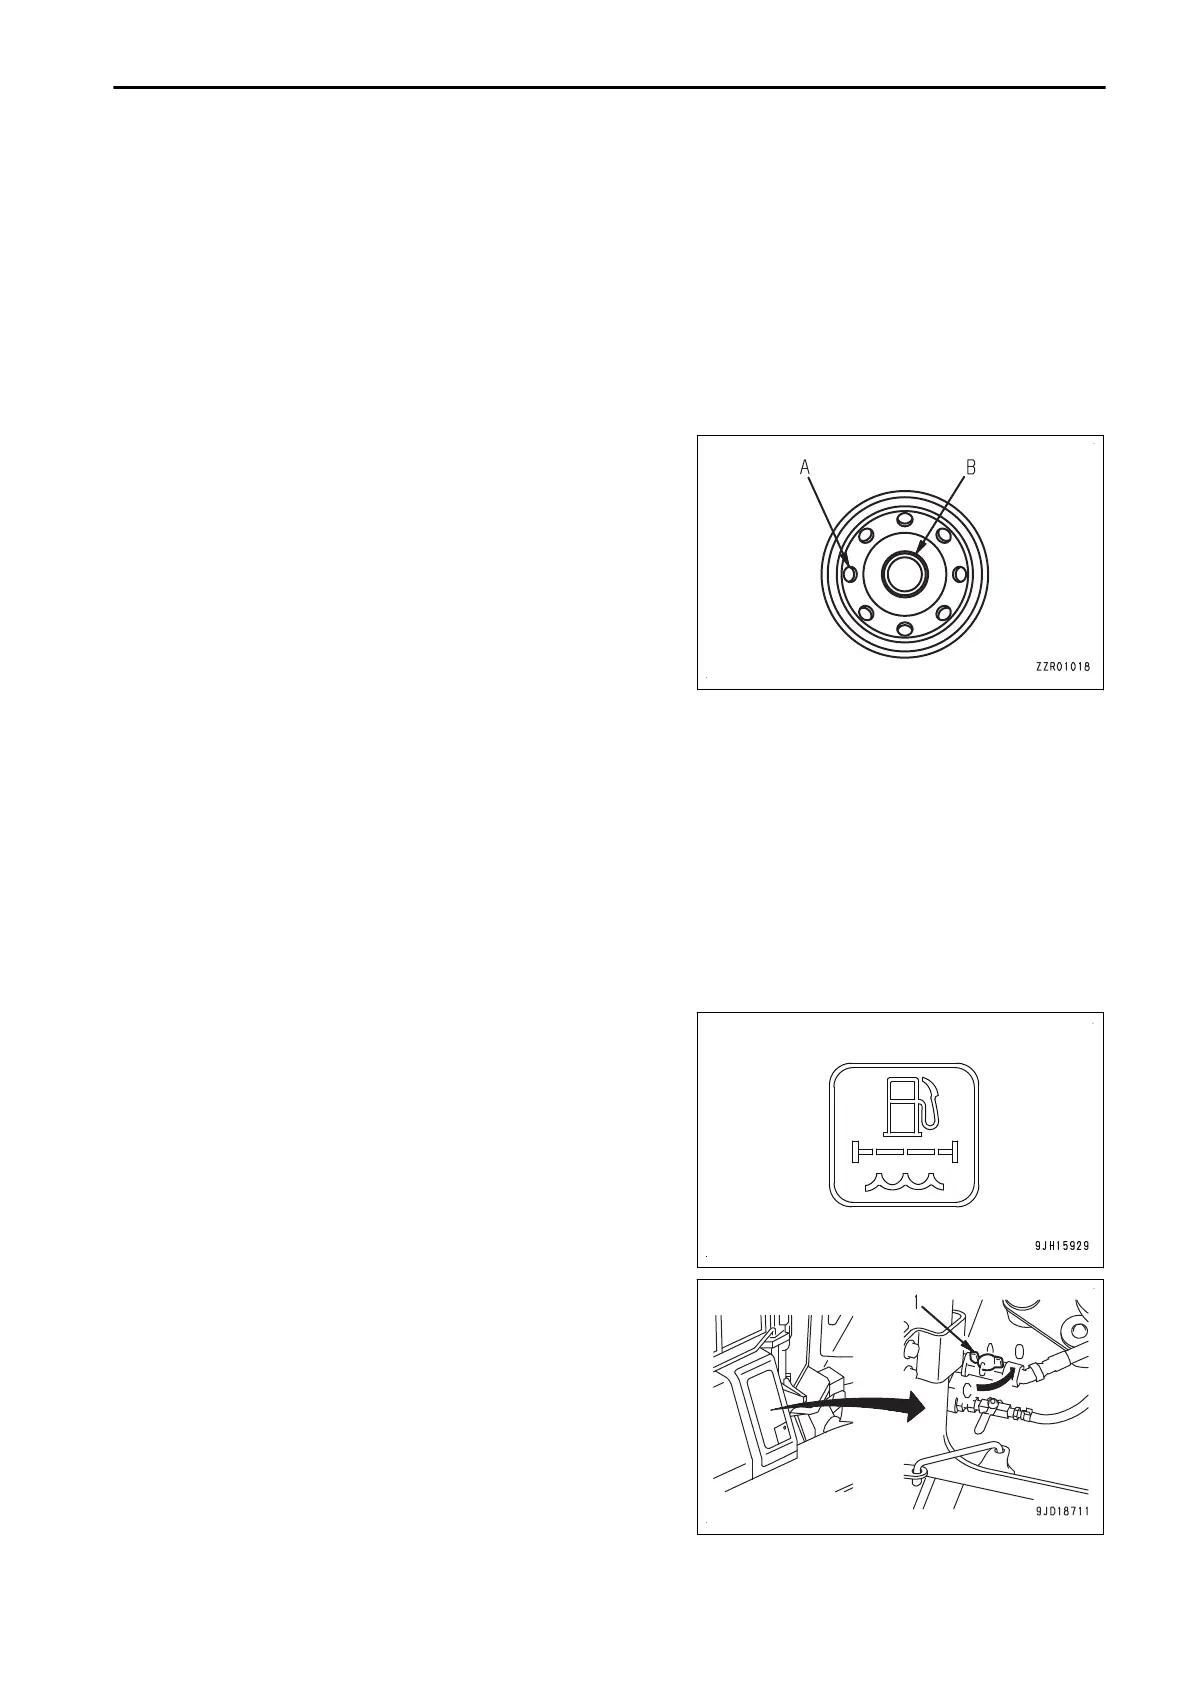
NOTICE
• When
filling the filter cartridge with fuel, do not re-
move cap (B). Always fill with fuel from small
holes (A) (8 places) on the dirty side.
• After filling with fuel, remove cap (B) and install
the fuel filter.
• Always fill with clean fuel. Be careful not to let any
dirt or dust get into the fuel. In particular, center
portion is the clean side, so do not remove cap (B)
when filling with fuel. Be careful not to let dirt or
dust get into the center portion on the clean side.
14.
After the packing surface reaches the sealing surface of the filter head, tighten the filter cartridge 3/4 turns.
REMARK
• If
the filter cartridge is fastened too much, the packing will be damaged and this leads to leakage of
fuel. If the filter cartridge is too loose, fuel will also leak from the packing. Be sure to observe the tight-
ening angle.
• When tightening with a filter wrench, be extremely careful not to dent or damage the filter.
15.
Confirm that drain plug (3) at the bottom of transparent cup (4) is tightened securely.
16.
Remove the plastic bag which is wrapping connector (7).
17.
Connect connector (7), and fix clamp (6) of water separator harness.
REMARK
• If
water gets on the connector, the sensor may mal-
function and the water separator caution lamp may
light up. When removing the connector, be extremely
careful not to let water attach to the connector.
• If water attaches to the connector, dry it completely
before connecting it.
18.
Turn fuel supply valve (1) to OPEN position (O).
19.
Bleed air.
1)
Fill up the fuel tank with fuel (to the level where the
float is at the highest position).
MAINTENANCE MAINTENANCE PROCEDURE
4-53
 Loading...