1918 Getting up and running
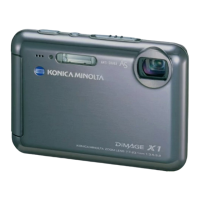
BATTERY-CONDITION INDICATOR
Full-battery indicator - the battery is fully charged. This indicator is displayed
when the camera is on.
Low-battery warning - battery power is very low. The battery should be
replaced as soon as possible. This warning automatically appears and remains
on the monitor until the battery is recharged. LCD monitor turns off while the
flash is charging. Some functions such as movie recording are not available.
This camera is equipped with an automatic battery-condition indicator displayed on the LCD moni-
tor. The indicator changes from white to red when battery power is low.
Low-battery indicator - the battery is partially charged.
AUTO POWER SAVE
To conserve battery power, the camera shuts down if an operation is not made within three minutes.
To restore power, press any button. The length of the auto-power-save period can be changed in
section 2 of the setup menu (p. 73). When the camera is connected to a computer or PictBridge
printer, the auto-power-save period is set to ten minutes and cannot be changed.
If power is insufficient for camera operation, the indicator lamp above the
LCD monitor blinks for three seconds when the camera is turned on, or the
battery-exhausted message appears on the LCD monitor just before the
camera shuts down. The shutter will not release. The battery must be
recharged.
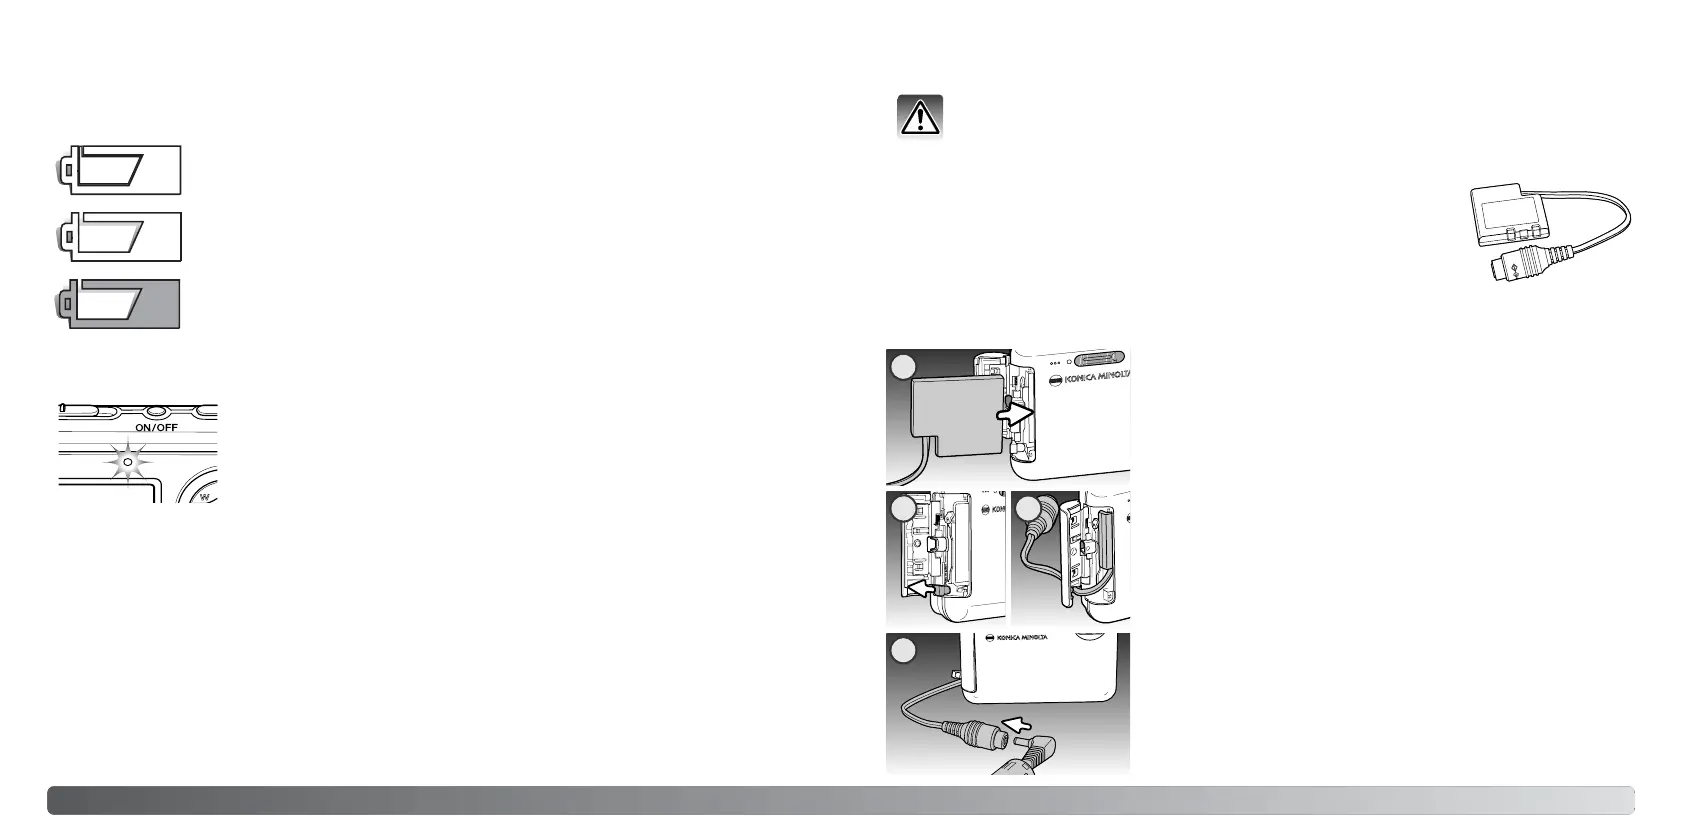
AC ADAPTER (SOLD SEPARATELY)
1. Open the battery-chamber door.
2. Move the battery latch towards the back of the camera to insert
the DC plug. Slide the DC plug into the battery chamber with
the terminals first until it is caught by the latch.
3. Open the cover on the side of the battery chamber.
4. Place the DC adapter cable in the notch in the battery-chamber
door and close the battery-chamber door.
5. Insert the mini-plug of the AC adapter into the AC socket of the
DC adapter.
6. Insert the AC adapter plug into an electrical outlet.
Do not place the camera on the cradle with the DC Adapter
inserted; it will damage the camera.
Always turn off the camera before changing between power supplies.
2
DC Adapter DA-200
The AC adapter AC-4 or AC-5 allows the camera to be powered from a
household outlet. The AC adapter is recommended during periods of heavy
use. AC adapter model AC-4 is for use in North America, Japan, and
Taiwan, and AC-5 is for use in all other areas. The battery cannot be
charged using the AC adapter.
To use the AC Adapter AC-4 or AC-5 with this camera, DC Adapter DA-200
is required. DC Adapter DA-200 is included in the AC Adapter Set AC-
402/502.
3 4
5
 Loading...