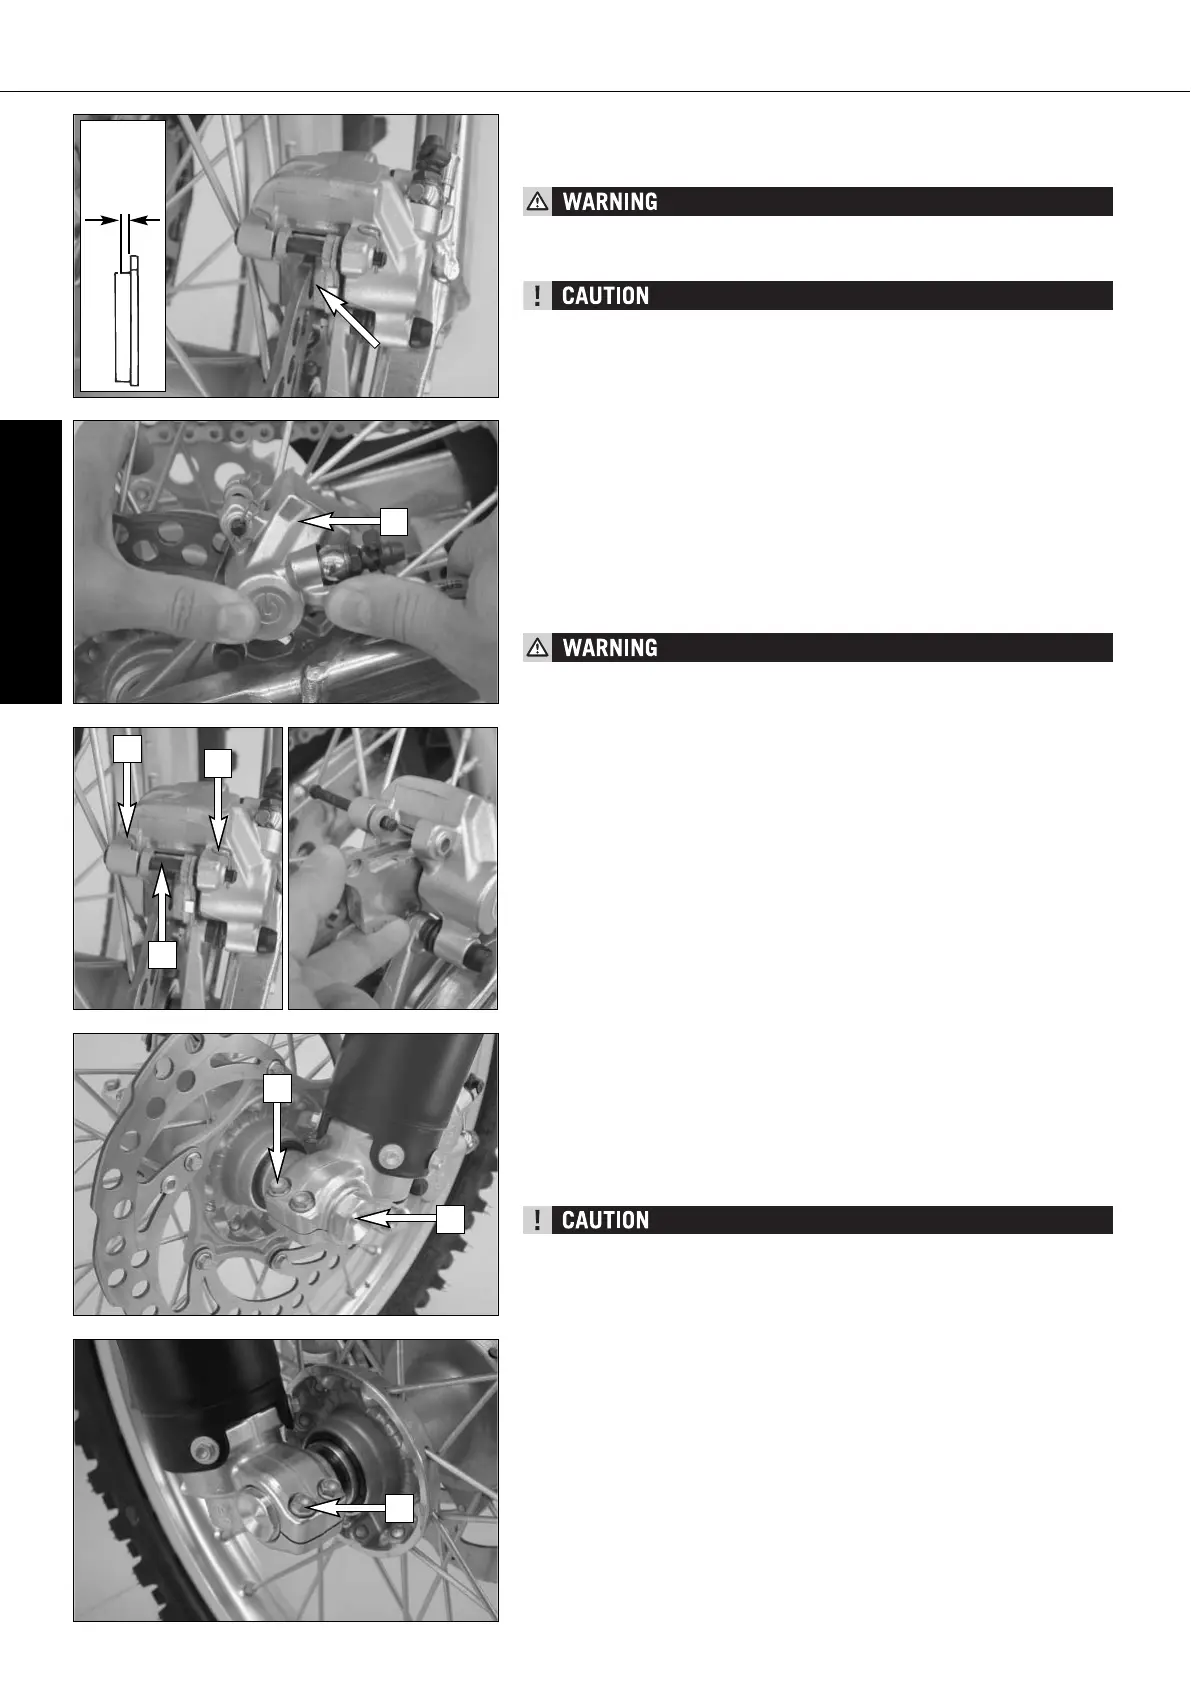
Checking the rear brake pads
The brake pads can be inspected from the rear. The thickness of the linings
may not be less than 1 mm (0.04 in).
AT THEIR MOST WORN POINT BRAKE PAD LININGS SHOULD NOT BE THINNER
THAN 1 MM, OTHERWISE THEY COULD LEAD TO BRAKE FAILURE. FOR YOUR OWN
SAFETY DON’T PUT OFF HAVING YOUR BRAKE PADS CHANGED.
IF THE BRAKE PADS ARE REPLACED TOO LATE SO THAT THE LINING IS PARTLY
OR ENTIRELY WORN, THE STEEL COMPONENTS OF THE BRAKE PAD WILL RUB
AGAINST THE BRAKE DISC, THEREBY IMPARING THE BRAKING EFFECT AND
DESTROYING THE BRAKE DISC.
Replacing the rear brake pads *
Press the brake caliper [1] in the direction of the chain wheel for the brake
piston to reach its basic position. Remove the safety device [2], knock out
the guide pin [3] from the brake caliper with a drift towards the chain wheel
and remove the brake pads. Carefully clean the brake caliper with compressed
air and check the sleeves of the guide pins for damage.
Slide the left brake pad into the brake caliper and fix it with the pin. Slide in
the right brake pad and knock the bolt [3] in as far as it will go. Mount the
safety device [2].
– IT IS VERY IMPORTANT TO KEEP THE BRAKE DISK FREE FROM OIL AND FATTY
MATTERS. OTHERWISE, THE BRAKING EFFECT WOULD BE STRONGLY REDUCED.
– AFTER ASSEMBLY, CHECK IF CIRCLIPS HAVE BEEN FITTED CORRECTLY.
– AFTER WORKING ON THE BRAKING SYSTEM, ONE MUST ALWAYS ACTUATE THE
HAND BRAKE LEVER OR FOOT BRAKE LEVER, RESPECTIVELY SO AS TO ENSURE
THAT THE BRAKE PADS WILL LIE AGAINST THE BRAKE DISK AND THE PRES-
SURE POINT IS ESTABLISHED.
Dismounting and mounting the front wheel
To remove the front wheel, jack the motorcycle up on its frame so that the
front wheel no longer touches the ground.
Loosen the 2 clamping screws [4] on the left side of the fork fists.
Loosen and remove the collar nut [5], loosen the clamping screews [6] on the
right side of the fork fist.
Hold the front wheel, pull out the wheel spindle [7].
Carefully remove the front wheel from the fork.
– DO NOT OPERATE THE HAND BRAKE WHEN THE FRONT WHEEL HAS BEEN
DISMOUNTED.
– MAKE SURE THE BRAKE DISC IS ALWAYS ON TOP WHEN YOU LAY DOWN THE
WHEEL, OTHERWISE THE BRAKE DISC CAN BE DAMAGED.
ENGLISH
34
MAINTENANCE WORK ON CHASSIS AND ENGINE »
min.
1 mm
1
3
2
2
4
5
6
 Loading...