11 MAINTENANCE WORK ON THE CHASSIS 40
700483-01
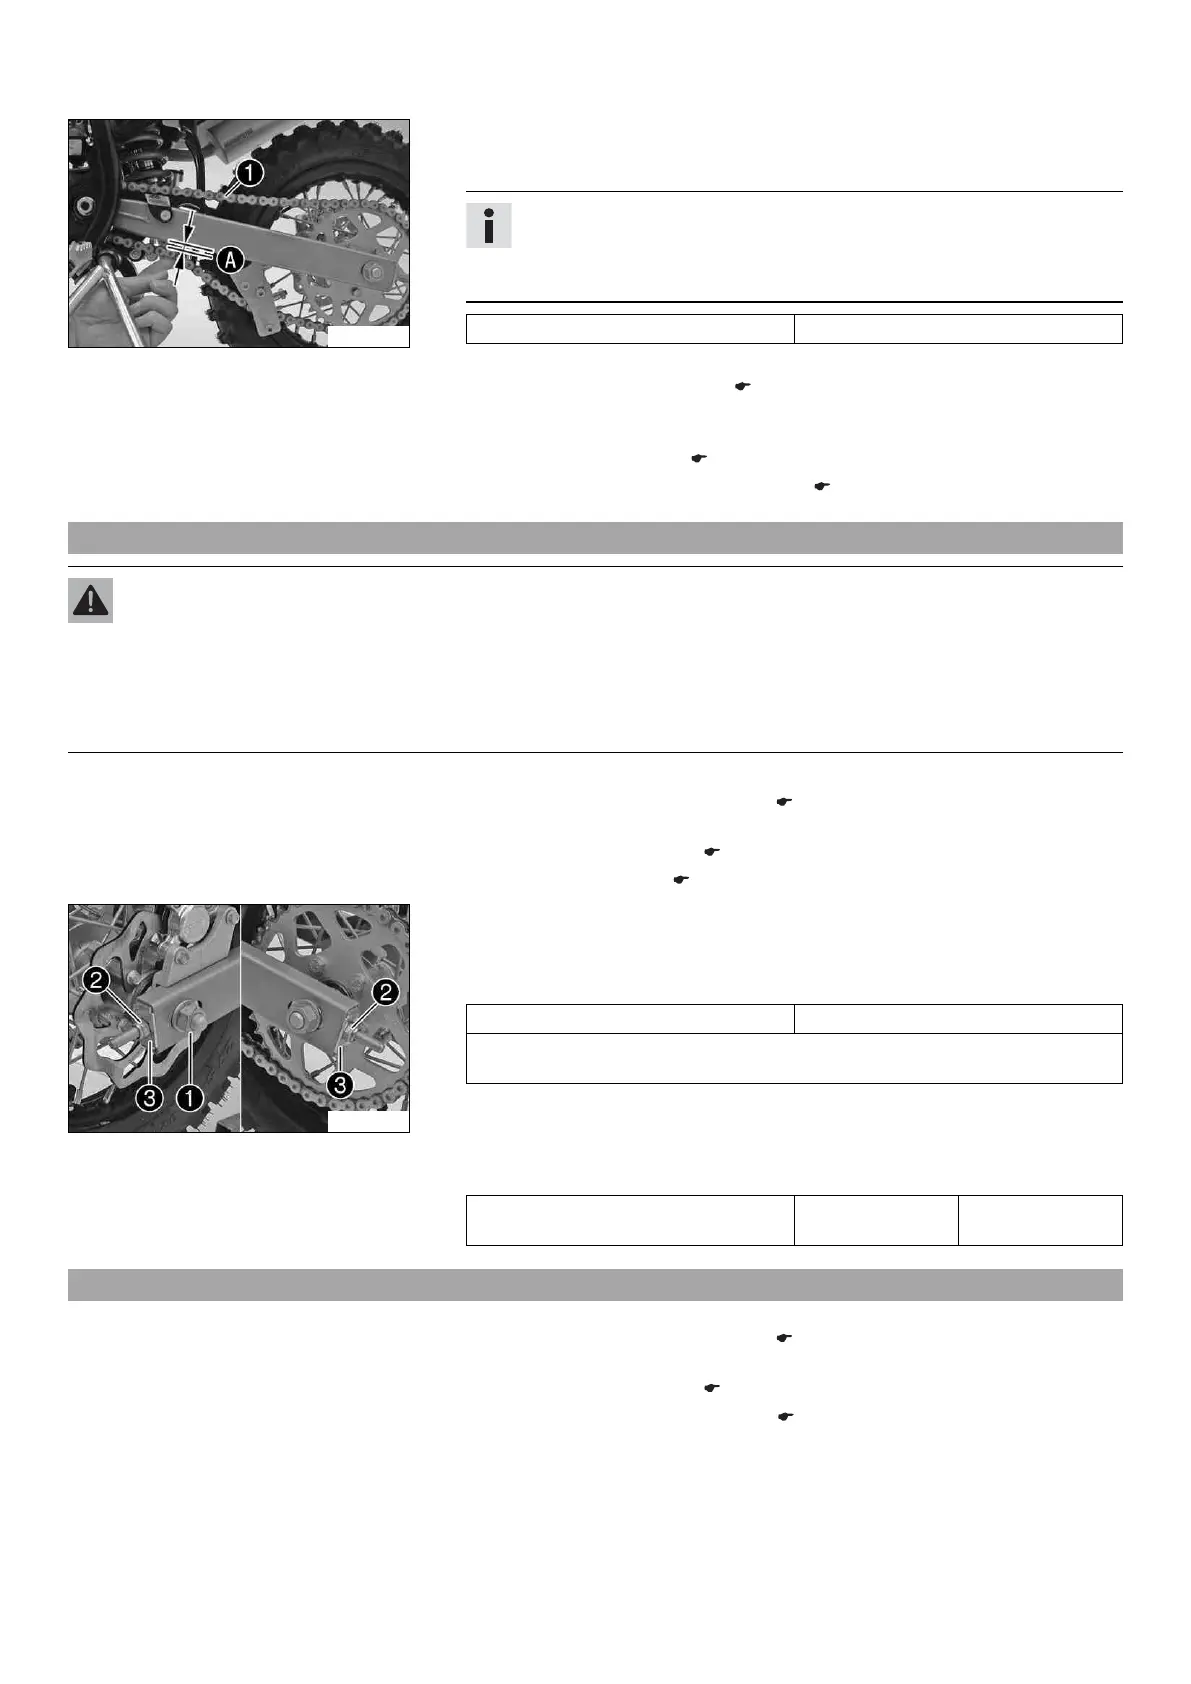
Main work
– Push the chain at the end of the chain sliding component upward to measure the
chain tension A.
Info
The upper chain section 1 must be taut.
Because chain wear is not always even, repeat this measurement at differ-
ent chain positions.
Chain tension 5… 8 mm (0.2… 0.31 in)
» If the chain tension does not meet specifications:
– Adjust the chain tension. ( p. 40)
Finishing work
(50 SX)
– Install the chain guard. ( p. 38)
– Remove the motorcycle from the lift stand. ( p. 27)
11.34 Adjusting chain tension
Warning
Danger of accidents Danger caused by incorrect chain tension.
– If the chain tension is too high, the components of the secondary power train (chain, engine sprocket, rear sprocket, bear-
ings in transmission and rear wheel) are under additional load. Apart from premature wear, in extreme cases the chain can
rupture or the countershaft of the transmission can break. On the other hand, if the chain is loose, it can fall off the engine
sprocket or the rear sprocket and block the rear wheel or damage the engine. Check the chain tension and correct if neces-
sary.
Preparatory work
– Raise the motorcycle with a lift stand. ( p. 27)
(50 SX)
– Remove the chain guard. ( p. 37)
– Check the chain tension. ( p. 39)
700484-10
Main work
– Loosen nut 1.
– Adjust the chain tension by turning adjusting screws 2 left and right.
Guideline
Chain tension 5… 8 mm (0.2… 0.31 in)
Turn adjusting screws 2 equally on the left and right. The rear wheel must be
aligned with the front wheel.
– Make sure that the chain adjuster support plates 3 are in contact with adjusting
screws 2.
– Tighten nut 1.
Guideline
Nut, rear wheel spindle M12x1 40 Nm
(29.5 lbf ft)
11.35 Checking the chain, rear sprocket, engine sprocket and chain guide
Preparatory work
– Raise the motorcycle with a lift stand. ( p. 27)
(50 SX)
– Remove the chain guard. ( p. 37)
–
Remove the engine sprocket cover. x ( p. 38)

 Loading...