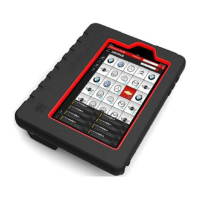
LAUNCH ScanPad 071 User’s Manual — Knowledge of ScanPad 071
8
2 Preparations
2.1 Install SD card
1. Push the rear top cover outwards in Fig. 1-2 until it is completely released.
2. Insert the SIM card and SD card in right direction as indicated on the slot.
Note: Do not plug or eject the SD card while using ScanPad 071.
Eject SD card
1. Tap
on the desktop to open the main menu.
2. Choose “Settings” > “Device” > “Storage” > “Unmou
nt SD ca
rd”.
3.
R
e
move it from the SD card slot.
2.2 Charge ScanPad 071
1. Insert the included USB cable into the charger.
2. Plug the charger into AC out
let.
3.
Connect the other end of US
B cable to Sc
anPad 071. If
appears on the
screen, it indica
tes it is being ch
arged.
4.
If the logo changes into
, it indicates that the battery is fully charged.
Dis
connect the charger from th
e AC outlet.
5.
Unplu
g
the USB cable on the charger from ScanPad 071.
2.3 On using your battery
z If the battery keeps unused for a long time or battery is completely
discharged, it is normal if it can not be turned on while being charged.
Please charge it for a period and then turn it on.
z Using data service will cause more power consumption and shorten the
standby time.
z The charging time of battery varies with temperature condition and battery
consumption status.
z While ScanPad 071 has low battery, a beep will sound. If it is very low,
ScanPad 071 will be switched off automatically.
Note: Do one of the followings to save power:
z When ScanPad 071 keeps unattended, press POWER key to turn off the

 Loading...